2023 Stanislaus County Fair: Participating in The Textile Arts & Literary Arts- Contest and Exhibits2/12/2024 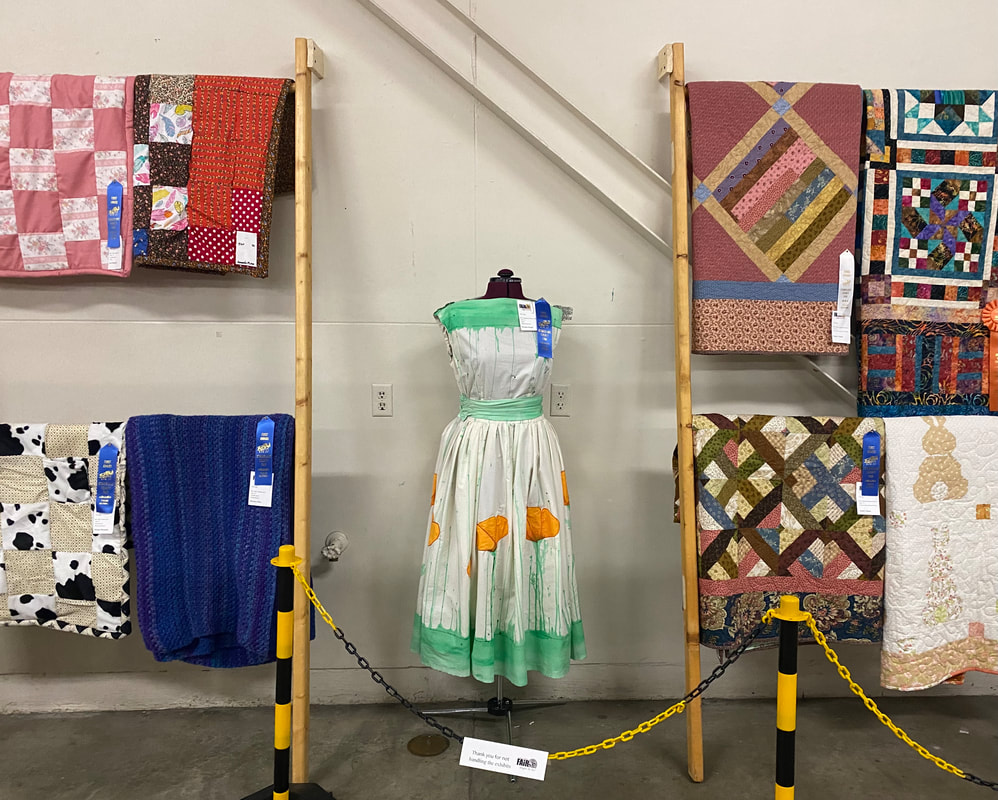 2023 Stanislaus County Fair; Textile Arts Exhibit. Photo: Roxanne Rodriguez Rangel Summer, Central Valley California Beautiful fields of fruit trees, towering stalks of corn, and twisting trunks of grapevines spread far out into the horizon. On the country roads and back highways, large trucks drive off the farmlands carrying loaded trailers overflowing with ripe tomatoes and ripe pumpkins. These trucks, filled with the fruits of California’s Agricultural Industry, are headed to nearby canneries ready to be steamed and canned, then shipped to grocery stores all over the world. It’s truly a sight to enjoy, one I admire each and every year. On this particular highway, trucks pull a different load. Disassembled carnival rides and attractions are folded up like mechanical origami, traveling to its next destination: The Midway of the county fair! 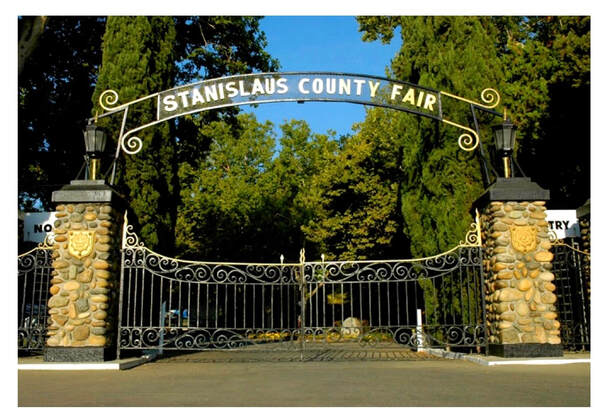 Stanislaus County Fair Gate. Photo: Roxanne Rodriguez Rangel, 2023 Each summer, Californian counties host an annual fair. The fair is a place where the local community can gather together to enjoy food, entertainment, agriculture, technology, share knowledge and expertise, as well as showcase local farmers, bakers, and artisans. Local businesses can set up vender booths promoting or selling their products and services, while the carnival lights up the night sky. The sounds of thrill induced shrieks fill the air as fair-goers are twirled and tossed about on their favorite rides.
Creating a California Day Dress: Poppy Inspired
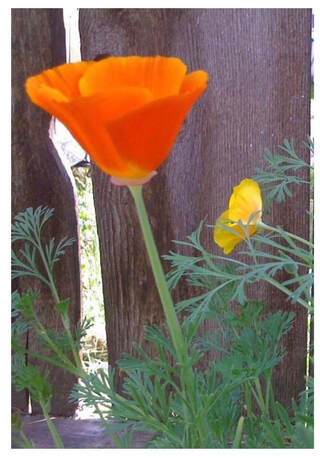
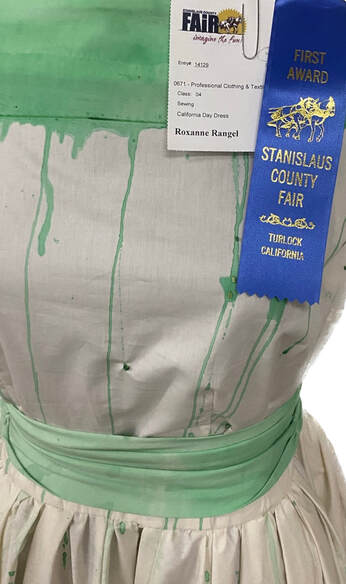
As I held the 2023 Stanislaus County Fair Contest and Exhibit Handbook, gazing at the numerous sewing and textile categories, I knew I wanted to create a day dress that reflected the very land it was made on for my exhibit entry. I chose the magnificent poppy, with a contrasting grassy green, as my subject, and began to conceptualize vintage dress silhouettes for this design. 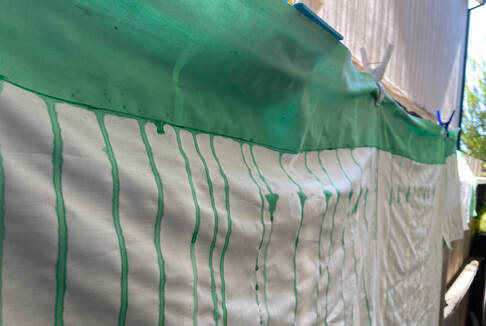 Behind the Scenes: Creating a Hand-Painted Textile. Photo: Roxanne Rodriguez Rangel When making artsy dresses, I love using a simple muslin fabric as the base. For this dress, I envisioned hand-painted techniques, as well as fabric appliqué and beadwork. I wanted the green paint to drip UP the dress, creating the illusion of wild poppy stems! I began to prepare my painted muslin fabric. 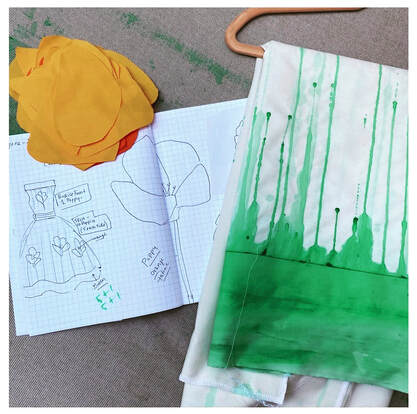 Behind the Scenes: Fashion Sketch and Fabric Preparations. Photo: Roxanne Rodriguez Rangel I painted my drippy paint design using diluted green fabric paint, then satin-stitched orange fabric shaped petals. I hand-stitched beads in both the poppies as pollen detail, as well as on the green dripped paint, like beads of morning dew… 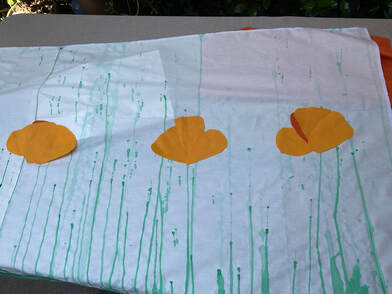 Behind the Scenes: Fabric Preparations: Applique. Photo: Roxanne Rodriguez Rangel 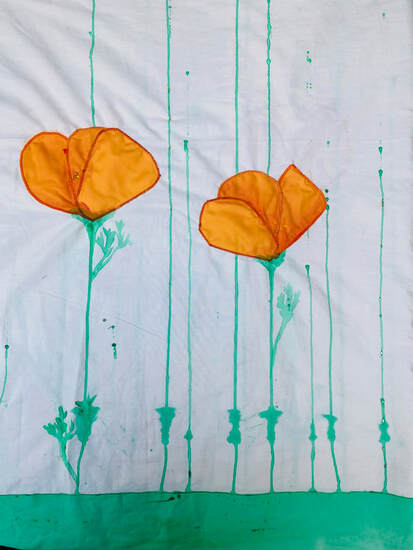 Behind the Scenes: Fabric Preparations: Applique and Other Details... Photo: Roxanne Rodriguez Rangel The result was exactly as I envisioned! Once the fabric had been prepared, I began cutting out and sewing together my Vintage Inspired Day Dress. 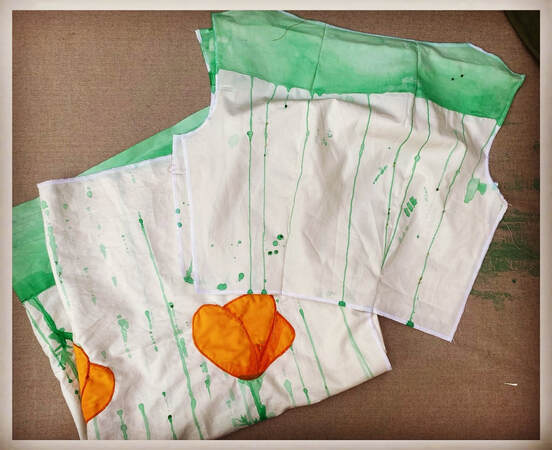 Behind the Scenes: Dress Construction Begins! Photo: Roxanne Rodriguez Rangel The Finished Dress! 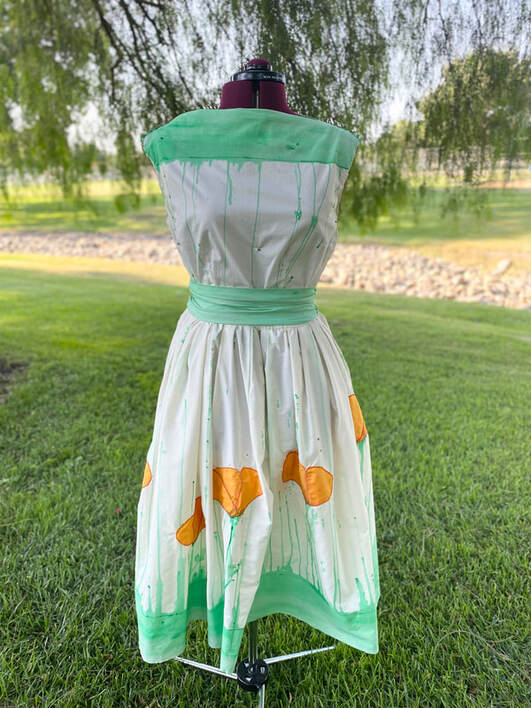 Roxanne Rodriguez Rangel California Day Dress, 2023. Photo: Roxanne Rodriguez Rangel 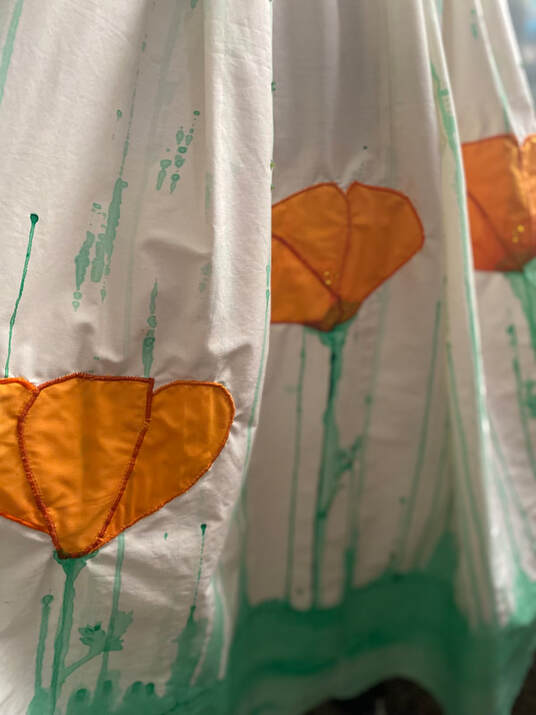 Roxanne Rodriguez Rangel California Day Dress, 2023. Photo: Roxanne Rodriguez Rangel 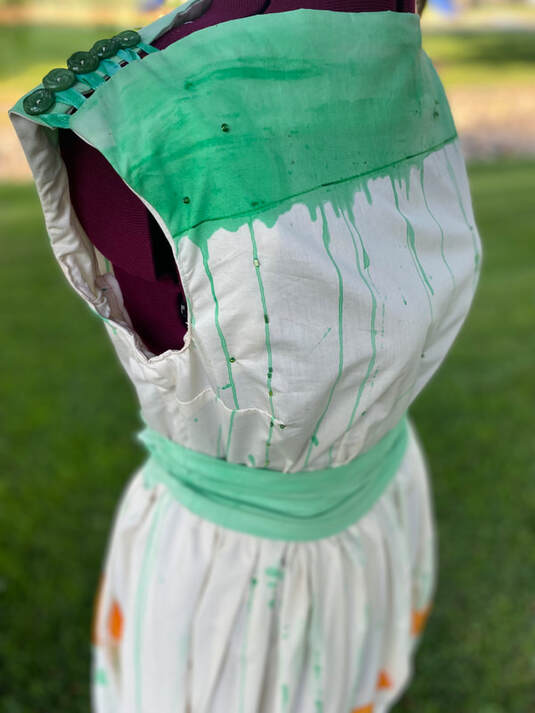 Roxanne Rodriguez Rangel California Day Dress, 2023. Photo: Roxanne Rodriguez Rangel At last, my dress is completed! Back At The Fair: Contest and Exhibits:
In addition to my dress, I also entered my Blog Article, Rendez-Vous: Lee Alexander McQueen and Ann Ray -The Crocker Art Museum- Sacramento, California, into the Best Blog Contest… I was amazed: Another Blue Ribbon!
 Thank you for reading my Blog! I hope to see YOU at the next Stanislaus County Fair, this upcoming July!  Dress Maker, Roxanne Rodriguez Rangel with Roxanne Rodriguez Rangel California Day Dress. 2023 Stanislaus County Fair- Professional Clothing and Textile Contest. Related Links:
0 Comments
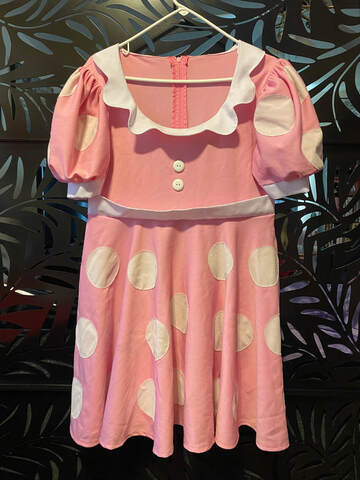
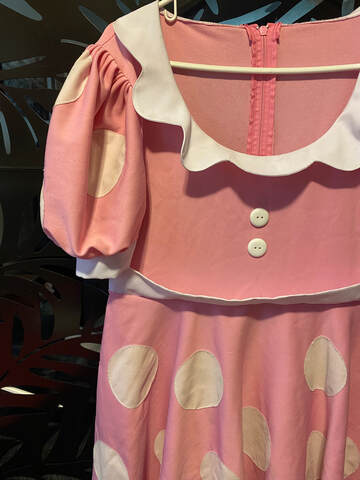
The Deconstruction and Reconstruction of a Costume: Creating a Dress Replica for Minnie Mouse4/13/2023 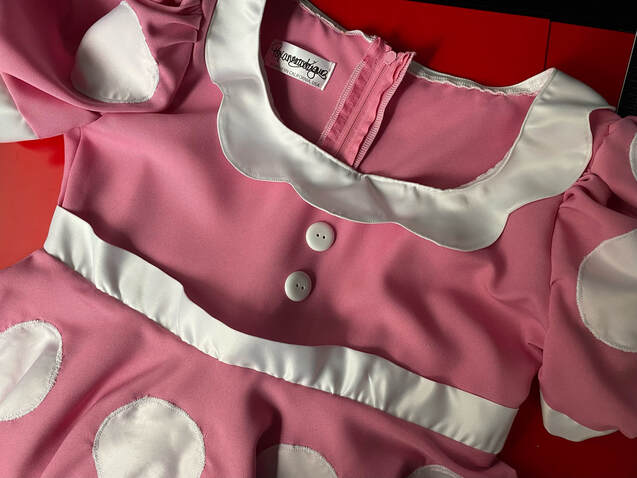 Minnie Mouse Dress Replica by Roxanne Rodriguez Rangel, 2023. Today I would love to share with you a recent project that I completed for a very special client… the fashionably famous, Mrs. Minnie Mouse! The Old Dress
The Minnie Mouse character at Princess Party People, had a lovely pink polka dot dress that had become too dingy and worn out for her to make appearances in. The dress was perfect in size and in color, but the fabric needed retiring. I was hired by the Princess Party People team to make a dress replica. The original dress was dropped off by their staff, and I then recreated a new dress, mimicking the old dress as precisely as possible! Here is a behind the scenes look at the process: Deconstruction 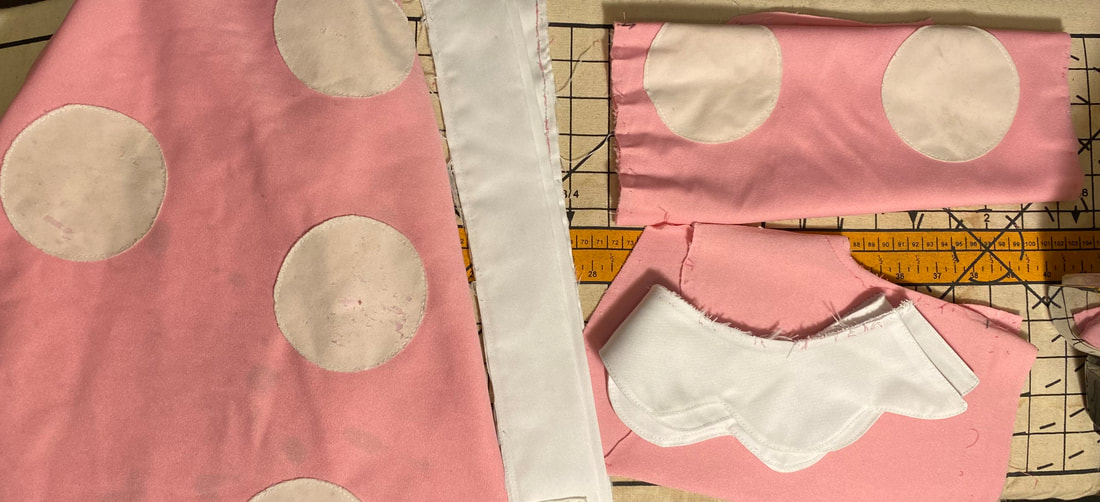 Deconstruction of a Costume: Pieces of the Old Minnie Mouse Dress To recreate a new dress using an existing dress as a template, I first deconstruct the old dress seam by seam. As I remove each portion, I make written notes and technical sketches in my workbook. These notes will be very helpful to me when I reconstruct the new dress! 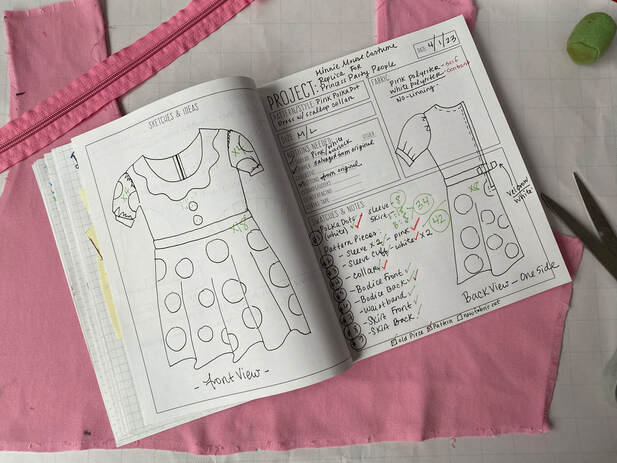 My Sewing Projects Planner is a great notebook to compile all of my notes and technical sketches. Pattern Drafting After the old dress is deconstructed, I trace the old fabric pieces onto paper for the pattern rough draft. I use rulers and measurements to create straight lines, crisp edges, and symmetry. Once the paper patterns are drafted, I can cut out the new material. 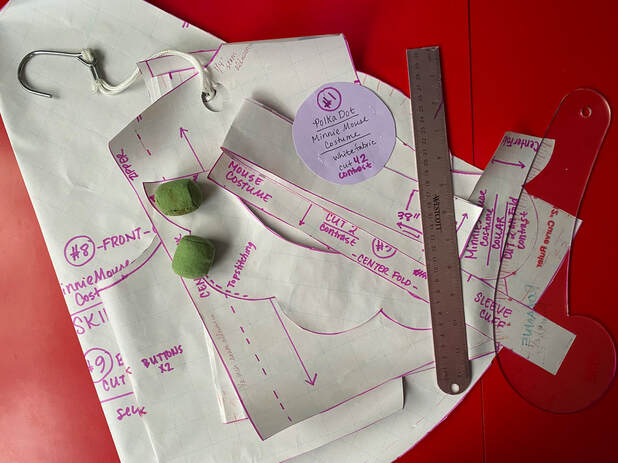 Drafted Patterns are the final outcome of tracing the old dress fabric onto paper. I then use rulers to straighten lines and curves, as well as to verify symmetry. 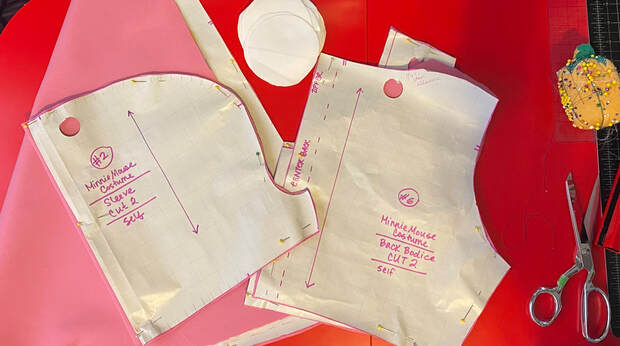 The new fabric is cut using the newly drafted paper pattern. Reconstruction 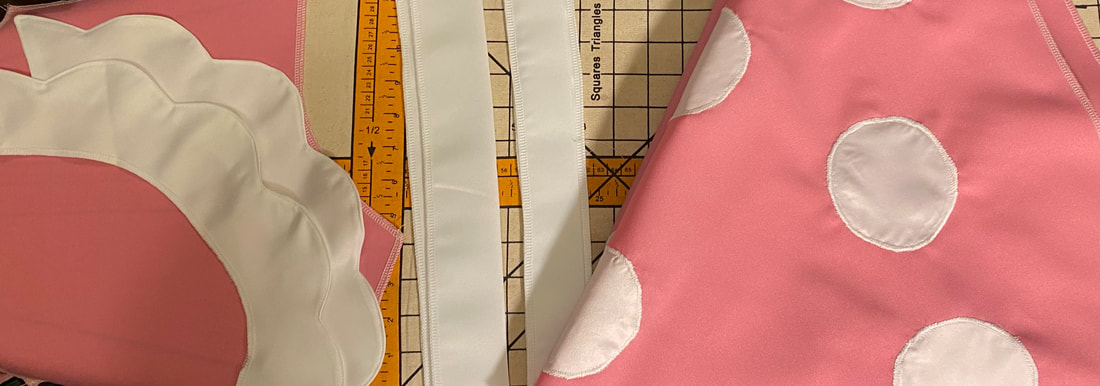 The new fabric: cut and prepped. Ready for assembly! Here are a few photos of the old dress pieces next to the new pieces as I begin the reconstruction portion of this project: 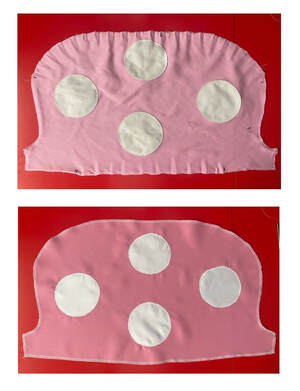 A sleeve of odd proportions! 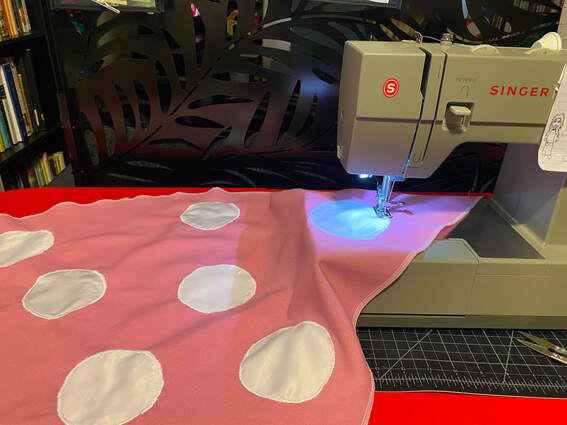 Polka Dots and Satin Stitching! The New Dress Like a puzzle nearing completion, the new Minnie Mouse dress begins to take shape. Before long, an old, tired dress is replaced by a new ready-to-mingle version!  The NEW Minnie Mouse Dress! 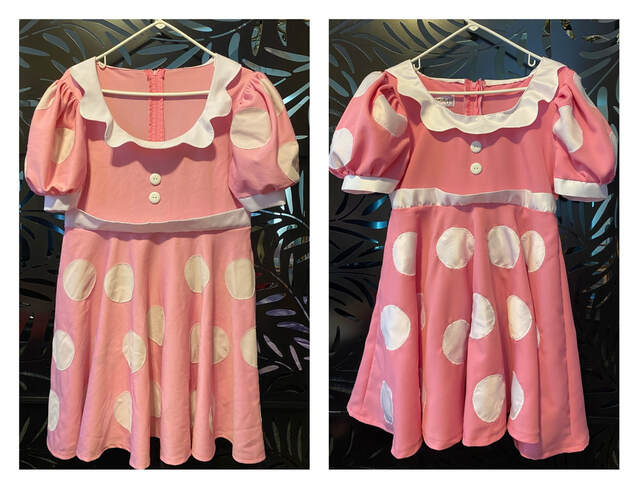 The Old Minnie Mouse Dress (pictured left) and The New Minnie Mouse Dress (pictured right). These types of projects are very fun for me, as I love using a variety of my skills when I am working! If you have any older clothes or costumes you would like to have reconstructed, send me a message with your ideas! You can read more about past costume projects of mine by clicking any of the article links below! Thank you for reading! Have a great day!  Contact Princess Party People to book your favorite character at your next event! Related Links:
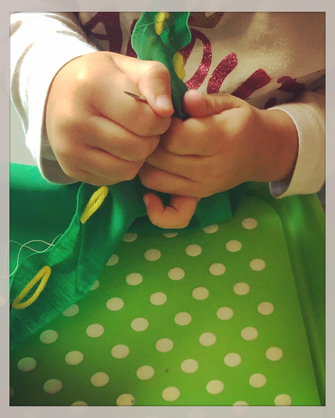
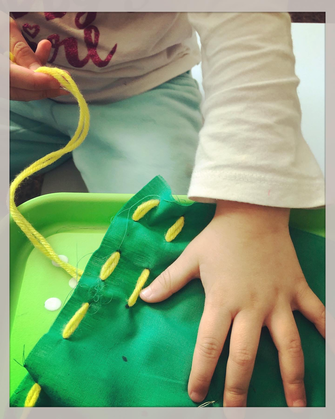
Hello my dearest darlings! I hope Springtime 2021 is finding you well! My Blog has been on my mind for sometime, as has about 20 personal sewing projects, that I have yet to even start. So, today, I thought I’d start somewhere, and get you an update on some recent happenings, and workroom photos of completed, and not-so-completed, projects! This is me, Roxanne, enjoying the fresh blooms of Spring, one of my favorite times of the year! 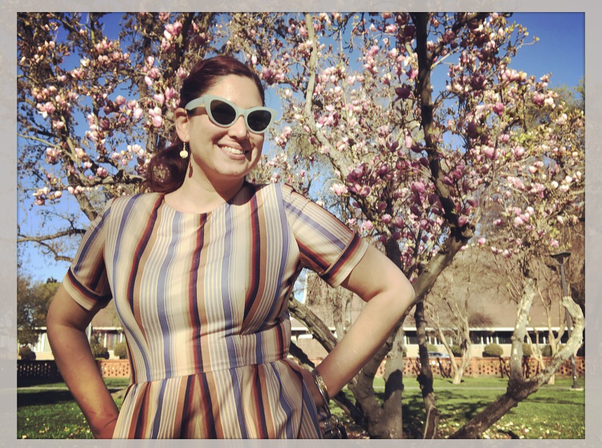 I recently found this lovely dress at The Salvation Army: It’s Vintage, a Perfect Fit, and... has Pockets! Since I Left You Last... I have been buzzing around like a pollinating bumble bee, juggling several side-hustles around my most important job: that of a Homemaker, Wife, and Mother. That may sound a bit old fashioned, but it is totally true, leaving me creatively drained with little energy for fashion design projects and sewing on most days! Although this past year has been spent mostly homebound for myself and children, we were able to safely travel to the Las Vegas/Henderson area of Nevada in January 2021, and we had a lovely time visiting our family there! Summer activities are already filling our schedule, including a camping trip this July! 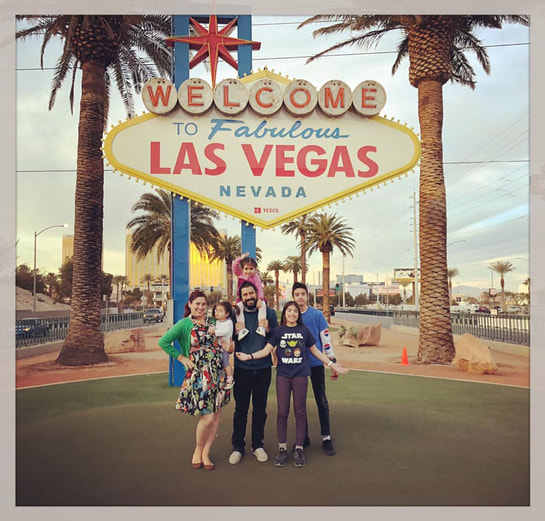 The Rangel Family- Las Vegas, January 2021 Work! I am still working Saturday’s as an Alterations Specialist with the clothier, The Buckle, and am currently creating a Blog Article all about Jeans, which I surprisingly found quite fascinating! I can't wait to share that soon! I am still busting out Alteration Services from my sewing room at home. My Dad’s Boat Upholstery Project was delayed due to fabric sourcing, but new fabric has arrived! Check out this photo of the old upholstery fabric, next to the new upholstery fabric, for one of my Dad’s boat chairs! I will be sure to continue to keep you updated on this project, in future Blog Posts, as I expect this project's completion to go fast at this point! 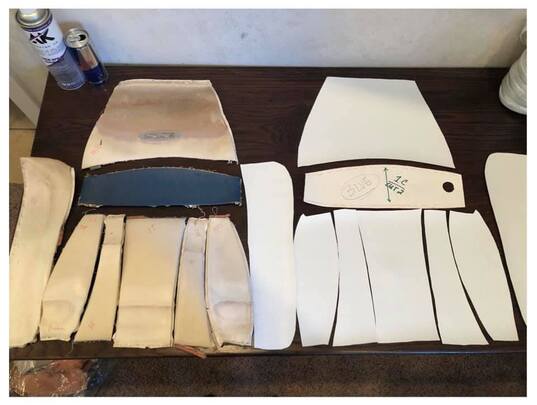 Adventures in Upholstery Project: side by side comparison of old and new fabric. Now, let’s get to even more SEWING! Toddler Sewing Time My two youngest daughters are no longer babies, and are now on their way to becoming capable young children. My second to youngest daughter, SkyLynne, is expressing interest in learning to sew! Since SkyLynne is almost 4 years old, I’m starting her with hand-sewing lessons. So far, I’ve been teaching SkyLynne to use a large embroidery needle and yarn to get used to hand-stitching. I draw dots on the fabric as a guide for her needle, and she is doing great! We also started another Sewing Project together...
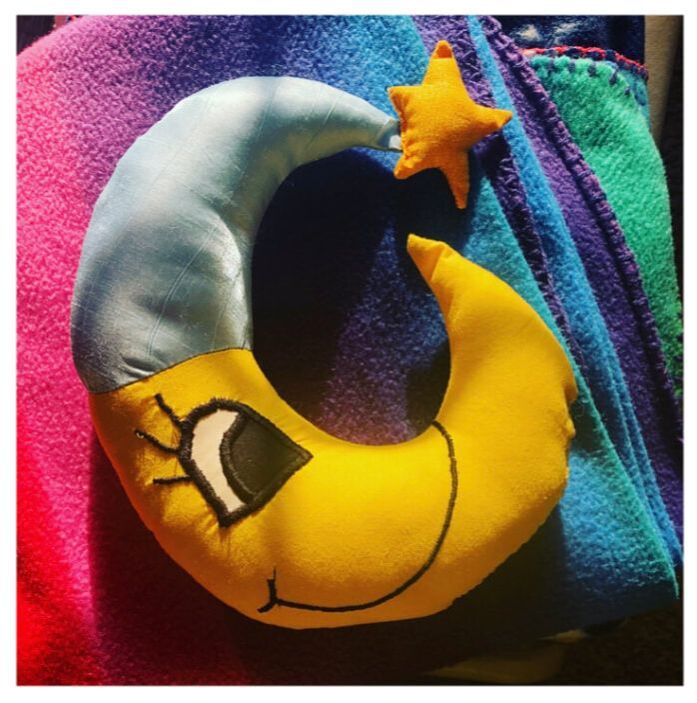
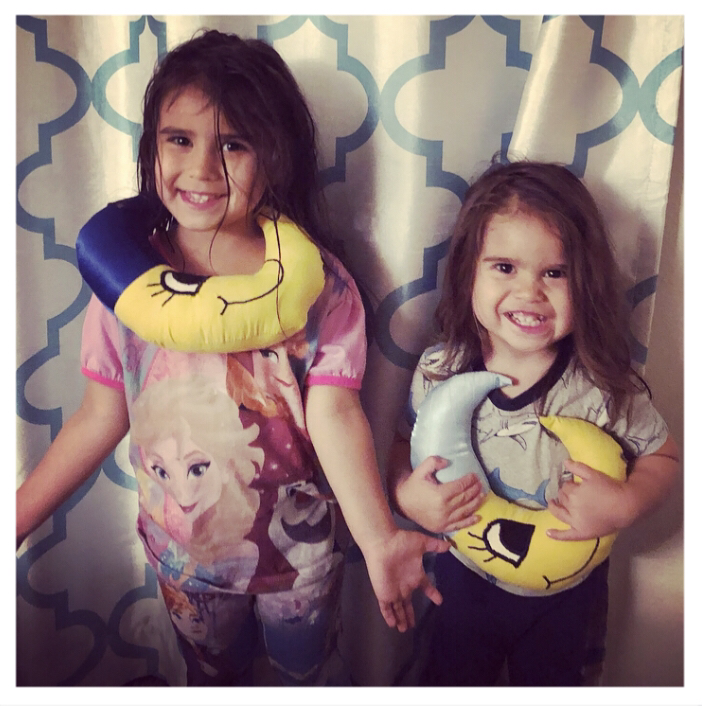
A Moon to Cuddle My two young daughters love the Moon (who doesn’t!). My youngest daughter, Minnie, is particularly obsessed, so when SkyLynne asked for “a Moon to Cuddle”, I decided to make a stuffed moon for each of them!
I have not made very many stuffed animals during my design/seamstress career, so these guys are definitely not perfect! Together, SkyLynne and I drafted a simple crescent moon pattern, with a night cap and star, as well as machine stitched face details! Although they could be better, I learned stuffed- toy-making tips & tricks for next time, and my girls now each have a cuddly moon to sooth them through the night! Priceless! Work in Progress... I love to visit thrift shops as often as I can. While shopping, I not only keep my eyes peeled for Vintage Clothing and Vintage Kitchen Wares, but also for... fabric! These recent acquisitions left me feeling inspired! Check out this yellow and green fitted sheet set, and lace curtains I bought for mere dollars! I will be creating something fantastic soon with these lovelies! Blog Post coming soon! 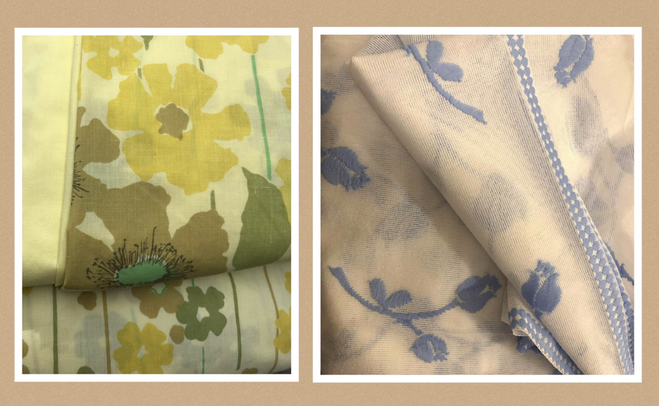 Vintage Bed Sheet Set (Left), and Lace Curtain (Right), that I will be using to create new dresses! 2021 Goals
I would love to hear your thoughts! What have you been up to this year? Do you Sew daily? What projects are you working on? Do you Sew with your children? What are your Creative Goals for the remaining 2021? Are there any Fashion or Sewing related topics that you would like me to write a Blog Article about? Leave me your comments below! I appreciate you! Have a fantastically fashionable day!  My beloved Grandma Minnie, San Francisco, California, April 2009 In Loving Memory of Mrs. Herminia “Minnie” Rodriguez 11/02/1941- 06/28/2020 Related Links:
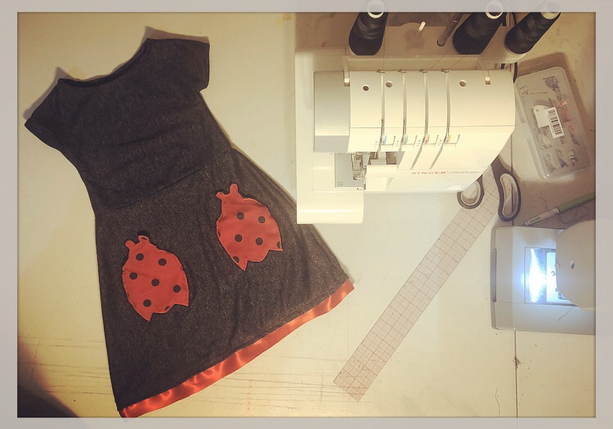
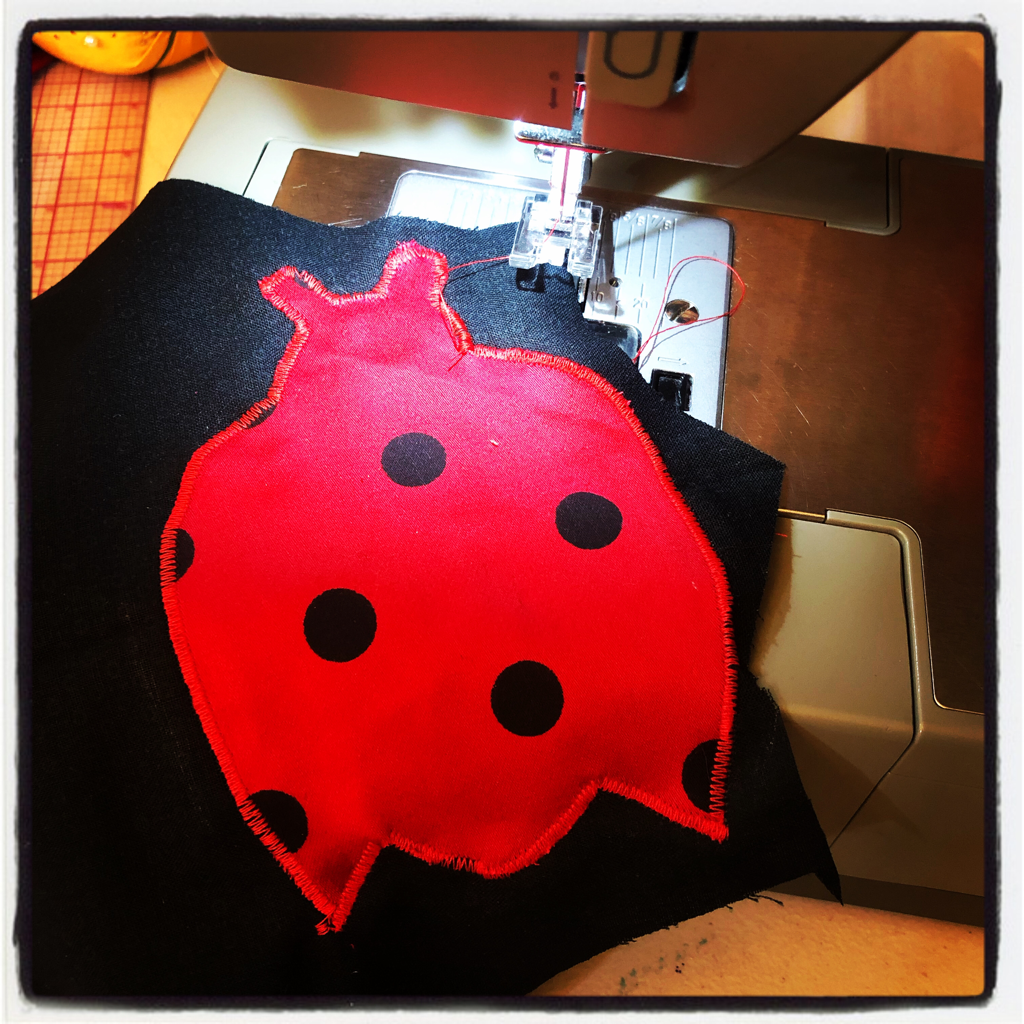
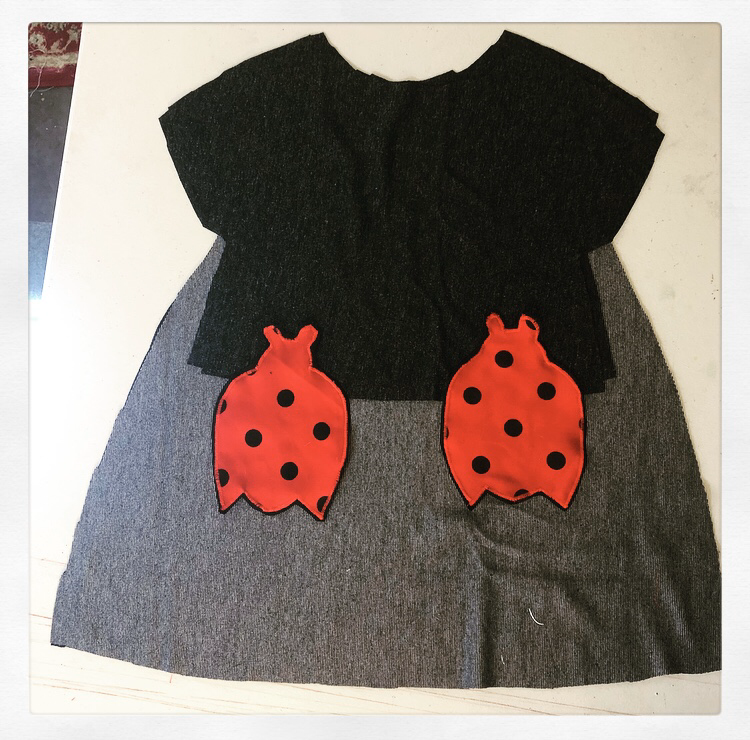
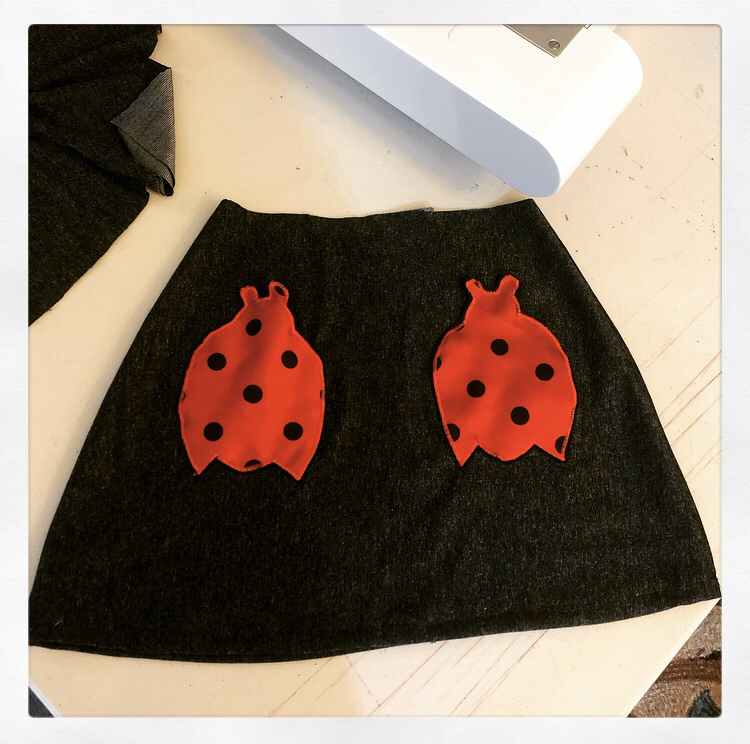
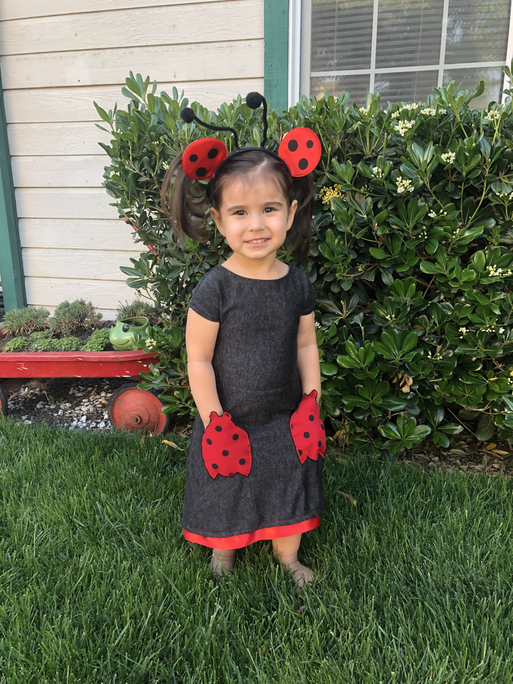
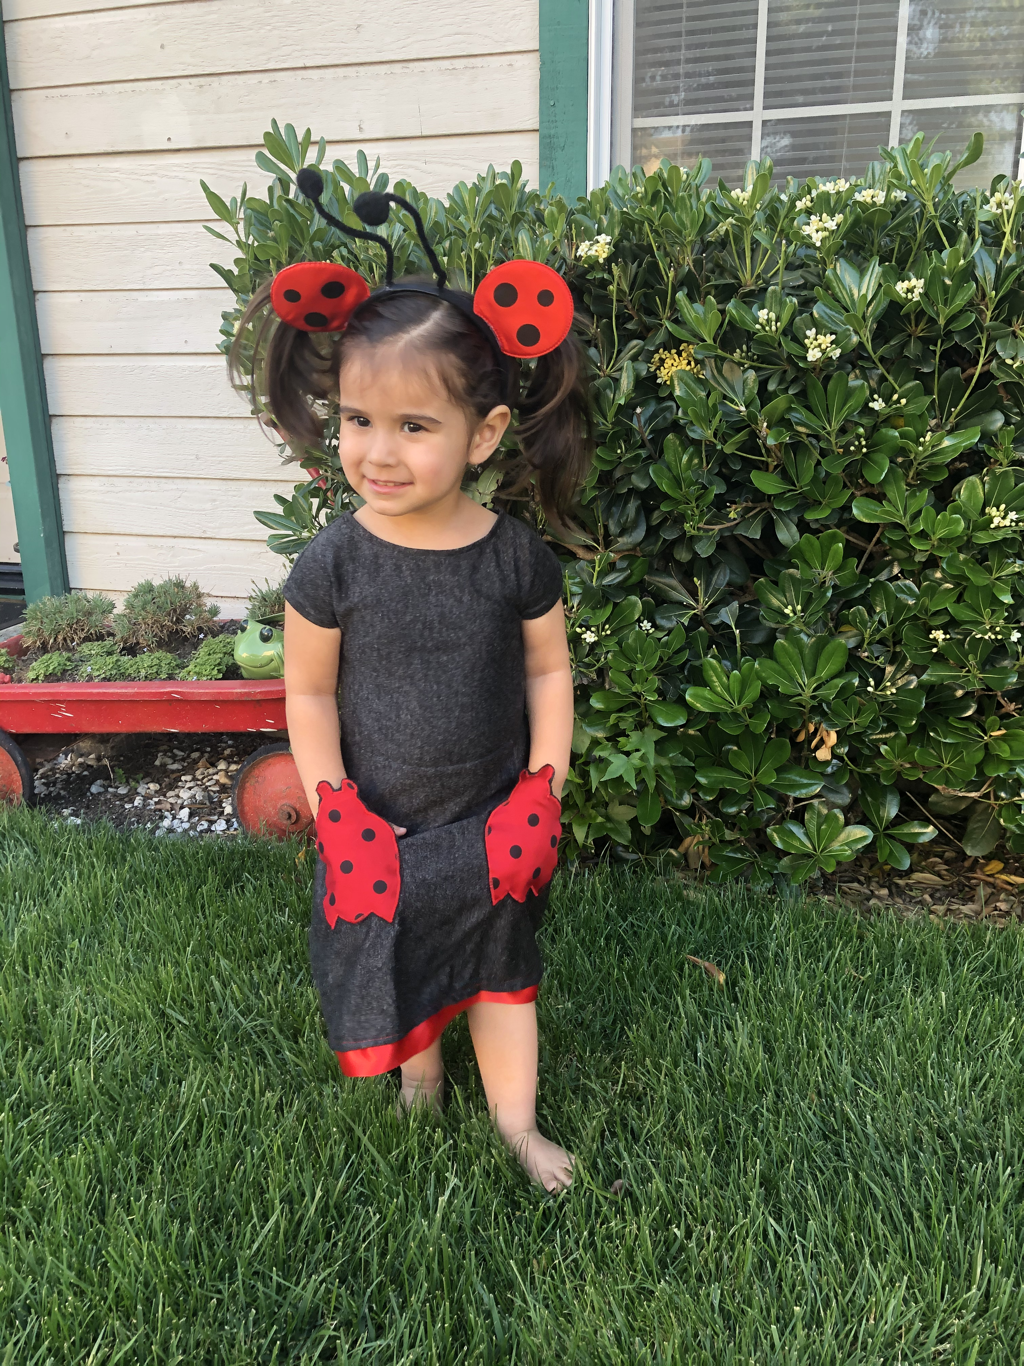
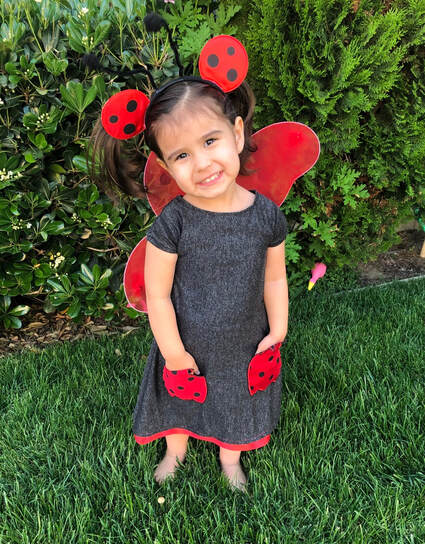 My 2 1/2 Year Old Daughter in the Ladybug Dress that I created for her! Her accessories include a Ladybug Headband and Ladybug Wings that we purchased last year at our local The Dollar Tree: Must haves for a little girls "Dress Up" Bin! For the last 2 1/2 Weeks, I have been sewing FaceMasks non-stop, every single day! Ok, maybe not exactly non-stop, but it sure feels like it! Over the last few weeks, my little darling daughter has seen me creating masks with a red and black polka dot fabric, that she calls "Ladybug Girl"! She has asked me several times if the fabric was for her, if the masks are for her, and if Mommy is making a dress for her... I told her that I would make her a Ladybug Dress sometime this week... As my FaceMasks orders have been coming in, more people are choosing the red and black polka dot fabric for their mask order, and it is adorable! I knew I had to make her something out of this darling fabric before I ran out! Today, I decided to take a short break from Mask Making, and create something for my little one. While she and my 1 year old baby were taking their afternoon nap, I made my toddler the cutest 3T Ladybug Dress! The dress took me about an hour and a half to make, and I love how it came out! 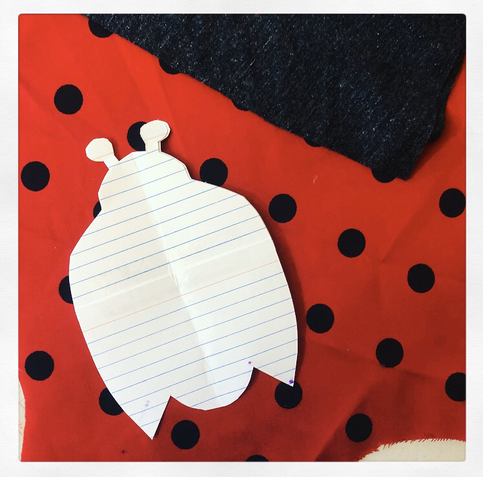 This is my Applique Template of a Ladybug that I drew freehand on an index card. I used this template to create applique Ladybug Pockets on my daughter's new Ladybug Dress. Earlier last week, I received my long coveted Singer Sewing Machine Accessory Kit, that I ordered from Amazon. This Presser Foot Kit has been on my Wish List for years! The Presser Feet included within this kit are: Blind Hem Foot, Cording Foot, Darning/Freehand Embroidery Foot, Even Feed/Walking Foot, Gathering Foot, Narrow Rolled Hem Foot, Overcasting Foot, Satin Stitch Foot, Straight Stitch Foot, plus a Twin Needle. Imagine the creative possibilities with these amazing accessories! In March, I found a fantastic book at my local library's annual used book sale, Encyclopedia of Sewing Machine Techniques, by Nancy Bednar and JoAnn Pugh-Gannon (1999). This book explains how to use all of the various presser feet along with step-by-step instructions! When I bought this book (for ONLY $1.00!), I knew for a certainty that I needed, absolutely needed, to buy the Singer Sewing Machine Accessory Kit that I had found on Amazon so long ago... So I bought it! I already love it! The Encyclopedia of Sewing Machine Techniques is a must have companion to the kit! 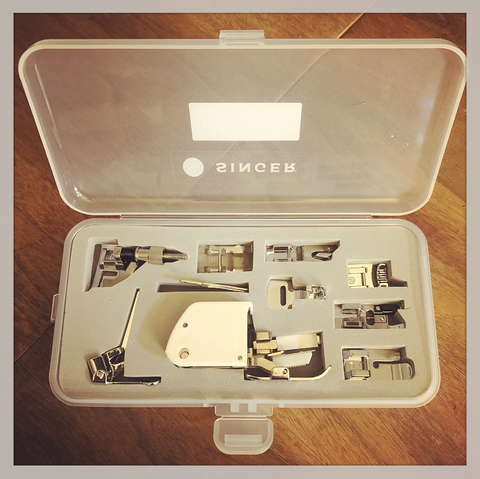 My NEW Singer Sewing Machine Accessory Kit that includes 9 Presser Feet! 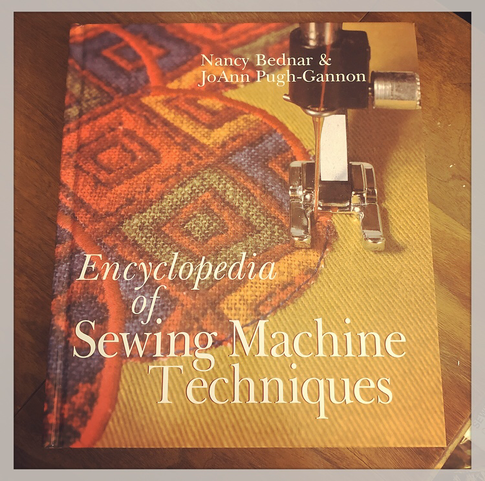 The Book, Encyclopedia of Sewing Machine Techniques, by Nancy Bednar and JoAnn Pugh-Gannon (1999). While on my sewing break from Mask Making, and with my babies peacefully asleep, I thought it would be fun to check out my accessory kit, by trying out the Satin Stitch Foot, and making my daughter her Ladybug Dress... I knew I could not make my daughter a dress entirely out of the red and black polka dot fabric, because I am running low. So I decided to make a Ladybug Applique out of the fabric, and attach it to a lovely charcoal grey stretch knit fabric that I had on hand. I was inspired by the design of a Carters Dress that I recently bought for my daughter online. The Carters Dress is a size 3T, fits her perfectly, and has little kitty cats as pockets on the front. I took the Carters Dress and traced the Skirt and Bodice on Pattern Paper, I added the seam allowances, then cut the new dress out of the charcoal stretch knit fabric. I also cut out the ladybug applique. With page 22, of my Encyclopedia of Sewing Machine Techniques open, I setup my new Satin Stitch Presser Foot following the Machine Set-Up Instructions on the "Applique, Basic Satin Stitch" Section of the book. How handy it is to have this tangible resource! 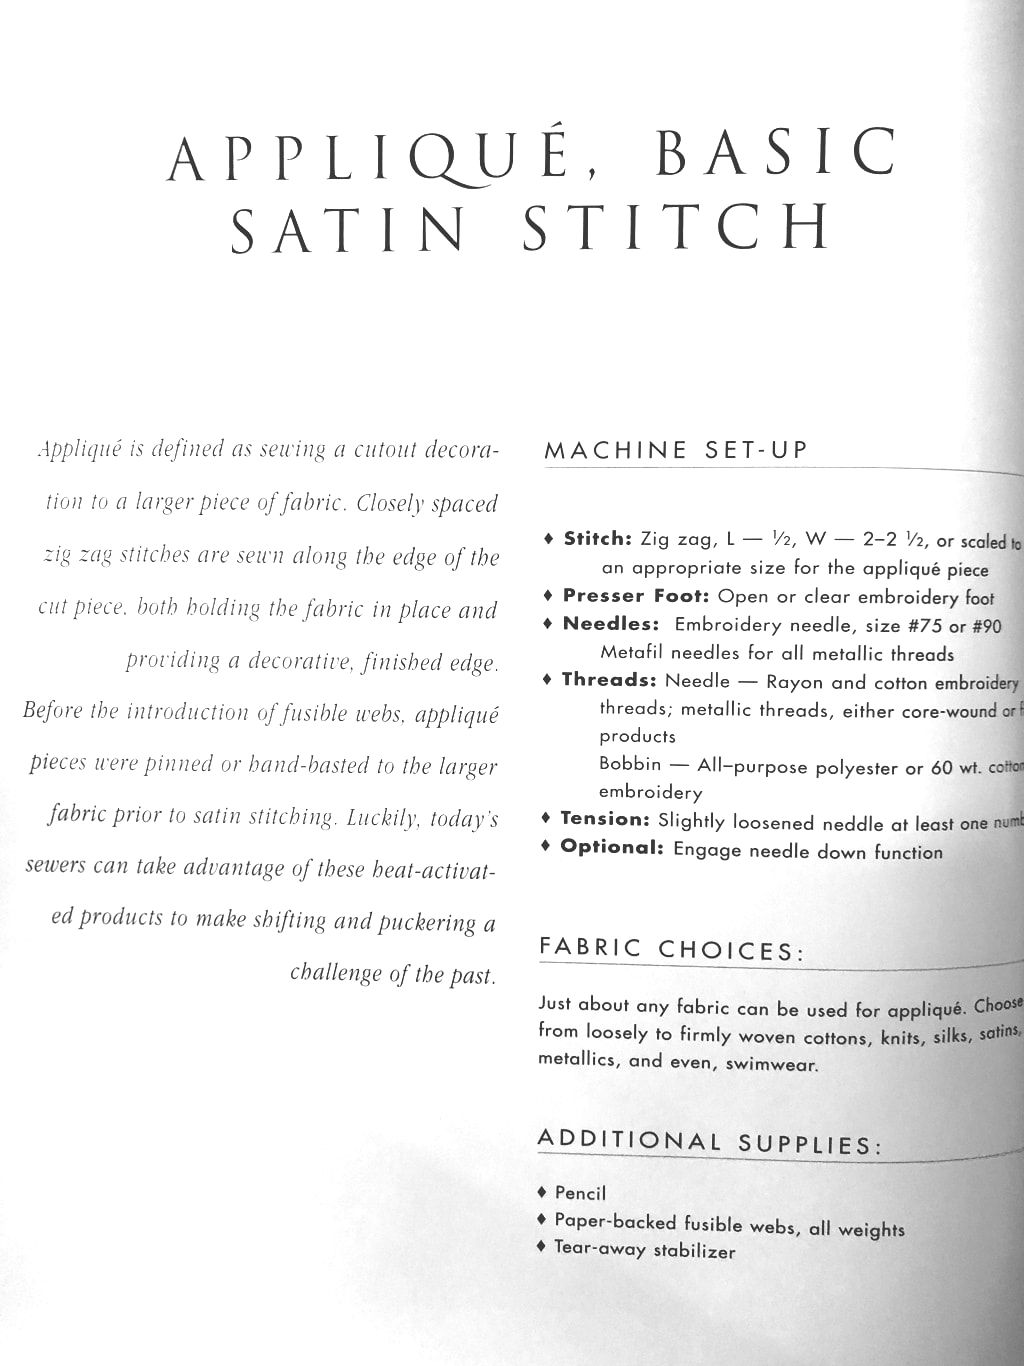 Page 22 of Encyclopedia of Sewing Machine Techniques. Check out my work in progress...
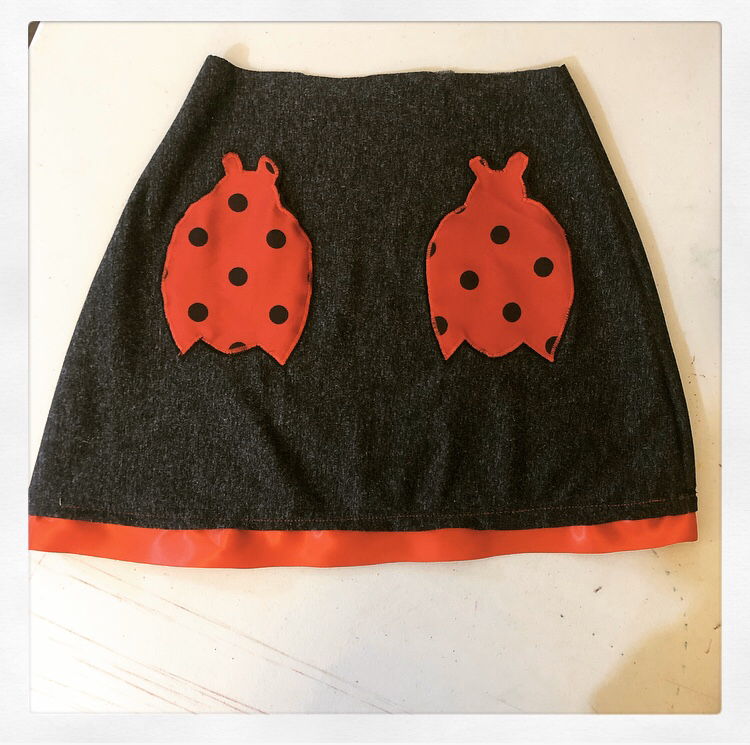
 After sewing the front and back of the bodice together, I finished the arm holes and neckline, then attached the dress bodice to the skirt. Finished! Nap Time is over, and the dress is ready! She loves it!
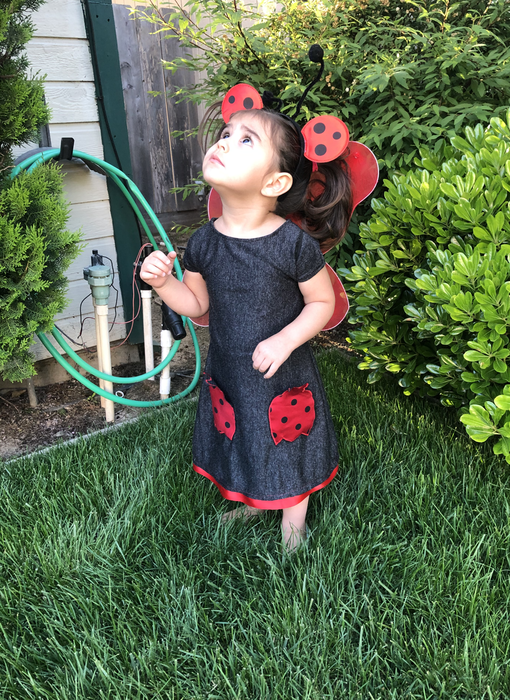 Here she is in her new dress, gazing at the bugs flying in the yard! Thank you for reading about my latest project! I am excited to try out the remaining 8 presser foot accessories in my accessory kit. I will be sure to tell you all about it once I do! GoodNight! Related Links:
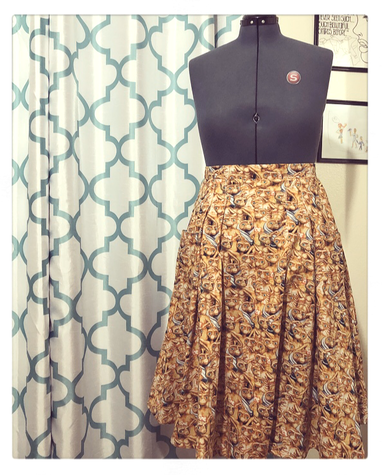
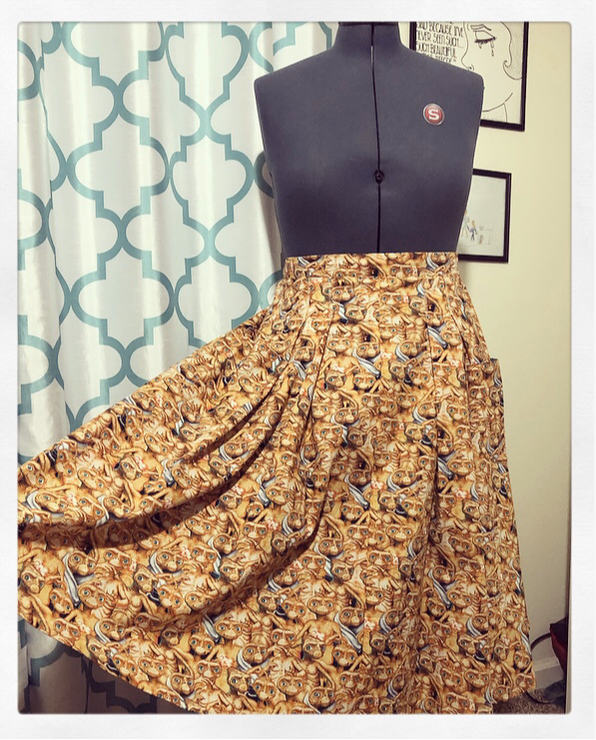
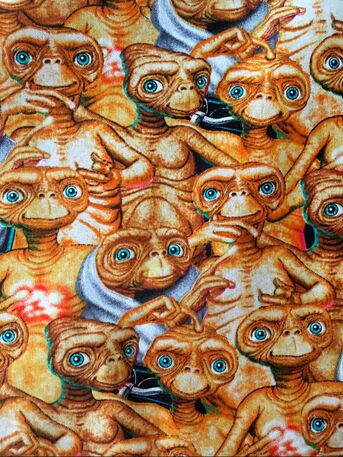
 This week I finally finished a Vintage Inspired Skirt for myself that I created with E.T. Novelty Fabric! 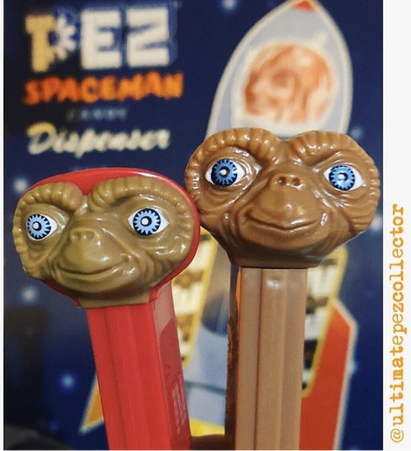 This is a photo of my E.T. PEZ Dispensers, posed in front of my PEZ Spaceman Metal Sign. I am a PEZ Dispenser Collector, and have an Instagram Account dedicated to my entire PEZ Collection! You can find me at www.instagram.com/ultimatepezcollector Ever since I was a child growing up in the 1980’s, I have loved all things E.T.! Over the many years, I have owned E.T. Dolls, E.T. Posters, E.T. PEZ Dispensers, an E.T. Watch, and a bar of E.T. Soap! Not surprisingly, when I spotted E.T. Fabric at Jo-Ann's Fabric, two summers ago, I couldn’t help but purchase several yards! I had planned to make myself a skirt with the fabric, but was delayed about a year and a half, due to finding out that I was pregnant with my youngest daughter. I had the skirt about half way made, when I decided to pause the project until after my baby was born, knowing I wouldn’t be able to wear it, with a growing baby-bump, followed by a post pregnancy body! Check out a close-up photo of the fabric that I found: (Isn't it bizarrely exquisite?!) 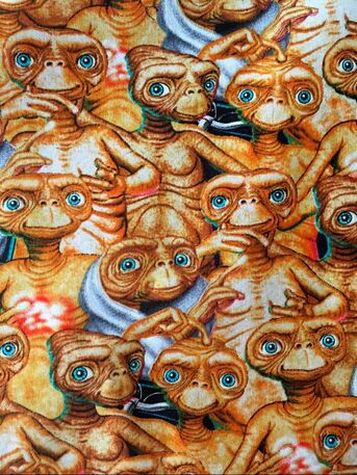 Novelty E.T. Fabric that I purchased at Jo-Ann Fabrics. Just recently, I found myself caught up on most of my ongoing projects... I pulled out my partially completed E.T. Skirt, and began to finish its construction! I rarely have time to make clothing for myself, so it is exciting for me when I finally do! I cut out contrasting lining, created a waistband to fit my current waist measurement, and I assembled the skirt to completion! I was very happy to find that I had just enough fabric remnants to add lined pockets! Check out the completed skirt:
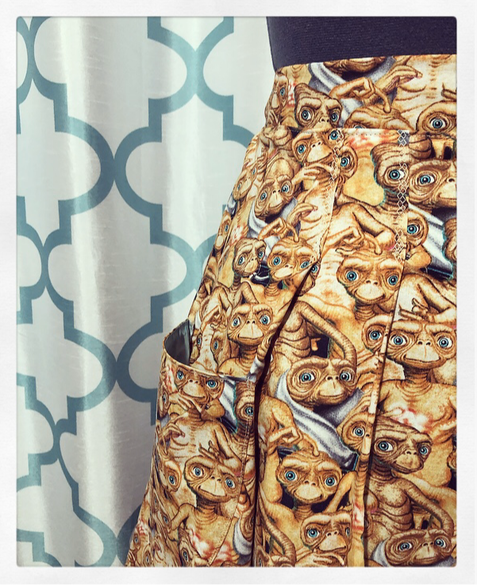 Close-Up photo of Lined Pocket and Pleats I absolutely love the design of this High-Waisted Full Skirt! To create this look, I used the skirt pattern pieces of Butterick Retro '56 Dress Pattern, B5813, and then created my own customized waistband, and pockets. I also love how this fabric isn’t instantly recognizable as an E.T. Print until one looks a little more closely! Check out a few more photos: 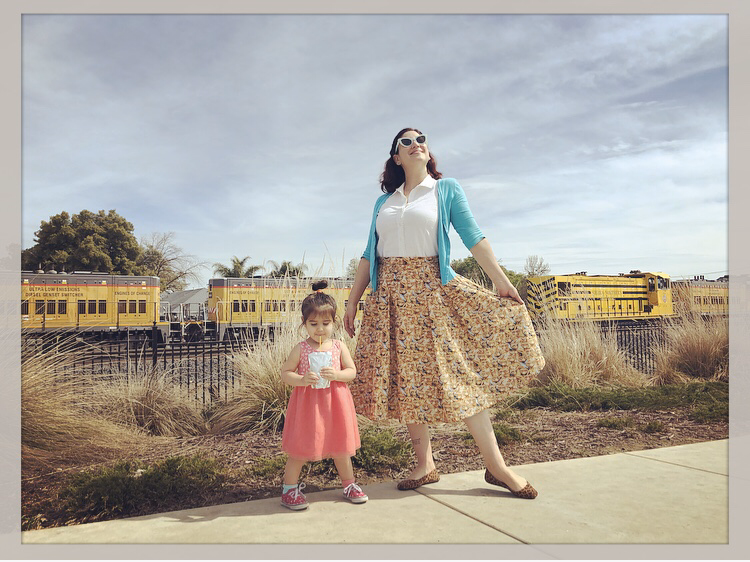 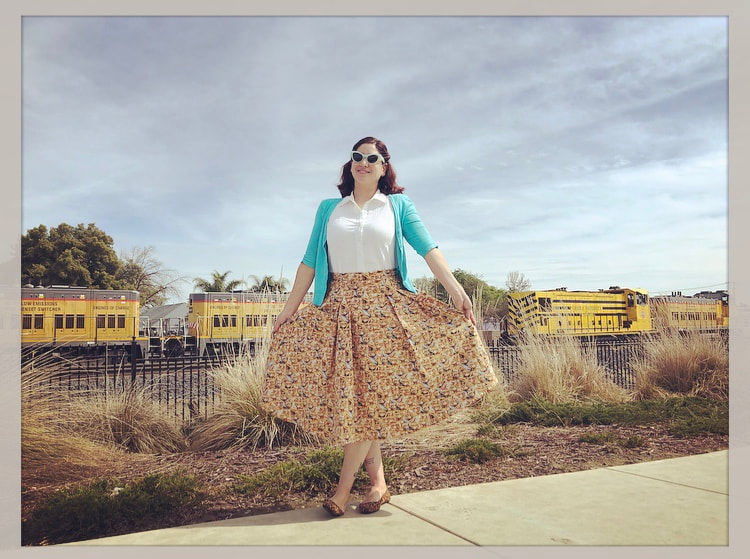 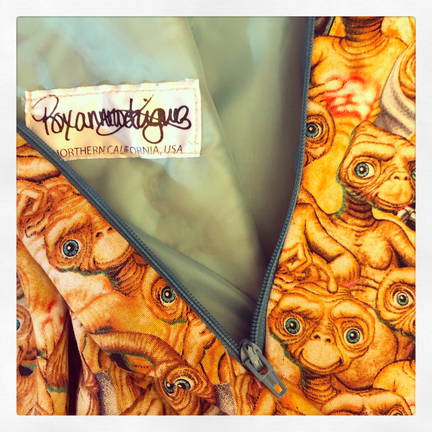 Close-Up photo of back zipper, and contrasting lining. Thank you for reading about my latest creation, my Vintage Inspired E.T. Skirt! I am looking forward to creating several more skirts and dresses for myself in the near future, as well as a 1930's Girdle! More Blog Posts coming soon! 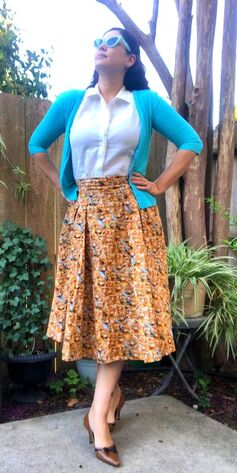 Related Links:
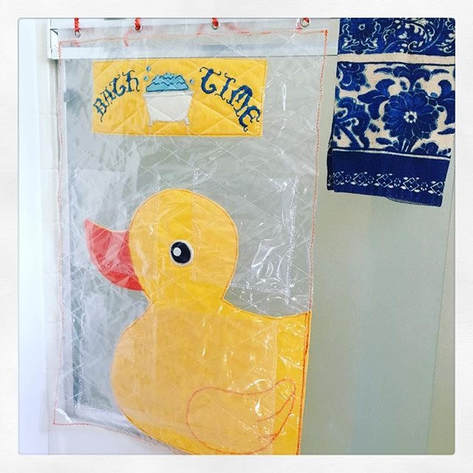
As a Freelance Fashion Designer, specializing in Women's Wear, I don't often receive client requests for Children's Clothes or for other children's sewing projects. Every once in a while, however, I do receive such a request. Recently, I finished my first sewing project of the year for a dear friend of mine, Custom Keepsake Teddy Bears, which was a first for me! As that project came to completion, along with the recent end of 2019, and the beginning of a new decade, I began to reflect back on the few Children's and Baby Projects that I have thus completed in my sewing and design career. In the last two years or so, I have only worked on a hand full of items for babies, or children. You may recall one such project, that I completed in October 2018, when I had the privilege of creating Dance Costumes for the P.R.O.U.D. Modesto Girl's Dance Group. You can check out my Blog Article detailing behind the scenes design studio details of that project by clicking HERE. In addition to the P.R.O.U.D Modesto Girl's Dance Costume project, I have created the following children's projects for my own family, friends, or for my clients... Custom "Bath Time" Baby Toy Holder 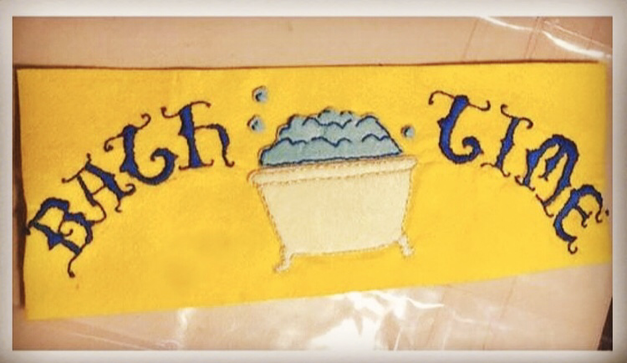 Work in Progress: Hand Stitched Embroidery, and Hand-Cut & Stitched Bathtub Applique, on Felt. By Roxanne Rodriguez Rangel.
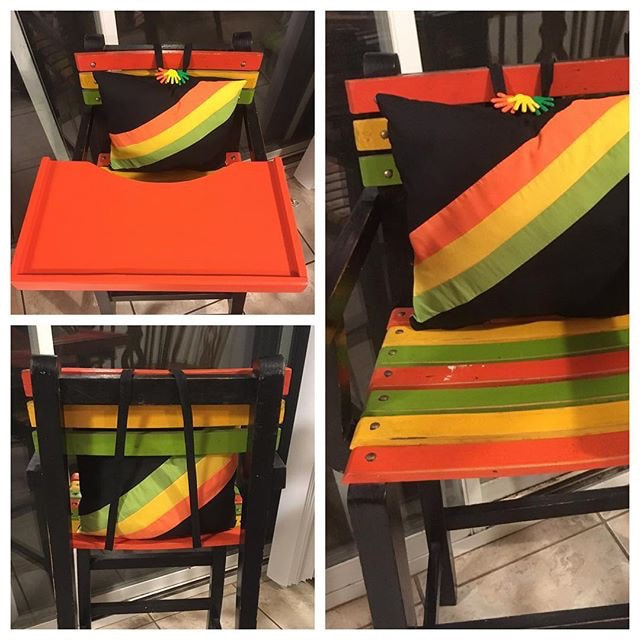
To achieve the idea I had in mind, I Hand-Stitched the words "Bath Time" in Embroidery, and I then cut and stitched a Bathtub Shaped Applique design which I attached to yellow felt. I also cut out a Rubber Ducky shape, also in felt, as well as the eye and duck-bill pieces. I sandwiched the felt details in between two sheets of plastic. On the top layer of plastic, I cut out and sewed three clear pockets, that would later be used for toy storage. The pockets have drain holes punched through the bottom to allow for drainage of wet toys. I loved the final outcome of this project! It is a fun piece to display in my children's bathroom, that is both decorational and functional! My family and I have gotten much use out of this toy holder over the past two years, and it has held up quite well! Custom High Chair Pillow After my daughter, SkyLynne was born, my Mother-in-Law, gave our family an old high chair that was my husbands when he was a tot back in the 1980's! I loved the colors, and simplicity of the 1980's design! After a fresh coat of orange paint on the tray of the high chair, and with the addition of a safety latch to secure the tray down, I then created a custom pillow to help support our growing infant. I used scrap fabric, that I already had on hand, in my fabric supply bin, of the same colors, black, orange, yellow, and green, that the High Chair originally featured. Take a look at the pillow that I created for our high chair! I am sure that it will be a treasured keepsake, along with the high chair for many more generations to come!
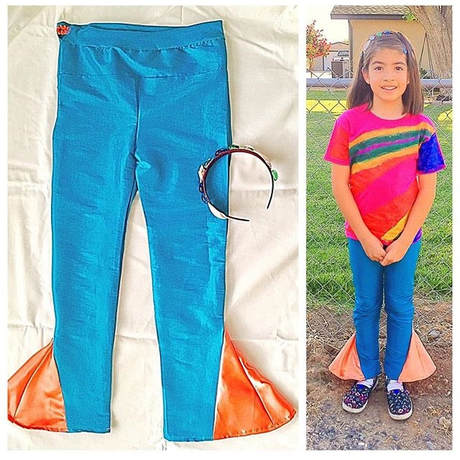
Custom Children's Mermaid Inspired Pants
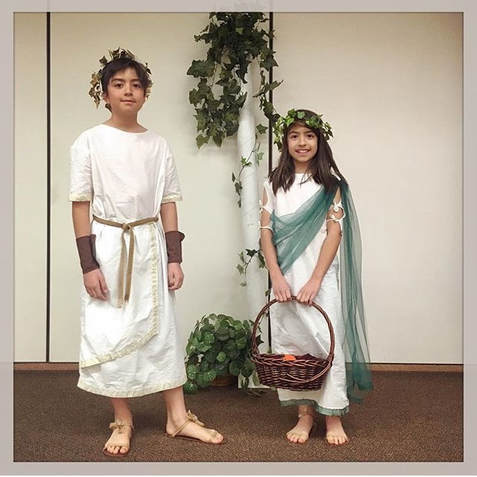
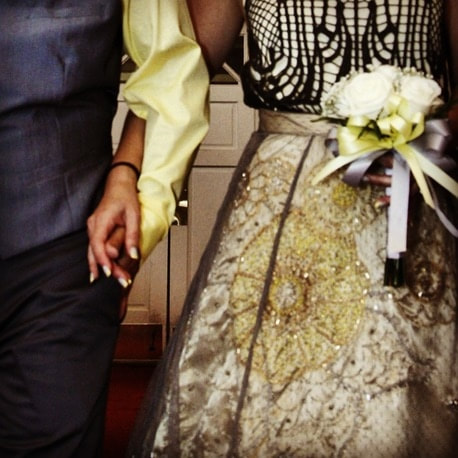
Custom Children's Greek Play Costumes
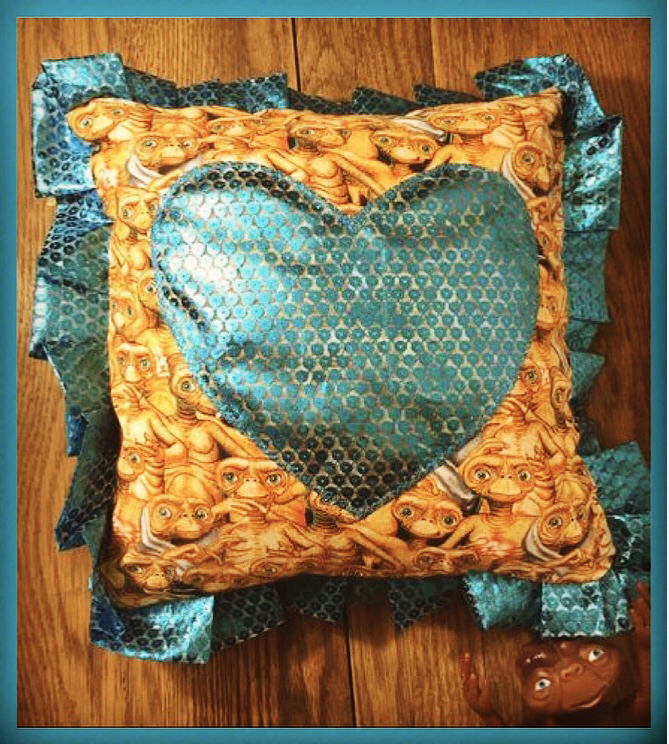
They were so happy with their costumes! Their increased confidence was evident in both of their outstanding performances! I can't wait to create more costumes for upcoming school plays! 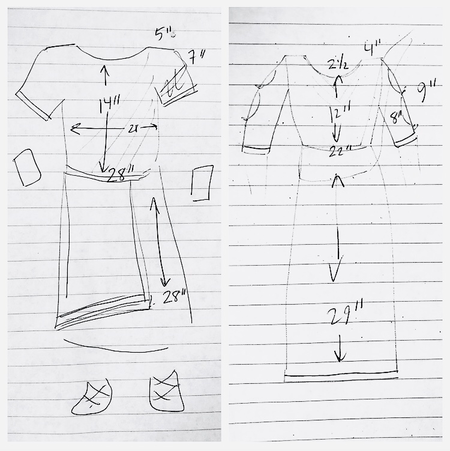 Quick sketch of measurements and design concepts for my children's Greek Costumes! Baby Couture 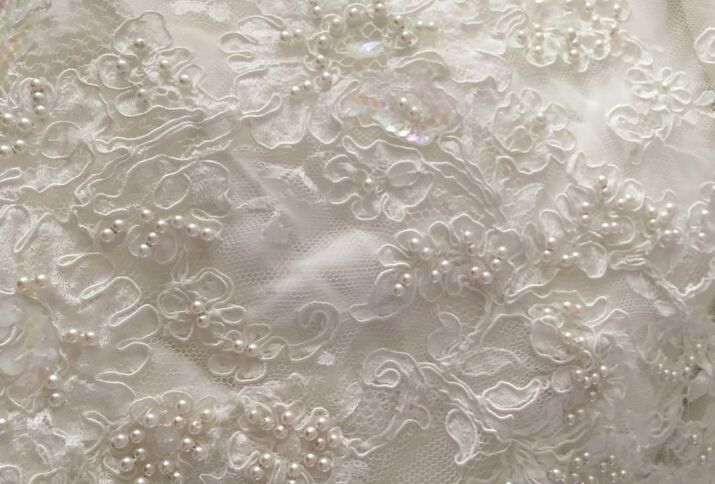 This is the lovely fabric from my clients Wedding Gown. I used the train of her dress to create a toddler's formal gown, bonnet and booties, out of the fabric! In the Spring of 2018, I was hired to create a fantastically creatively fun piece for one of my clients. The project was to create a baby's formal gown by using the material from my client's wedding dress! The wedding dress was an amazingly beautiful beaded lace gown with a long detachable train. I was honored to have been chosen for this special task! Because the wedding dress had a huge train that separated from the wedding gown, I was able to use the train fabric, leaving the beautiful wedding dress intact for future generations. The fabric included lovely beaded lace applique, that I took apart very carefully. All of the pieces I created, a Baby Formal Gown, a Bonnet, and Beaded Booties, are made of the original wedding dress material. I removed all of the beaded lace applique from the original fabric, and then reattached the beaded lace to the bonnet, booties, and dress. The final outcome was perfect! 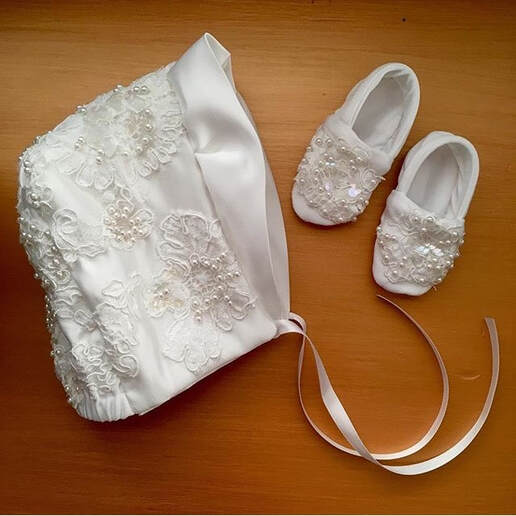 Formal Wear: Baby Bonnet and Baby Booties, by Roxanne Rodriguez Rangel 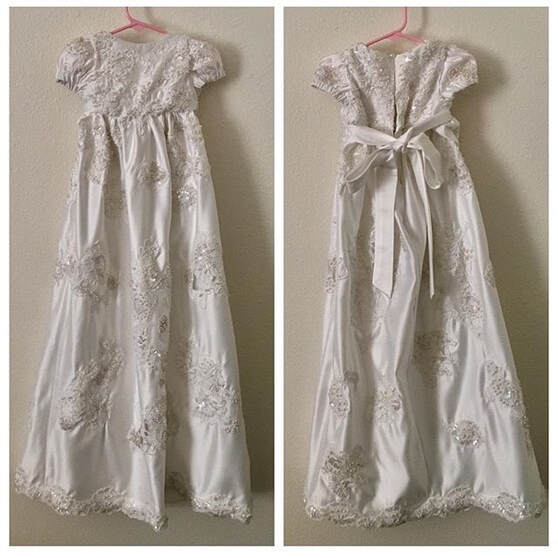 Formal Wear: Baby Couture by Roxanne Rodriguez Rangel Check out this video featuring Behind the Scenes Photos of this project in my Designer Workroom: E.T. Pillow I love all things E.T.! Last summer, I was in the fabric store, and my eye instantly caught sight of this marvelous E.T. novelty fabric! I couldn't help myself, and I bought several yards to make myself a fun skirt (Click Here to see my Vintage Inspired E.T. Skirt)! I used the leftover fabric remnants to construct a lovely little pillow for my daughter's room! I love it! (My sister, Desiree, thinks that E.T. is absolutely creepy! I can't wait to surprise Desiree by wearing my new E.T. Skirt to her house! He he...)
(Can you find my E.T. Doll in the photo of my E.T. Pillow? I snuck him in there just for Desiree! I hope she is reading this article and is creeped out! Muah ha ha...) And now for my most recent completed children's project... Custom Keepsake Teddy Bears A very dear friend of mine, Megan, experienced tremendous loss, when her father passed away several years ago. Since his passing, she, and her only sister, have been married, and have had children of their own. Unfortunately, these grandchildren were born after their Grandpa passed away, and the children were never able to met him personally. Megan asked me if I could turn shirts that belonged to her father into a keepsake teddy bear for her son. I loved the idea, and agreed instantly, especially since I know the family so well. When Megan brought to me her father's shirts, I was pleasantly surprised that there were four shirts, with enough fabric, that would allow me to create four separate teddy bears! I didn't tell her that I made four until I presented the final project to her. My idea was that she, her sister, as well as both of their children would have their very own keepsake teddy bear to cherish, or she can do whatever she wishes with them! She loved the idea and she loved the teddy bears! Check out my Work In Progress photos of this project, as well as what the shirts looked like before I transformed them into bears! 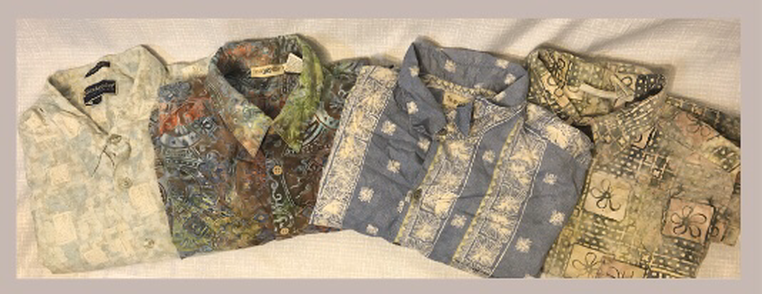 Photo of Shirts (Before) 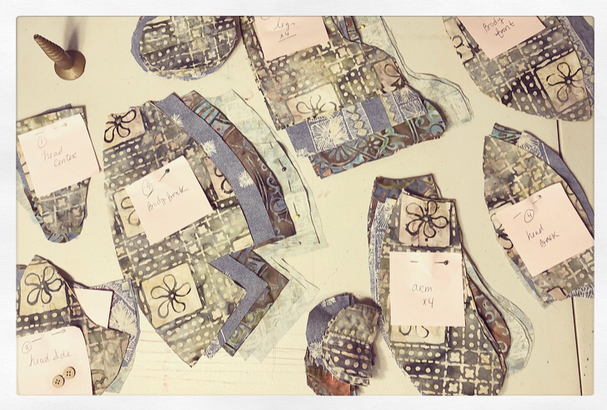 Work in Progress: Bear Pieces... 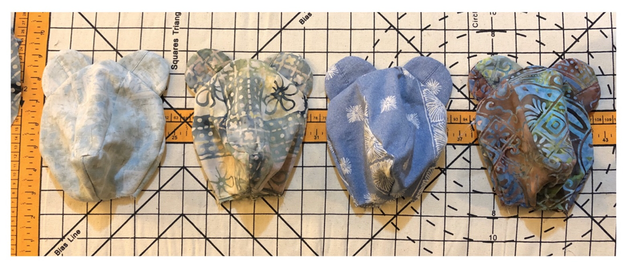 Work in Progress: Unstuffed Bear Heads 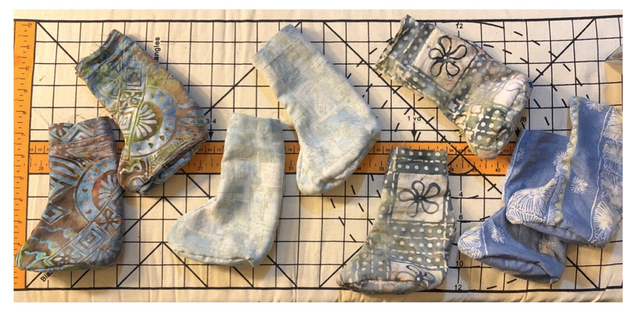 Work in Progress: Unstuffed Bear Legs... 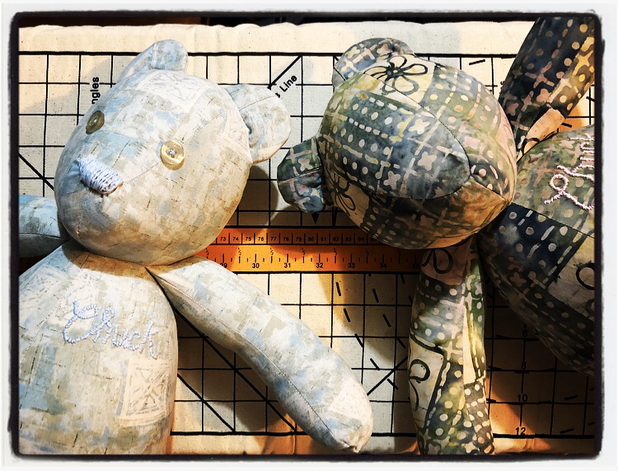 Final Details: Button Eyes and Embroidered Noses... Check out the finished bears: 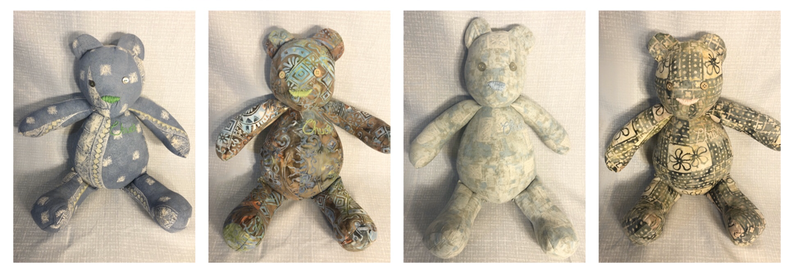 The four finished Keepsake Teddy Bears, made out of four Men's Button Front Shirts. 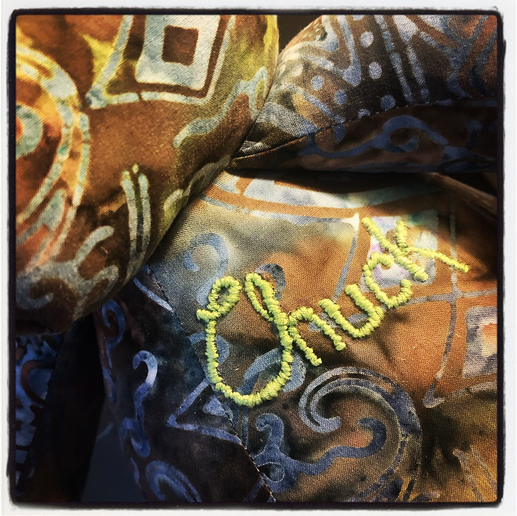 Close up of the Hand-Stitched Embroidery on the Teddy Bears chest. I embroidered, by hand, the name "Chuck" on each of the four bears. 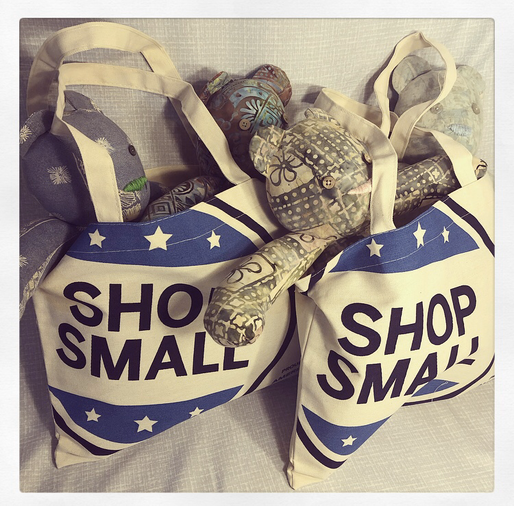 Ready for delivery! Thank you to American Express for supporting Small Businesses, and supplying me with shop supplies every year, including these "Shop Small" Totes! Making these Teddy Bears was a fun project, and I definitely learned much in how to improve my Stuffed Animal making skills! It was especially hard for my youngest two daughters, ages 2 1/2, and 1 to watch me create Teddy Bears that they could not play with! I have since been inspired to create a Fig from Tumble Leaf Doll, as well as a few Frida Kahlo Inspired Dolls! I will keep you readers updated on those projects! That completes my recap of the sewing projects that I have made for children or babies! Although these types of projects are not my professional specialty, it is definitely fun to create sewing projects that are different than what I normally do, and that are interestingly creative! I hope that you enjoyed my Blog Post! Which project did you enjoy viewing the most? Do you have any ideas for upcoming children/baby sewing or design projects? Please leave me a comment below with any of your feedback or opinions! Until we meet again, Dear Reader! Have a exceptional day! Related Links:
Welcome to My Sewing Journal! Today I am reflecting on embroidery pieces that I created as embellishments on clothing that I designed. The selected embroidery pieces that I would like to share with you today were created in the years 2015-2018. "Embroidery is the craft of decorating fabric or other materials using a needle to apply thread or yarn. Embroidery may also incorporate other materials such as pearls, beads, quills, and sequins.” - https://artsandculture.google.com 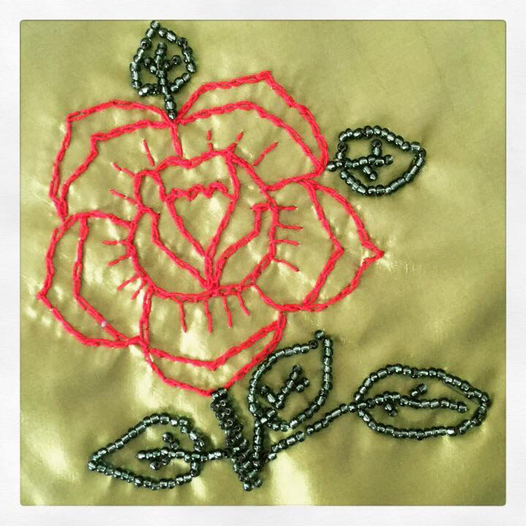 Figure 1: Hand-Stitched Embroidery with Hand-Stitched Beadwork, by Roxanne Rodriguez Rangel, 2018. Figure 1: Adding hand sewn details such as embroidery or beadwork to my fashion designs is not only fun to create, but it adds an interesting artistic element to my designs that I really enjoy. I created this hand-stitched rose (Figure 1) with red embroidery thread and green hand-stitched beads for the leaves. This particular design was featured on a green capelet that I created for my 2018 Fall Collection. Check out the photos from that collection here: A Look Back: Fall 2018.
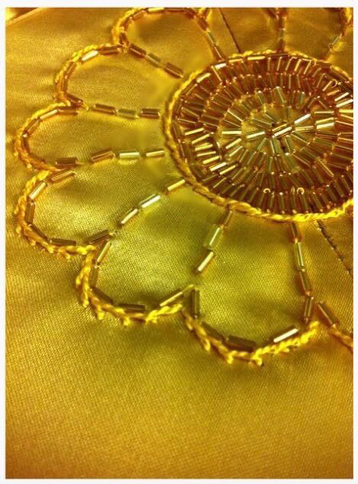
Figure 3A and Figure 3B:
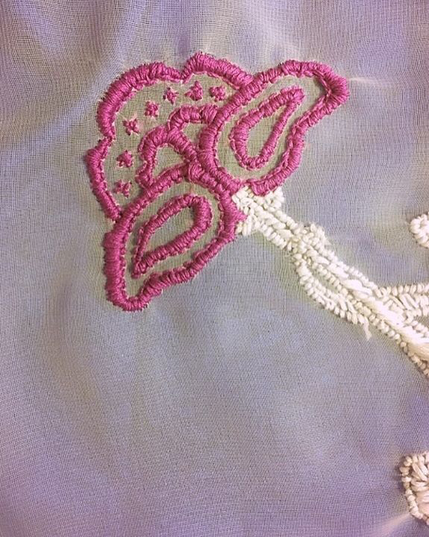
This gold toned hand-stitched flower was something I came up with for the hand-beaded design on my 2015 Wedding Ball Skirt. The skirt featured a wide variety of hand-stitched embroidery and beadwork detail. The overall design included a gold floral motif on gold satin, as well as silver beading for the accompanying leaf motif. The beaded gold layer was over-layed with a grey swiss knotted netting. Although time consuming to create, these one-of-a-kind details add elegance and regalness to any formal gown. See more photos of this final Bridal look here: "My Whirlwind Wedding Engagement: From The Cliff House to Las Vegas in Four Months and Three Dresses!" Figure 4A and Figure 4B:
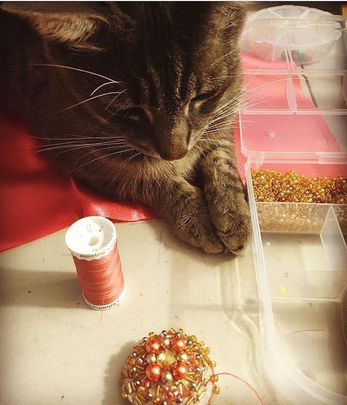
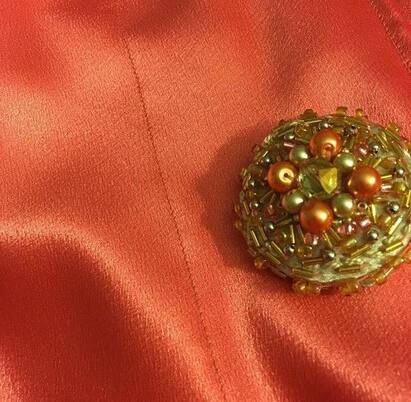
One of the design details that I was inspired to create for my 2016 collection, was this hand-beaded fabric covered button. I had never created a fabric covered button before, and greatly enjoyed learning something new with this technique. This button was one of three, featured on my 2016 Summer Collection: Pink Flamingo Halter Pencil Dress. Check out photos of this dress, along with the rest of my 2016 collections in my article, "RAW San Francisco Presents: Reveal!" 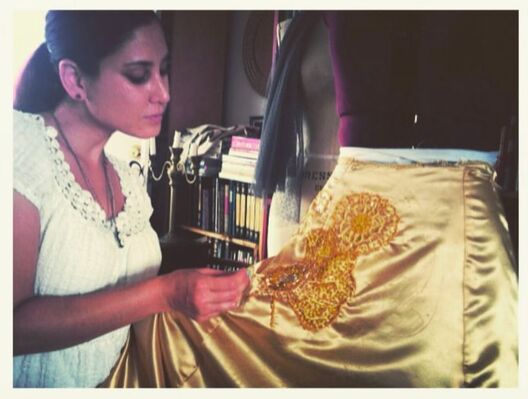 Designer Roxanne Rodriguez Rangel: hand-stitching in progress, 2015. I am continually inspired by hand-stitched embellishments on clothing and in fashion! I greatly enjoy reading books about sewing and fashion from my own personal library, and look forward to applying the techniques I learn in many more of the garments I create! Thank you for taking the time to read about my hand-stitched embroidery and beadwork! Leave me your thoughts in the comments below! RELATED LINKS:
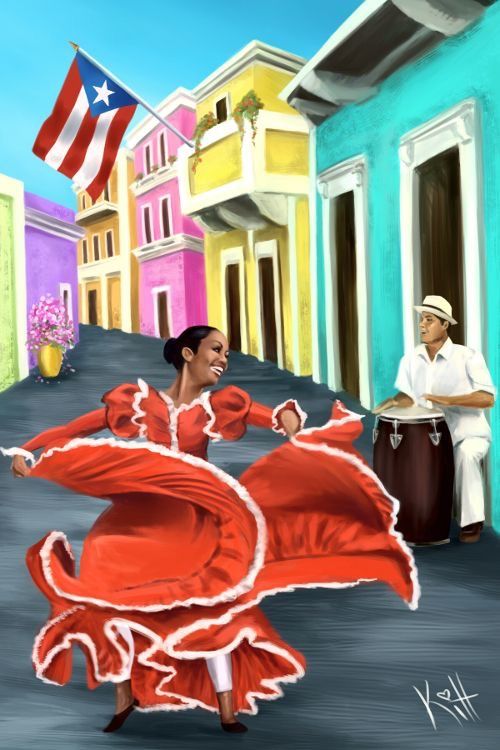
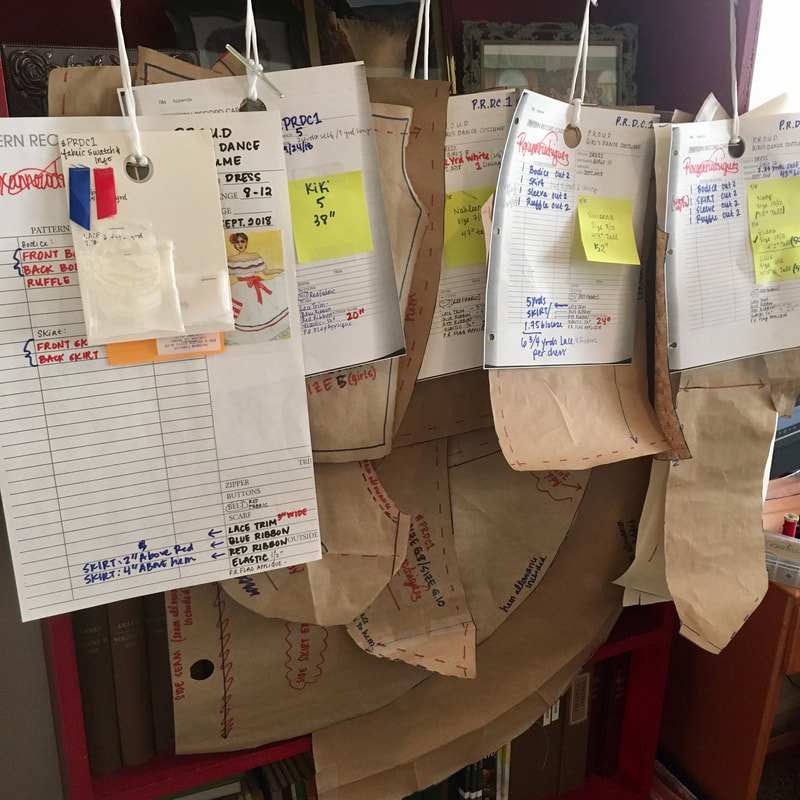
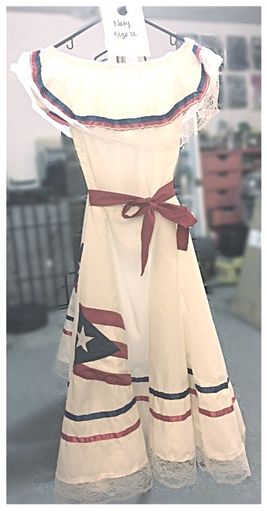
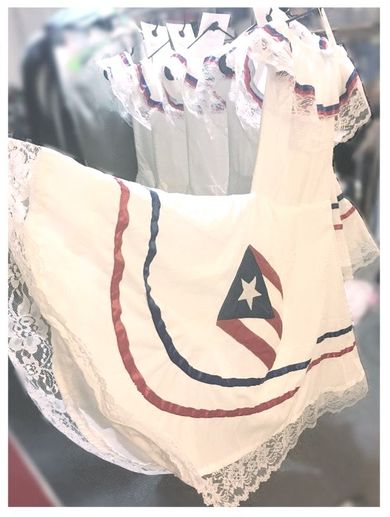
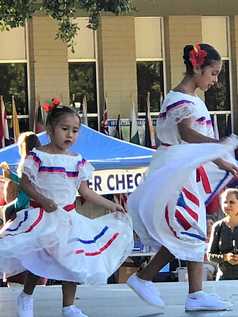
The Dance Group is open to interested Boys and Girls, but at this time, only Girls have joined. Like the club, Dance Group members do not need to be Puerto Rican to join. I am delighted to have been commissioned by P.R.O.U.D. Modesto to construct the dresses for the girls in the new Dance Group! In September, I was sent photos of traditional Puerto Rican Dance Dresses, as well as the orders for the members of the Dance Group. I wanted to stay as close to the original concept as possible, due to this being a cultural costume. All dresses would be the same, but in various sizes. Once the orders were in, I drafted the pattern for the dress, in girl's dress sizes 5 through 12, I purchased fabric, trim, and notions, and I then began to create the costumes... Check out the sketch I drew, illustrating the dance costume concept, that the P.R.O.U.D Club Members decided on: 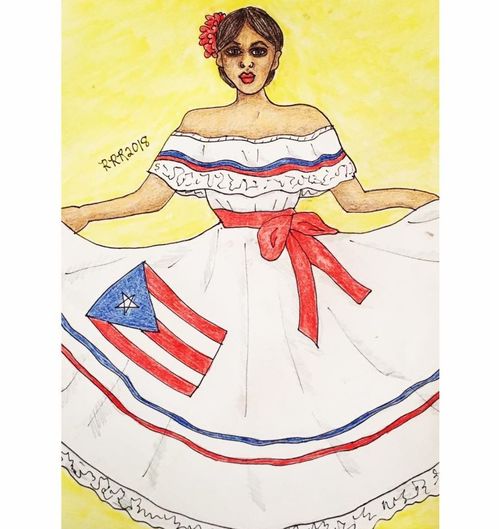 Conceptual Illustration of Puerto Rican Dance Costume, by Roxanne Rodriguez Rangel. Work in Progress... Here are some exclusive, behind the scenes, photos, taken in my workroom, as I created these lovely costumes!
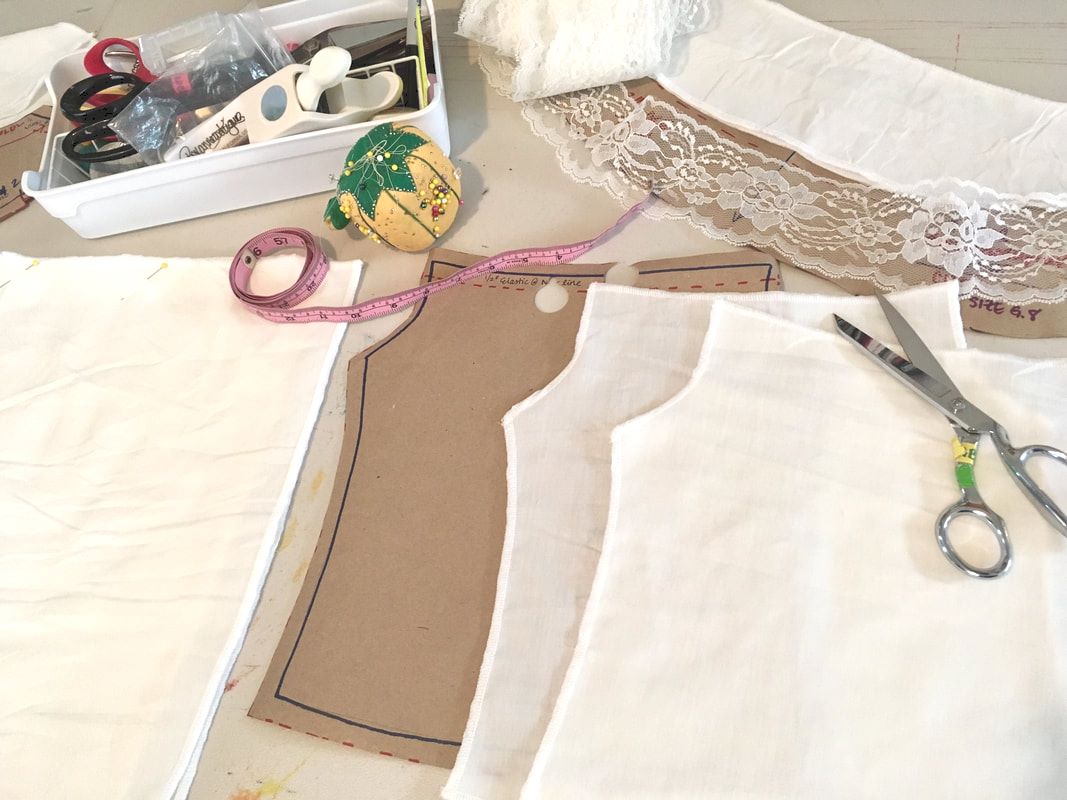
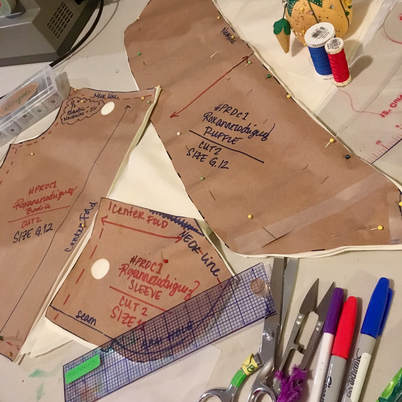 Cutting out the fabric for my size 12 dresses...
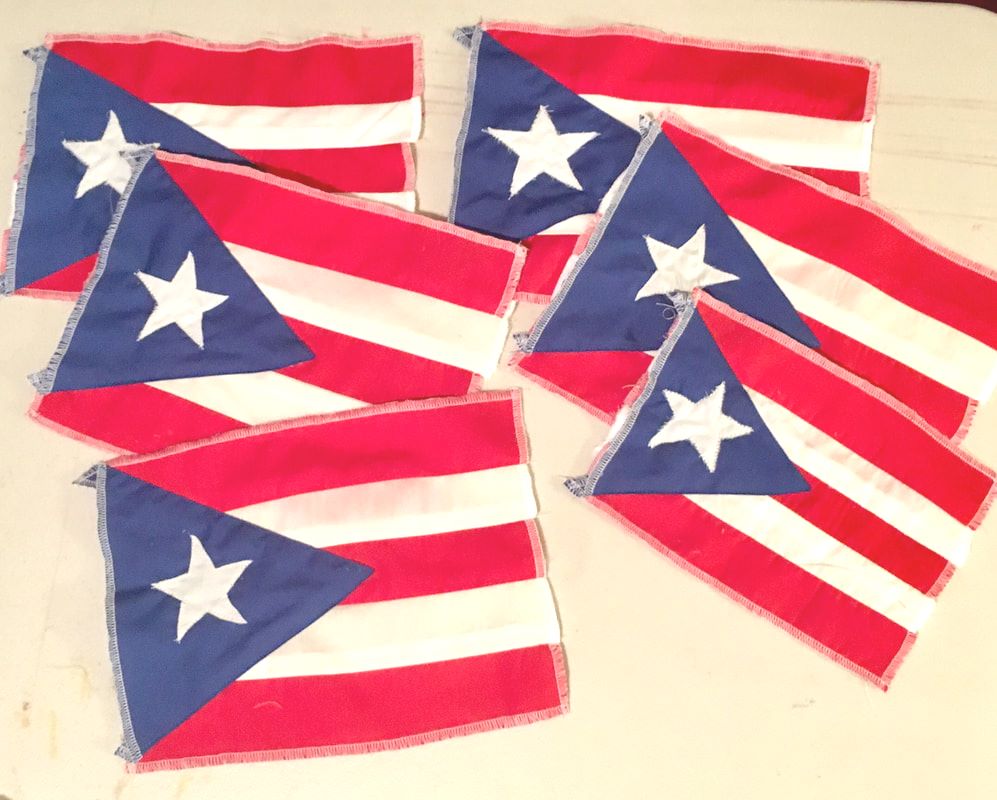
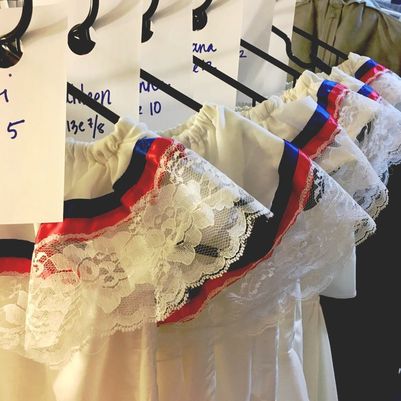 The garment rack begins to fill up with dresses! Project almost completed!
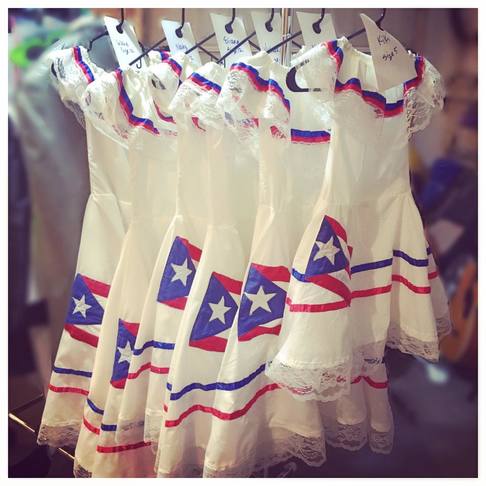 The Puerto Rican Dance Costumes are ready for the Final Fitting! Dresses Completed! When all of the dresses were finalized, I met with the dance group for a final fitting. With my rolling rack in hand, we met where the group was rehearsing. Once the girls tried on the costumes, I was pleased to see that only one minor alterations was needed. The dresses were performance ready!
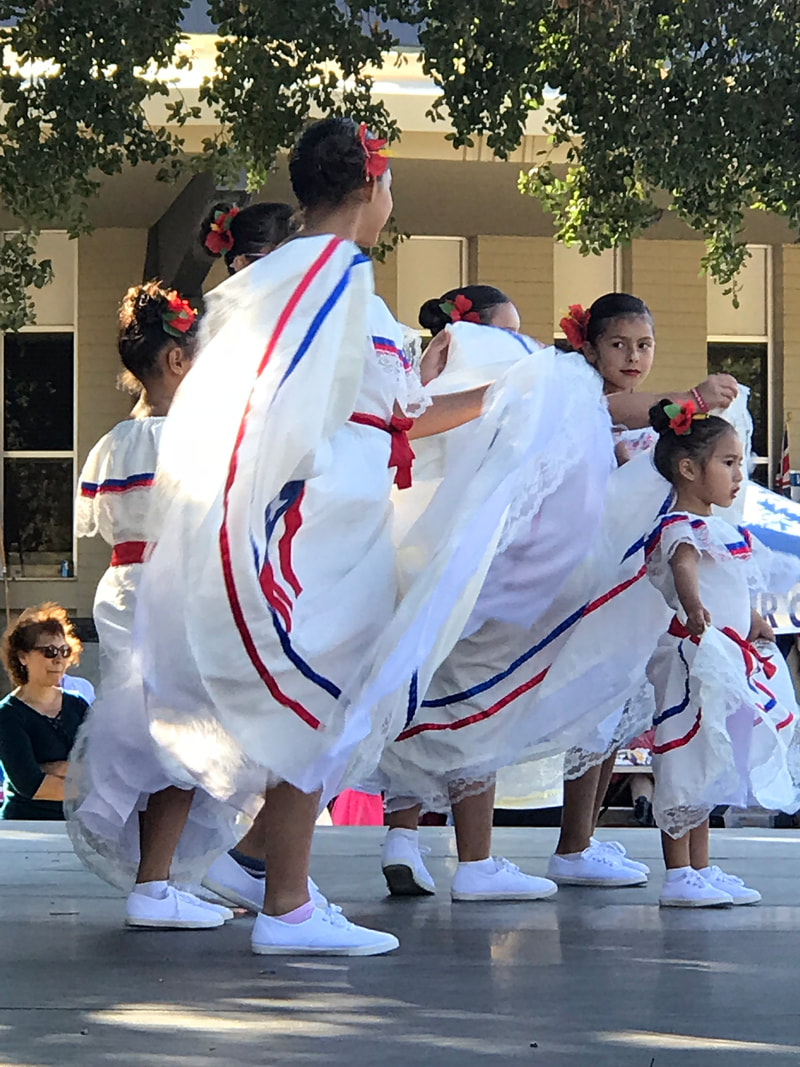
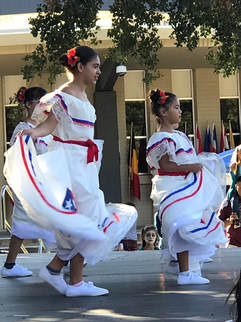
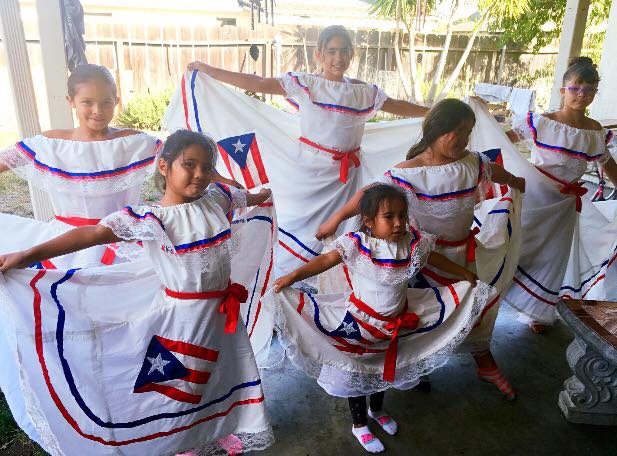 The PR.O.U.D. Girl's Dance Group, in costume, at their dance rehearsal. The First Performance!  On October 6th, 2018, the P.R.O.U.D Modesto Girl's Dance Group performed for the first time at The International Heritage Festival, held at Modesto Junior College in Modesto, California. Unfortunately, I was unable to attend this festival, since I had a prior commitment scheduled for an OFW Art & Style Magazine Photo Shoot that same day in Oakland. However, my loving husband, Javier, took our three children to this event, where they were able to view a fantastic presentation of traditional Puerto Rican Dance, presented by the P.R.O.U.D. Girl's Dance Group! One of my nieces, Vivianna, is a member of the Dance Group! Javier was able to take some beautiful photos of their performance. Here are some of the marvelous photos that my husband, and my sister, Desiree, took of the P.R.O.U.D. Modesto Girl's Dance Group's first performance: 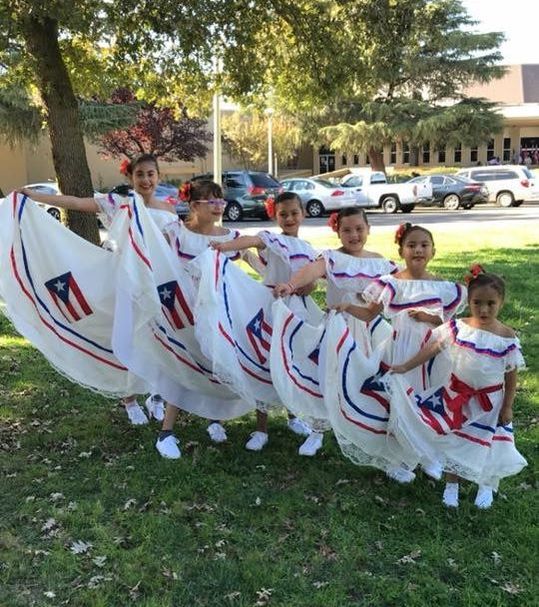 P.R.O.U.D. Modesto Girl's Dance Group at the International Heritage Festival! Photo by Desiree Rodriguez Peredez. 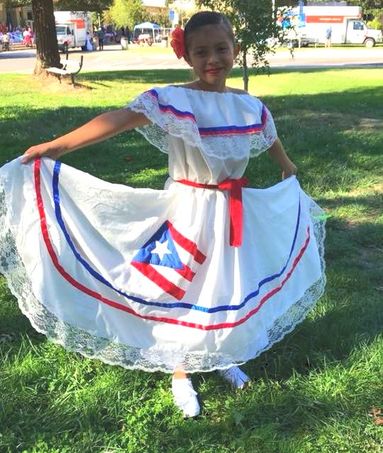 P.R.O.U.D. Modesto Girl's Dance Group at the International Heritage Festival! Photo by Desiree Rodriguez Peredez.
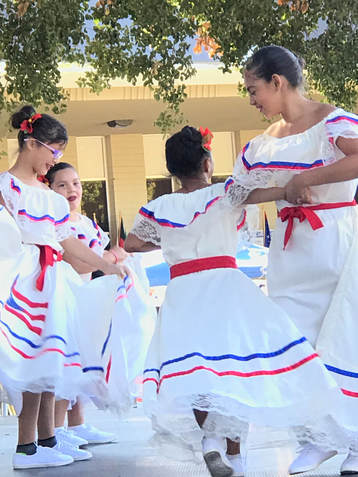 P.R.O.U.D. Modesto Girl's Dance Group at the International Heritage Festival! Photo by Jav Ran Photography. 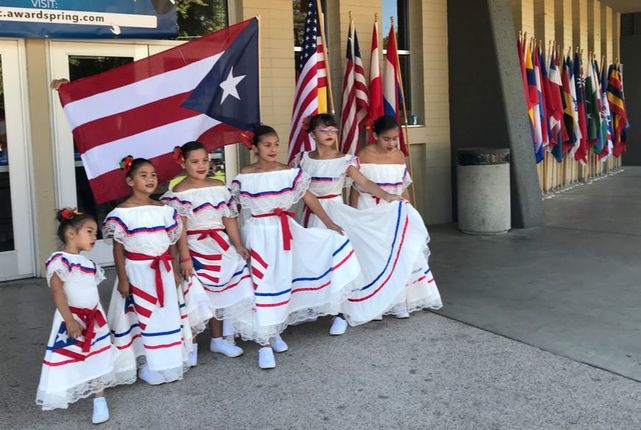 P.R.O.U.D. Modesto Girl's Dance Group at the International Heritage Festival! Photo by Jav Ran Photography. When viewing the photos myself, it was wonderful to see these young ladies enjoy themselves, while learning traditional dance of the Puerto Rican Culture! It was exciting to see the dresses I had created flowing with rhythmic beauty as the girls twirled and waved the folds of fabric while dancing! Thank you for joining me, as I created the Dance Costumes for the P.R.O.U.D. Modesto Girl's Dance Group! I hope you enjoyed the photos and commentary! Leave me a comment! I would love to hear your feedback on my Blog! I hope you have a wonderful day! Related Links:
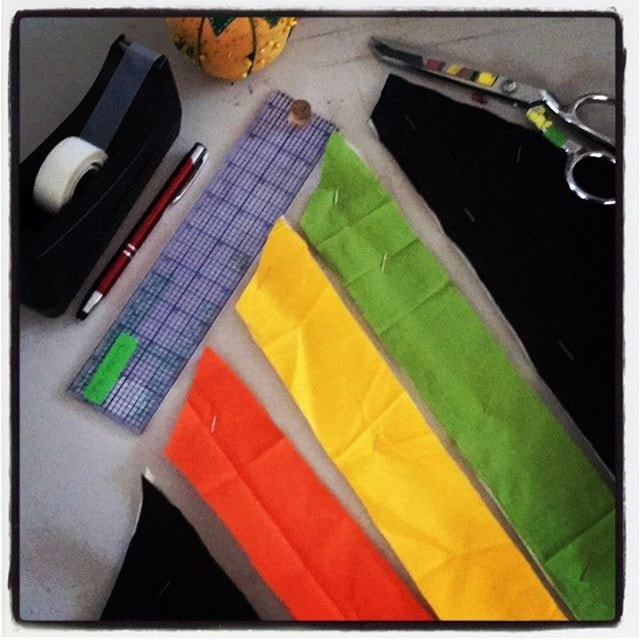
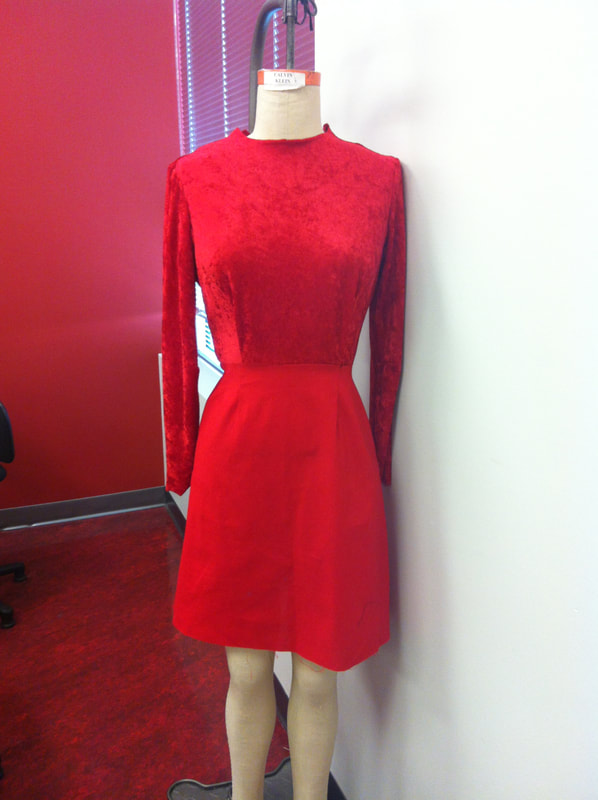
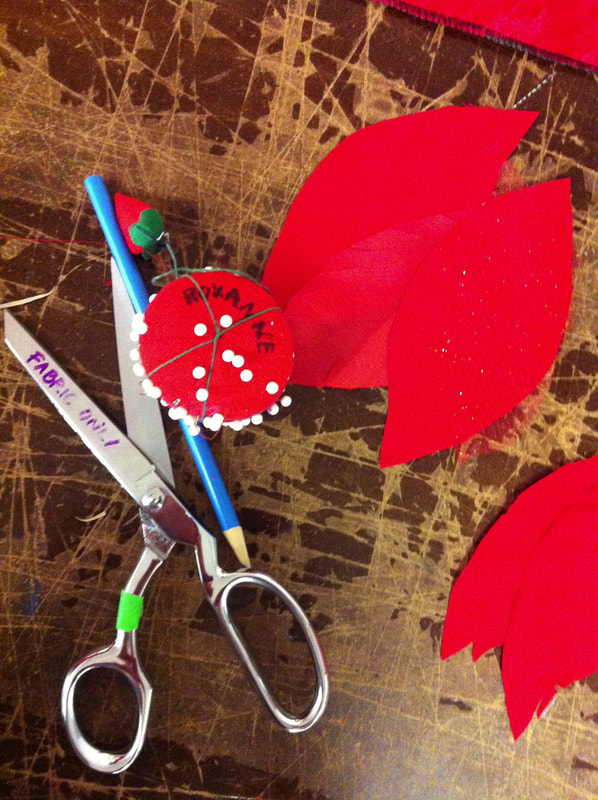
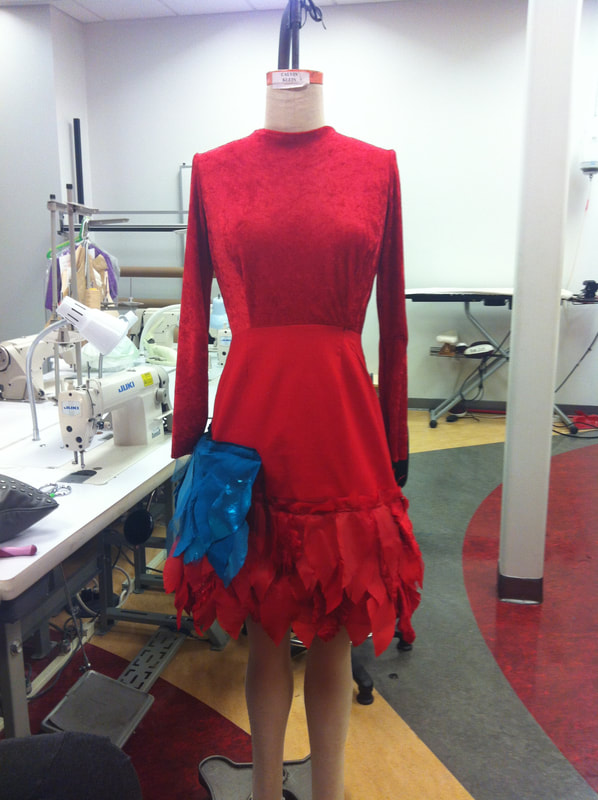
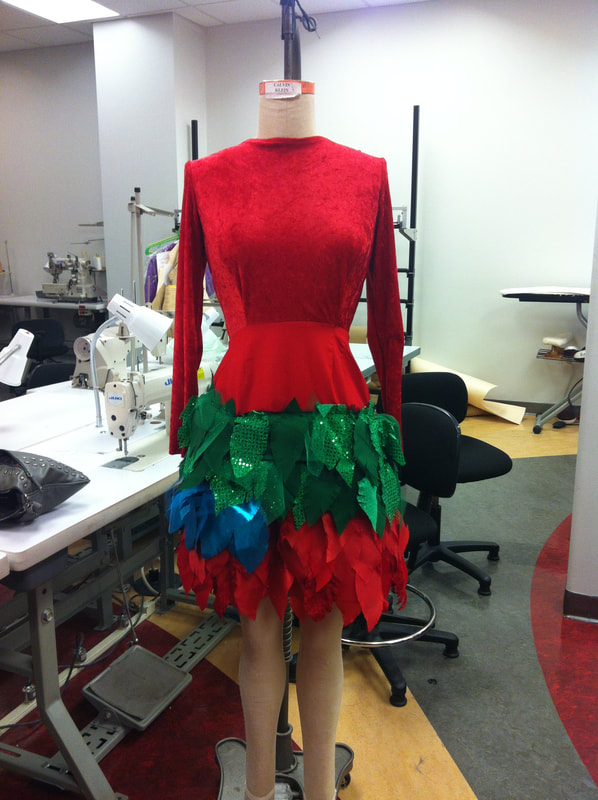
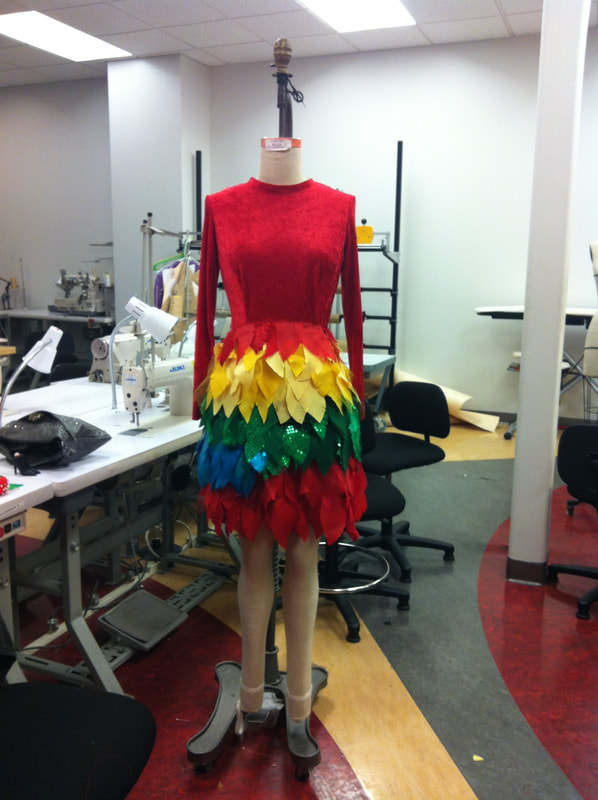
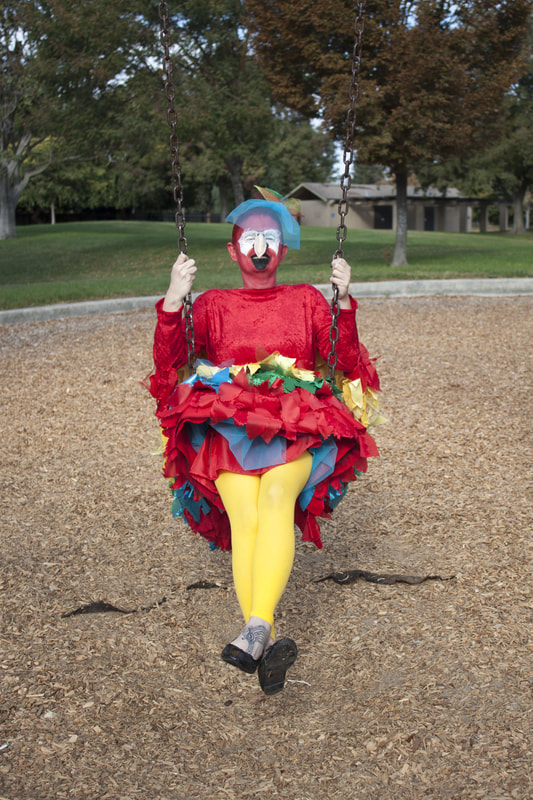
As a Freelance Fashion Designer, I often take on requests from clients to create custom garments. My client may be a bridesmaid in a wedding that is looking for a custom fitted gown to match the wedding party specification. My client may be a clothing size that is not commonly found in the style outfit she may need for an upcoming event. My client may have an article of clothing that she would like re-created into something else completely. All of these are fairly common in my line of work, but once in a while, a client will contact me asking for something completely out of my realm of experience... "Can you make me a Parrot Costume?" While studying Fashion Design in college, a professor once told those of us who were hoping to pursue design and creative sewing as a future means of income, to not turn down requests, even if it is something we have never done before. Even if it is something that sounds mundane, or uninteresting. The reason? First, saying no to projects will lead to less people asking. Over time, no one will ask for your participation in projects, because they know you will say no. Secondly, the more you say yes, the more experience you gain, and more opportunities are presented. So, when a referred client called me up asking if I could create a Parrot Costume for her, my response was a firm, "Yes!". Even though I had never before made a costume at that point in my career, let alone a Parrot Costume! From Concept to Creation... 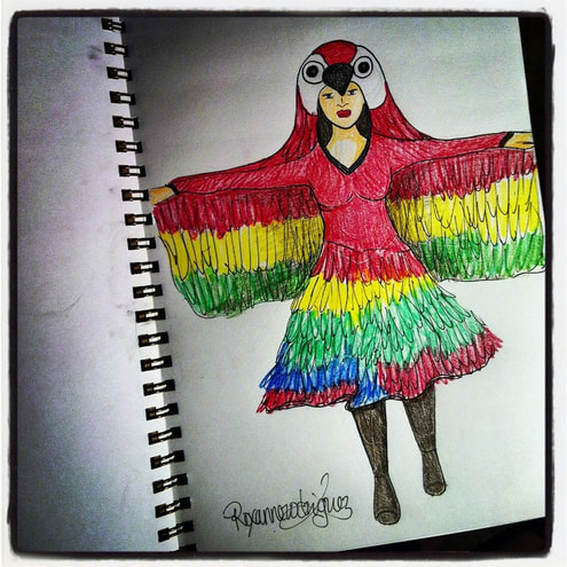 Conceptual Sketch of my custom Parrot Costume. Illustration by Roxanne Rodriguez Rangel. As a trained Dress-Maker and Fashion Designer, my immediate idea was to create a Parrot Dress, with a caped hood mimicking the Parrot's head and wings. I wanted to approach this project as High Fashion as possible, to stay true to my design aesthetic. I drew out the above conceptual illustration to show my client at our first meeting. I also went to my fabric supplier to obtain fabric swatches and pricing for the materials that I would use to make my sketch a reality. 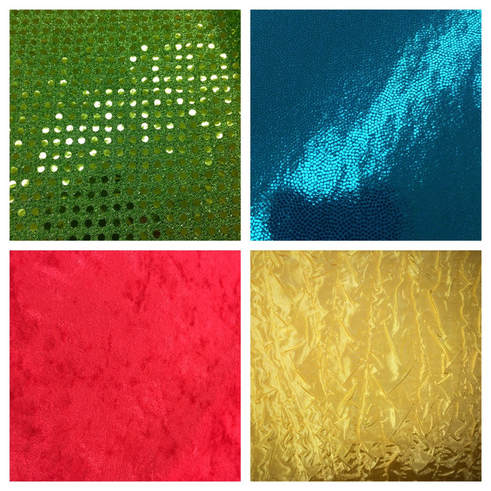 This photo includes four fabrics that I used to create the Parrot Costume for my client. The Green, Blue, and Yellow textiles were used as feathers, and the Red Velvet was used for the bodice of the dress. I used a Red Cotton fabric as the base of the skirt for more structure, it was lined and completely covered in hand-cut feathers. I met with my client, with my illustration, fabric swatches, and price estimate in hand. When I presented my idea to her, she was thrilled! She loved the concept that I had come up with. Her only change was the hood in the sketch. My client wanted a Headpiece or Fascinator instead. She was also planning on full professional Special Effect Parrot Make-Up, from local Make-Up Artist, Paula Serrano. I took her measurements, and deposit, then I was off to the sewing work room to get this dress completed! Progress in the Designer Workroom!
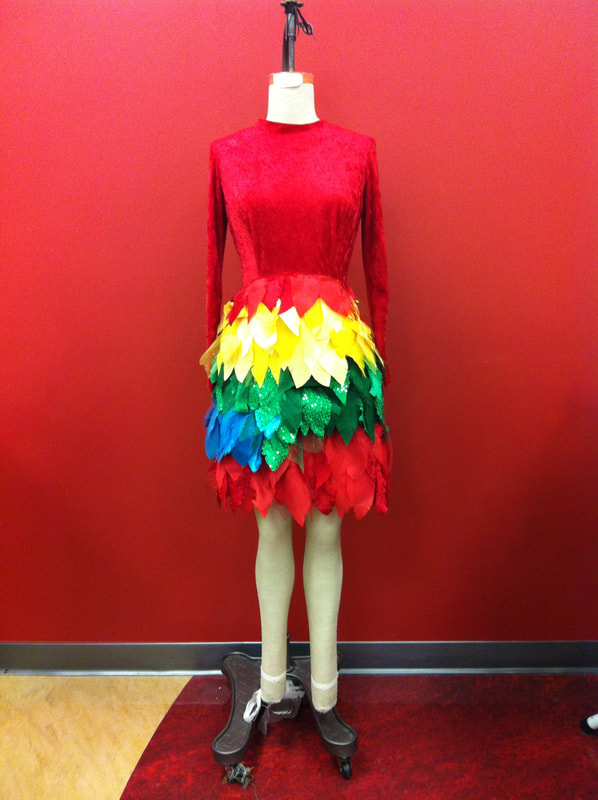
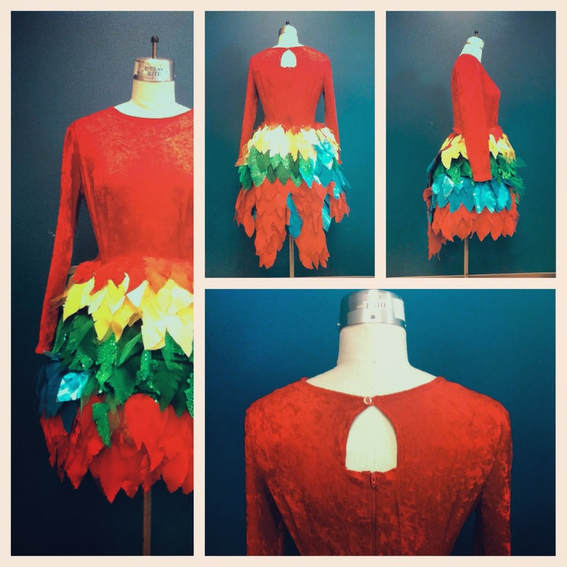 Tail Feathers added, as well as the zipper, button and button loop. (Costume in Progress by Roxanne Rodriguez) A Photo Shoot with my Client... After one fitting, and much work, the Parrot Dress, and Headpiece I created was finished! I also created a clutch for my client by creating a velvet pouch that I placed in a hand-held bird cage! The skirt was underlined with layers of Tule to create more volume in the silhouette. My client had a very specific idea for the completion of her look, and wanted realistic Parrot Special Effect Make-Up to transform herself into as close to an actual Parrot as humanly possible! She hired professional MUA, Paula Serrano to create the Special Effect Make-Up. This was my client's vision. With the help of myself and Mrs. Serrano, her vision was achieved! 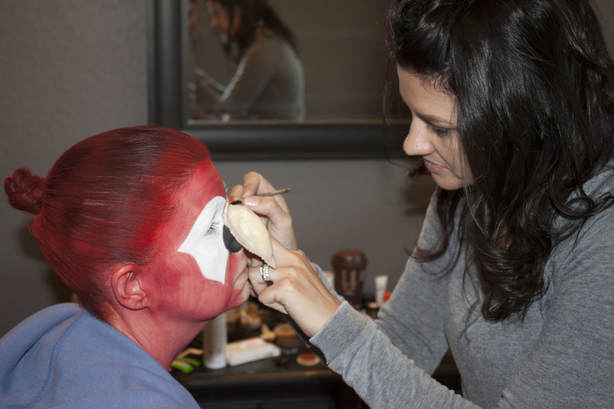 MUA Paula Serrano completes Parrot Special Effect Make-Up. Photo: Roxanne Rodriguez. After my client was dressed and ready to go, I took her to the local park to take a few photos of the costume! Check out the completed look!
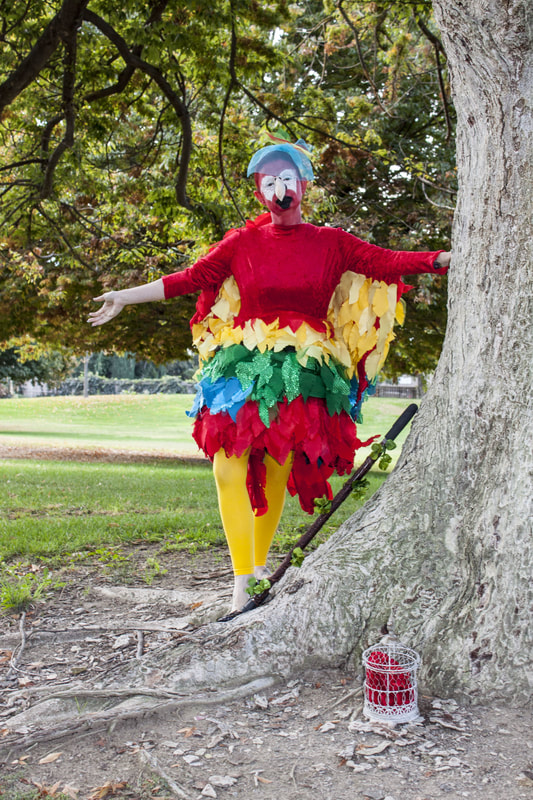
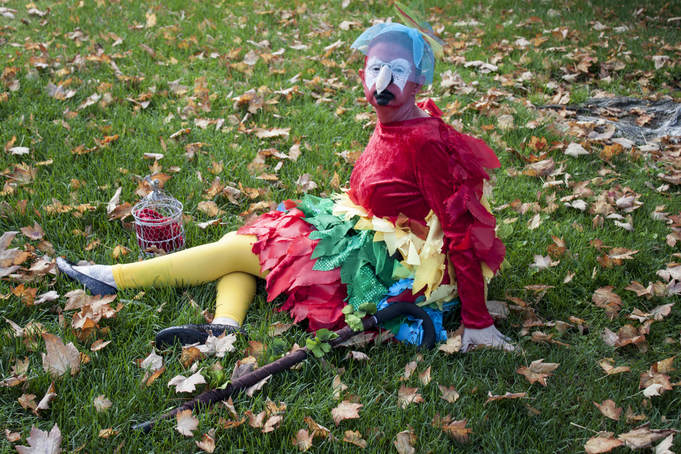 My client poses in the Parrot Costume I created for her. Costume: Roxanne Rodriguez, MUA: Paula Serrano. As you can see, my client really enjoyed herself. The project was a success! As a designer, having a happy client is by far the biggest reward! If you have a costume idea that you would like to have custom made, contact me! I would love to create more interesting costumes! As always, feel free to contact me for all you Custom Clothing needs! 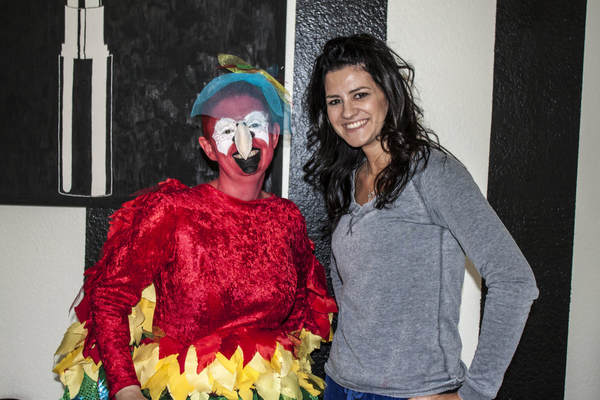 Our Client with MUA Paula Serrano. Costume: Roxanne Rodriguez. 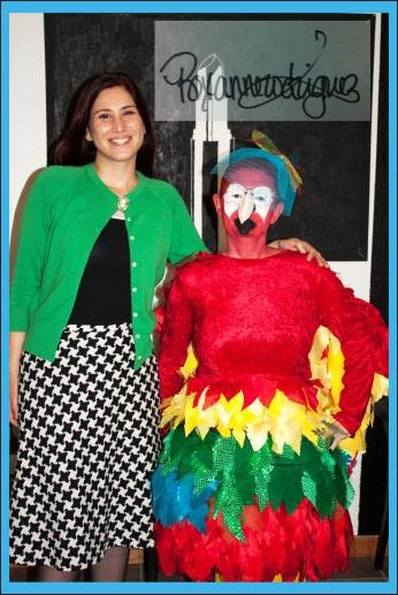 Designer, Roxanne Rodriguez with client wearing completed Parrot Costume. Costume by Roxanne Rodriguez, Make Up by Paula Serrano. Thank you for reading my Blog! Let me know what you think of my take on a Parrot Costume, by leaving me a comment below! Related Links:
 Hello! This week on my Blog, I wanted to share with you a brief article on the topic of Alteration Services, Re-Design, and Clothing Repair! It came to my attention recently, that some of my clients were unaware that I offer these services at my in-home Design Studio! If you have a moment, I would like to share with you the importance of alterations on Off-the-Rack garments, as well as my experience, and the various services that I currently offer! 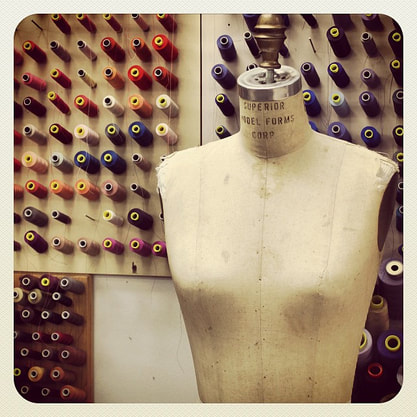 Wall of Thread, Photo: Roxanne R Rangel. Reasons to have Garments Altered by a Professional In modern times, much of the clothing that we purchase is Off-the-Rack, which is a term used to describe clothing that is mass-produced, in standard sizes. This term applies to almost all clothing found at retail establishments. Unfortunately, due to each person having a unique, one of a kind body, we rarely find Off-the-Rack garments that offer a perfect fit. One alternative to Off-the-Rack clothing, is Custom Made, or Made-to-Order Clothing, which is clothing created exclusively for one individual using their exact measurements. Because Off-the-Rack clothing is mass-produced, and often made in countries over-seas, where materials and labor costs are extremely low, clothing purchased through an apparel retailer can be considerably lower in cost to the customer than having a garment custom made within the United States. However, custom made clothing not only fits the costumer, or client, perfectly, but is usually a higher quality crafted garment. 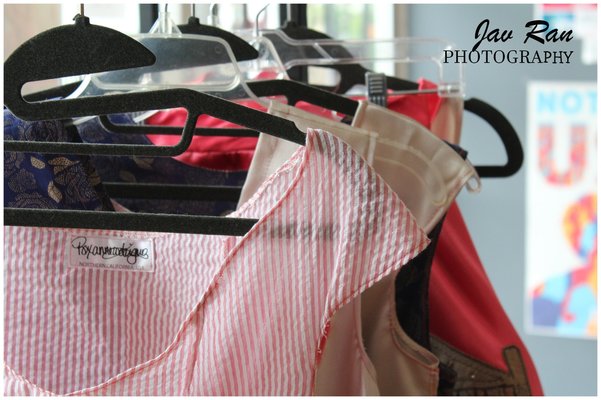 A photo of my 2016 Ready-to-Wear Collection. All of my Ready-to-Wear Designs are Made To Order, and Custom Fitted. Photo: Jav Ran Photography. Another alternative to Custom Made clothing, is taking Off-the-Rack garments to a professional Alteration Specialist, Seamstress, or Tailor. These sewing professionals, can take any garment, and using the measurements of the client, create a custom fitted look. Common alterations on clothing include taking up, or lowering the hem of a pant, dress, or skirt, taking in, or letting out the waist of a garment, and shortening or lengthening sleeves. In some cases, a client may need a garment re-sized completely. All of this can be done, the cost will be calculated depending on the type of operations performed, and taking into consideration any unique garment details, that may take more time and skill to adjust accordingly. 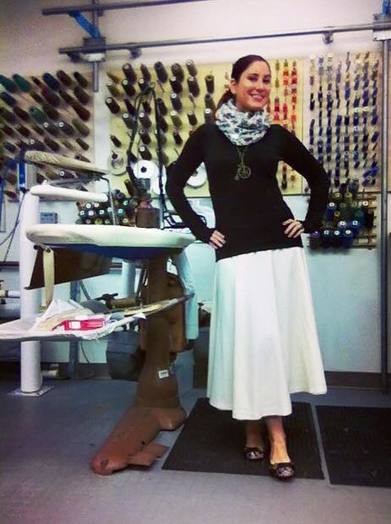 Here I am working at the Nordstrom Tailor Shop! My Experience While studying Fashion Design at The International Academy of Design and Technology in Sacramento, California, I worked with the retailer, Nordstrom, within their Alteration/Tailor Shop. Nordstrom offers Alteration and Tailoring Services on clothing purchased at any of their store locations, including Nordstrom Rack, and Online. Nordstrom has onsite Alteration Specialists and Tailors at every retail location. I started my career with Nordstrom as a Customer Service Specialist in the Men's Wear Department, but then transferred to the Alteration/Tailor Shop, as an Administrative Assistant. I also completed my College Internship with Nordstrom as a Tailor Apprentice. During my years with Nordstrom, I was trained to complete fittings, and to perform a wide range of alterations. Due to my Fashion Design education, I began to specialize in Women's Wear Alterations, and Clothing Repair.
After my time with Nordstrom, I began working as a Tailor Assistant to Master Tailor, Mr. Randy Rowden, at The Oxford Way Tailoring and Men's Clothing, located in Oakland. One of the things I appreciated about Mr. Rowden, was his commitment to excellence, and quality, often using hand-sewing techniques to complete tailoring tasks. 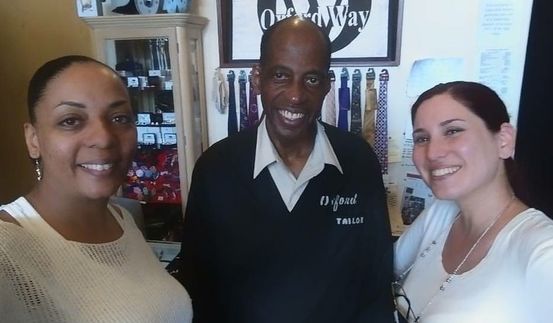 The Oxford Way Taioring and Men's Clothing: Tiendres Rowden, Randy Rowden, and Roxanne Rodriguez Rangel. Currently, I work for myself, at my in-home Design Studio, creating my own Ready-to-Wear designs, as well as creating Custom Clothing for my clients. Due to my past training and experience, I also offer Alteration Services, Re-Design Services, and Clothing Repair. 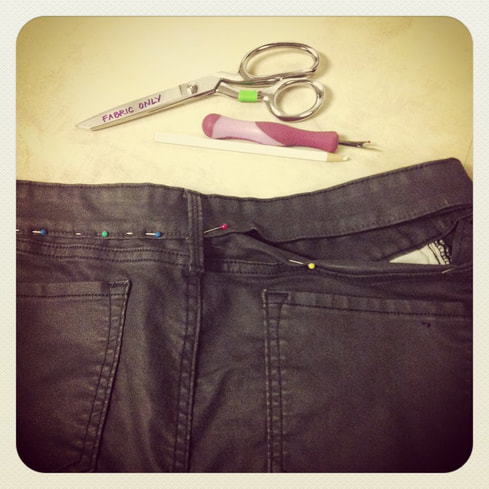 Alterations: Lowering a Waistband Alteration Services, Re-Design, & Clothing Repair Alterations Services are available with me by appointment. Simply contact me for your alteration requests, and you can either come to my Design Studio in Oakdale, California, or I can come to you! At the time of our appointment, I will give you a total of the cost, based on the work to be done. Alterations may take up to one week to be completed. In addition to Alteration Services, I also offer Re-Design and Clothing Repair. To Re-Design an existing garment can mean many different things. In general, to Re-Design clothing, means using the material and findings (small articles or tools used in making garments), found in the original garment to create something completely different. Perhaps you have an article of clothing that is outdated in style, but you love the material. I can remake that garment into a modern article of clothing. I particularly enjoy this type of work for two reasons: it allows me to use my creativity and expertise to create something unexpected, and, by re-designing existing garments, we extend the garments life, limiting fabric waste that contributes to the pollution of our world. 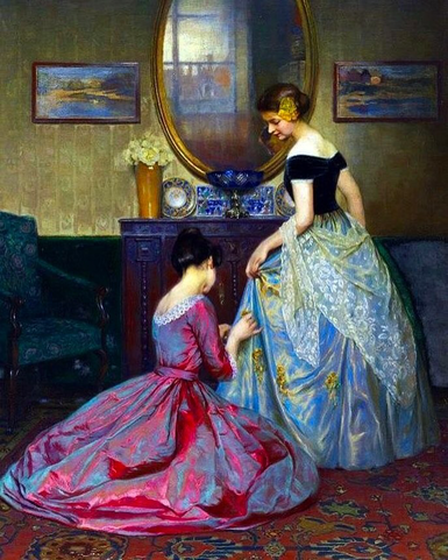 "The Fitting" by Viktor Schramm, 1900. Many of my clients have clothing that needs to be repaired. Jeans commonly need patches at back pockets, or at the inner thigh. Sometimes, seams need to be re-sewn, or formal gowns may need beading replaced or mended. Snags and holes can also be fixed. Whatever the case, repairing clothing may be more cost effective then throwing the item out and replacing it completely. 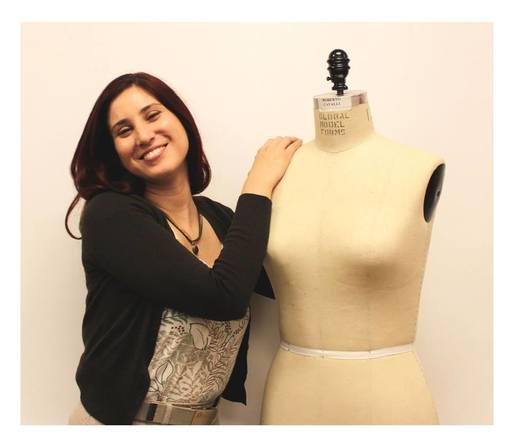 Photo of Roxanne Rodriguez Rangel. To see a few photos of some of my completed projects, click the links below:
Alterations & Re-Design Services Custom Formal Wear Thank you for taking the time to visit my Blog! Please contact me for all your Alteration, Re-Design, or Clothing Repair needs! For all the ways you can contact me and connect, click the link below! Contact Information |
AuthorHello Readers! Welcome to my Blog! I am Roxanne Rodriguez Rangel, a Fashion Designer from Northern California. I love all things Fashion, particularly historical fashion! Join me, as I take you around Northern California, covering fashion events and related topics! 
Categories
All
|


 RSS Feed