|
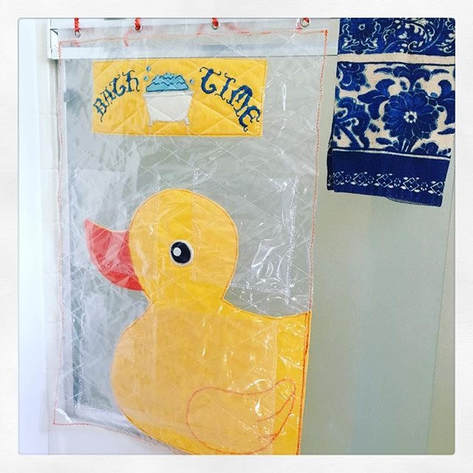
As a Freelance Fashion Designer, specializing in Women's Wear, I don't often receive client requests for Children's Clothes or for other children's sewing projects. Every once in a while, however, I do receive such a request. Recently, I finished my first sewing project of the year for a dear friend of mine, Custom Keepsake Teddy Bears, which was a first for me! As that project came to completion, along with the recent end of 2019, and the beginning of a new decade, I began to reflect back on the few Children's and Baby Projects that I have thus completed in my sewing and design career. In the last two years or so, I have only worked on a hand full of items for babies, or children. You may recall one such project, that I completed in October 2018, when I had the privilege of creating Dance Costumes for the P.R.O.U.D. Modesto Girl's Dance Group. You can check out my Blog Article detailing behind the scenes design studio details of that project by clicking HERE. In addition to the P.R.O.U.D Modesto Girl's Dance Costume project, I have created the following children's projects for my own family, friends, or for my clients... Custom "Bath Time" Baby Toy Holder 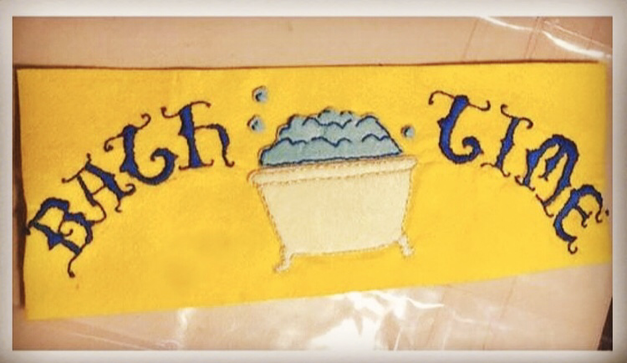 Work in Progress: Hand Stitched Embroidery, and Hand-Cut & Stitched Bathtub Applique, on Felt. By Roxanne Rodriguez Rangel.
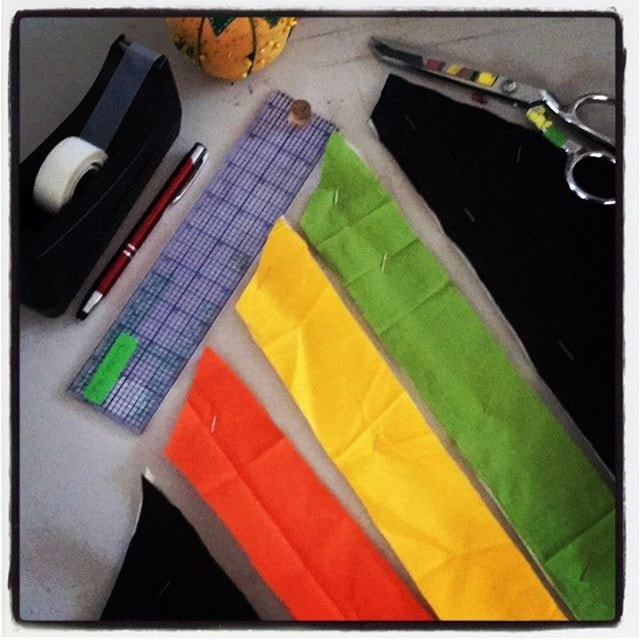
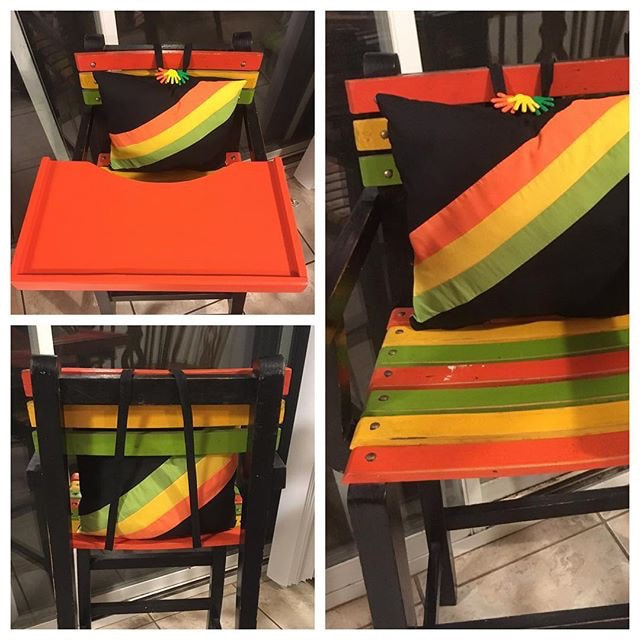
To achieve the idea I had in mind, I Hand-Stitched the words "Bath Time" in Embroidery, and I then cut and stitched a Bathtub Shaped Applique design which I attached to yellow felt. I also cut out a Rubber Ducky shape, also in felt, as well as the eye and duck-bill pieces. I sandwiched the felt details in between two sheets of plastic. On the top layer of plastic, I cut out and sewed three clear pockets, that would later be used for toy storage. The pockets have drain holes punched through the bottom to allow for drainage of wet toys. I loved the final outcome of this project! It is a fun piece to display in my children's bathroom, that is both decorational and functional! My family and I have gotten much use out of this toy holder over the past two years, and it has held up quite well! Custom High Chair Pillow After my daughter, SkyLynne was born, my Mother-in-Law, gave our family an old high chair that was my husbands when he was a tot back in the 1980's! I loved the colors, and simplicity of the 1980's design! After a fresh coat of orange paint on the tray of the high chair, and with the addition of a safety latch to secure the tray down, I then created a custom pillow to help support our growing infant. I used scrap fabric, that I already had on hand, in my fabric supply bin, of the same colors, black, orange, yellow, and green, that the High Chair originally featured. Take a look at the pillow that I created for our high chair! I am sure that it will be a treasured keepsake, along with the high chair for many more generations to come!
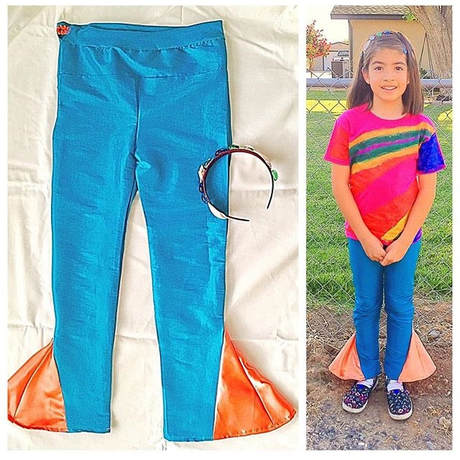
Custom Children's Mermaid Inspired Pants
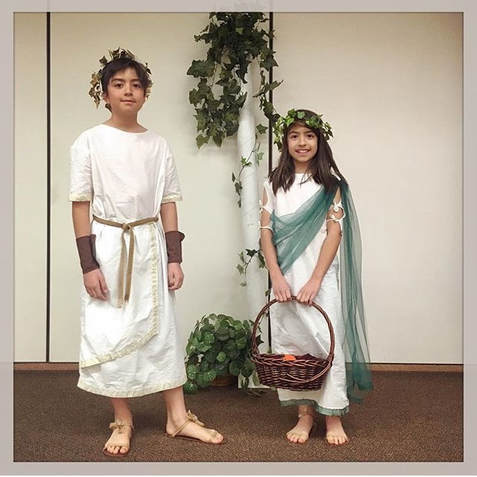
Custom Children's Greek Play Costumes
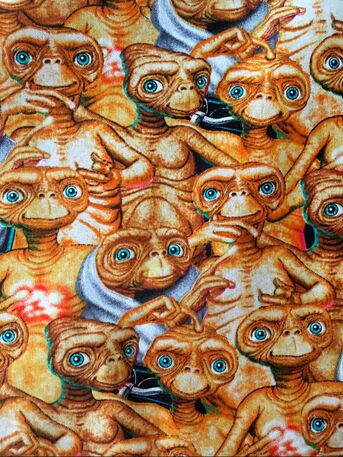
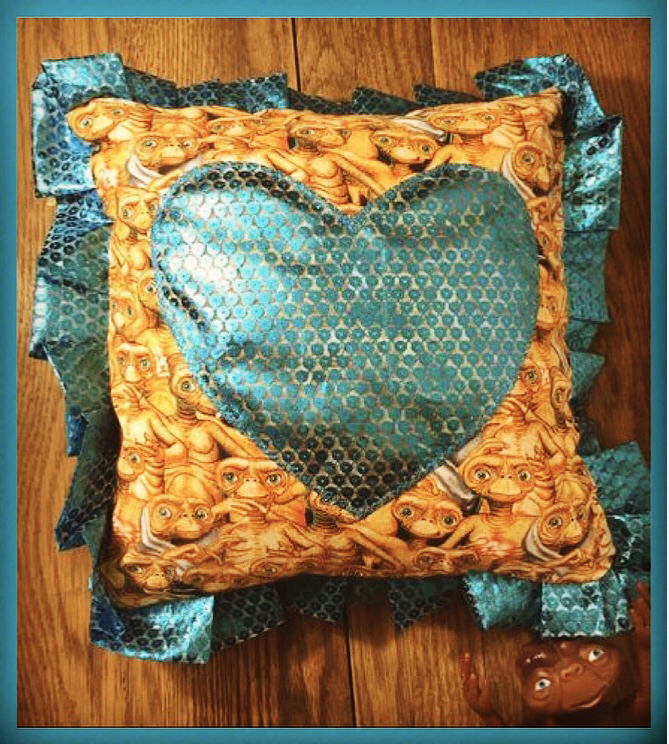
They were so happy with their costumes! Their increased confidence was evident in both of their outstanding performances! I can't wait to create more costumes for upcoming school plays! 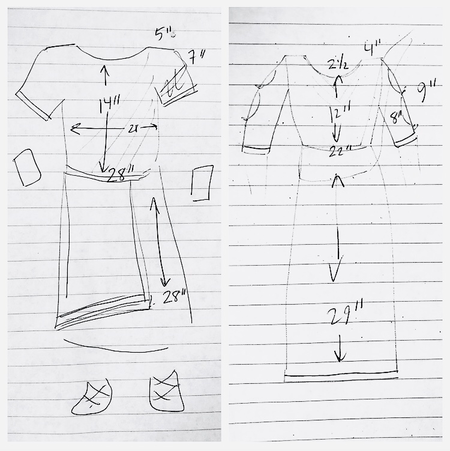 Quick sketch of measurements and design concepts for my children's Greek Costumes! Baby Couture 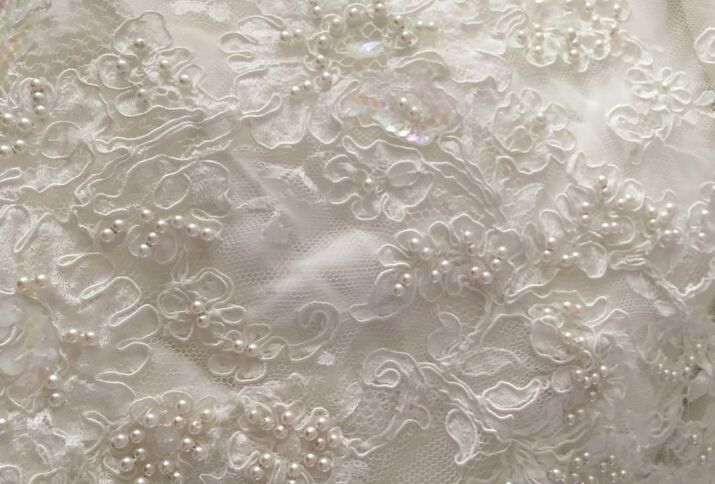 This is the lovely fabric from my clients Wedding Gown. I used the train of her dress to create a toddler's formal gown, bonnet and booties, out of the fabric! In the Spring of 2018, I was hired to create a fantastically creatively fun piece for one of my clients. The project was to create a baby's formal gown by using the material from my client's wedding dress! The wedding dress was an amazingly beautiful beaded lace gown with a long detachable train. I was honored to have been chosen for this special task! Because the wedding dress had a huge train that separated from the wedding gown, I was able to use the train fabric, leaving the beautiful wedding dress intact for future generations. The fabric included lovely beaded lace applique, that I took apart very carefully. All of the pieces I created, a Baby Formal Gown, a Bonnet, and Beaded Booties, are made of the original wedding dress material. I removed all of the beaded lace applique from the original fabric, and then reattached the beaded lace to the bonnet, booties, and dress. The final outcome was perfect! 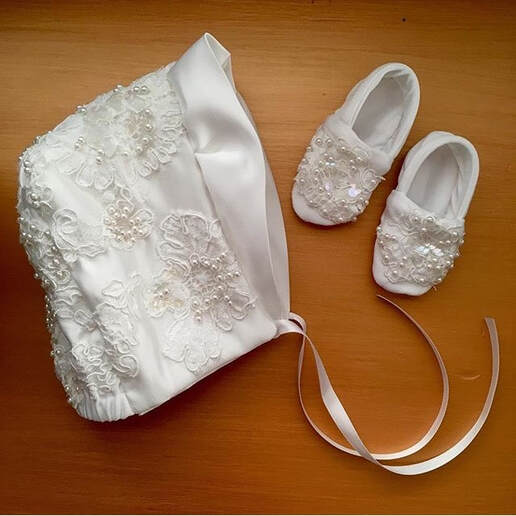 Formal Wear: Baby Bonnet and Baby Booties, by Roxanne Rodriguez Rangel 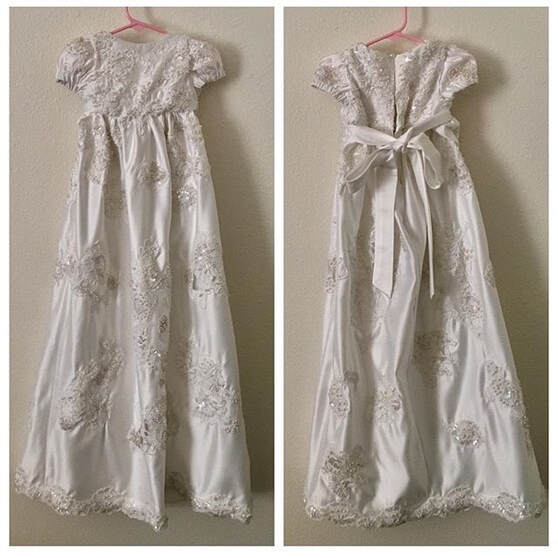 Formal Wear: Baby Couture by Roxanne Rodriguez Rangel Check out this video featuring Behind the Scenes Photos of this project in my Designer Workroom: E.T. Pillow I love all things E.T.! Last summer, I was in the fabric store, and my eye instantly caught sight of this marvelous E.T. novelty fabric! I couldn't help myself, and I bought several yards to make myself a fun skirt (Click Here to see my Vintage Inspired E.T. Skirt)! I used the leftover fabric remnants to construct a lovely little pillow for my daughter's room! I love it! (My sister, Desiree, thinks that E.T. is absolutely creepy! I can't wait to surprise Desiree by wearing my new E.T. Skirt to her house! He he...)
(Can you find my E.T. Doll in the photo of my E.T. Pillow? I snuck him in there just for Desiree! I hope she is reading this article and is creeped out! Muah ha ha...) And now for my most recent completed children's project... Custom Keepsake Teddy Bears A very dear friend of mine, Megan, experienced tremendous loss, when her father passed away several years ago. Since his passing, she, and her only sister, have been married, and have had children of their own. Unfortunately, these grandchildren were born after their Grandpa passed away, and the children were never able to met him personally. Megan asked me if I could turn shirts that belonged to her father into a keepsake teddy bear for her son. I loved the idea, and agreed instantly, especially since I know the family so well. When Megan brought to me her father's shirts, I was pleasantly surprised that there were four shirts, with enough fabric, that would allow me to create four separate teddy bears! I didn't tell her that I made four until I presented the final project to her. My idea was that she, her sister, as well as both of their children would have their very own keepsake teddy bear to cherish, or she can do whatever she wishes with them! She loved the idea and she loved the teddy bears! Check out my Work In Progress photos of this project, as well as what the shirts looked like before I transformed them into bears! 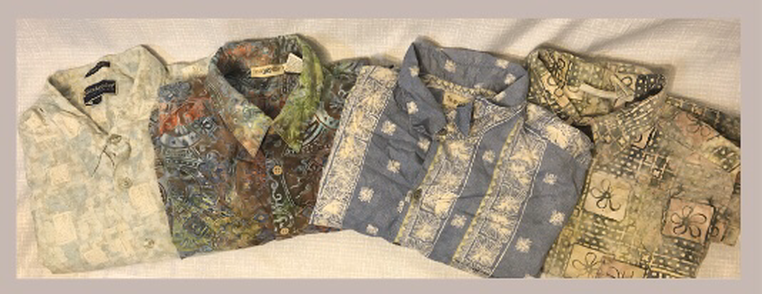 Photo of Shirts (Before) 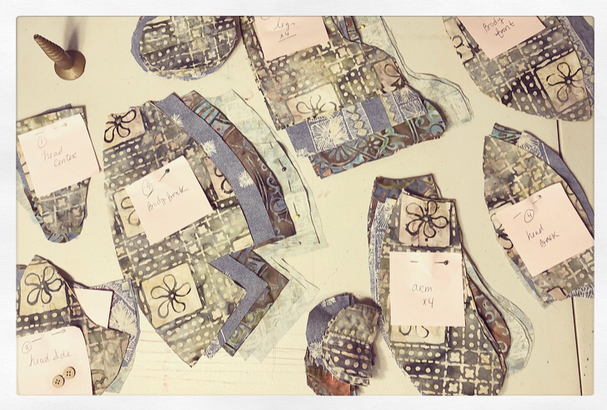 Work in Progress: Bear Pieces... 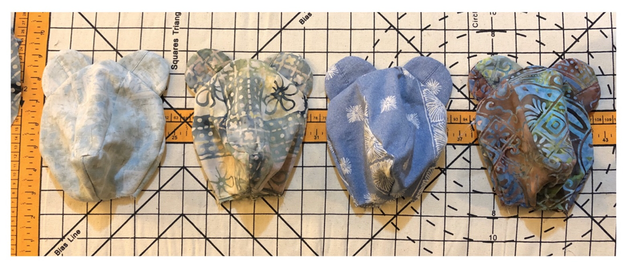 Work in Progress: Unstuffed Bear Heads 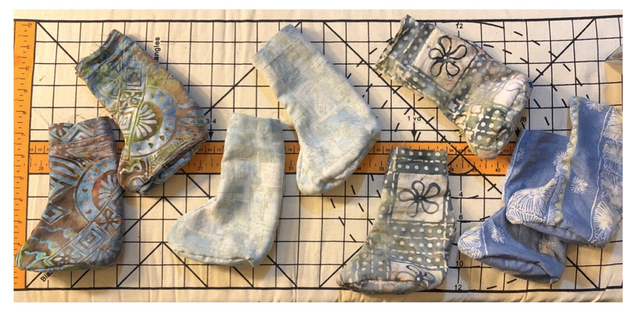 Work in Progress: Unstuffed Bear Legs... 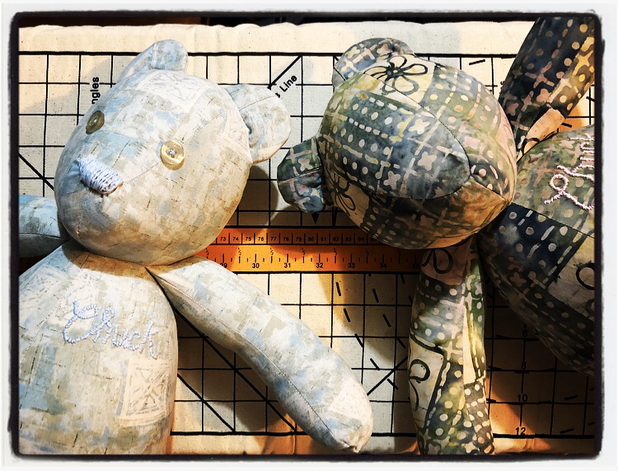 Final Details: Button Eyes and Embroidered Noses... Check out the finished bears: 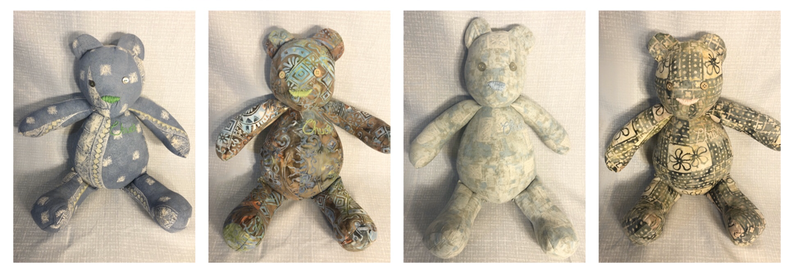 The four finished Keepsake Teddy Bears, made out of four Men's Button Front Shirts. 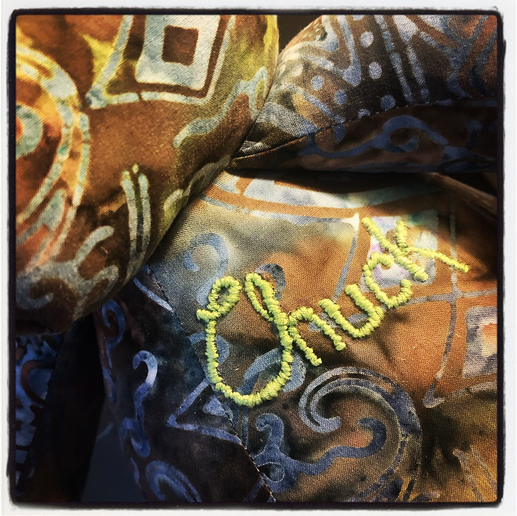 Close up of the Hand-Stitched Embroidery on the Teddy Bears chest. I embroidered, by hand, the name "Chuck" on each of the four bears. 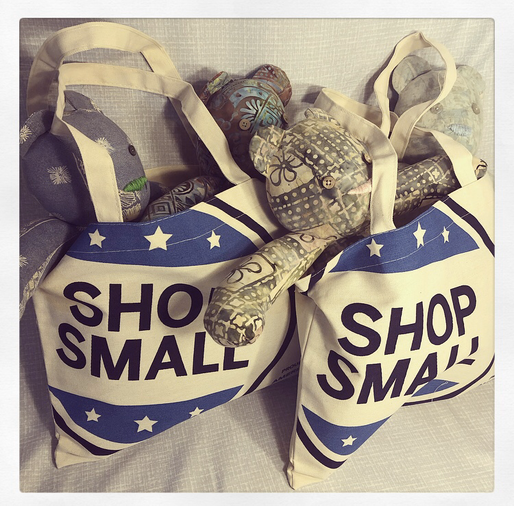 Ready for delivery! Thank you to American Express for supporting Small Businesses, and supplying me with shop supplies every year, including these "Shop Small" Totes! Making these Teddy Bears was a fun project, and I definitely learned much in how to improve my Stuffed Animal making skills! It was especially hard for my youngest two daughters, ages 2 1/2, and 1 to watch me create Teddy Bears that they could not play with! I have since been inspired to create a Fig from Tumble Leaf Doll, as well as a few Frida Kahlo Inspired Dolls! I will keep you readers updated on those projects! That completes my recap of the sewing projects that I have made for children or babies! Although these types of projects are not my professional specialty, it is definitely fun to create sewing projects that are different than what I normally do, and that are interestingly creative! I hope that you enjoyed my Blog Post! Which project did you enjoy viewing the most? Do you have any ideas for upcoming children/baby sewing or design projects? Please leave me a comment below with any of your feedback or opinions! Until we meet again, Dear Reader! Have a exceptional day! Related Links:
5 Comments
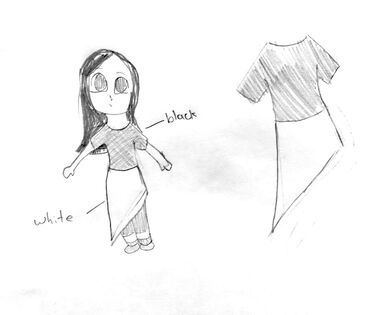
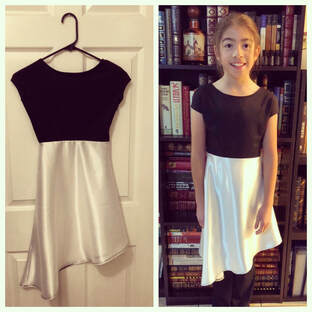
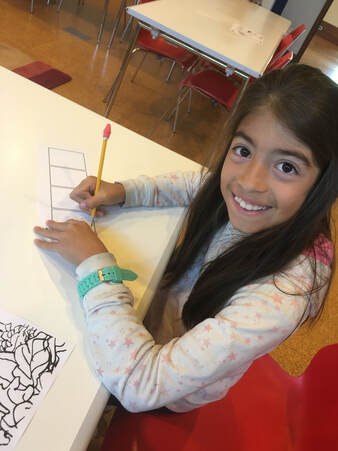
Iyska is a fantastic student, she learns quickly, and has a natural artistic talent and creative mind. Teaching her was a joy! In the past, Iyska has drawn her own Fashion Illustrations, which are adorable! This past year, she participated in her annual school play, and took the time to design her own costume, for her character, "The Historian". After Iyska completed her illustration, I created this look for her, using fabric I already had on hand. Here is her Fashion Illustration and the final costume, that I created for her.
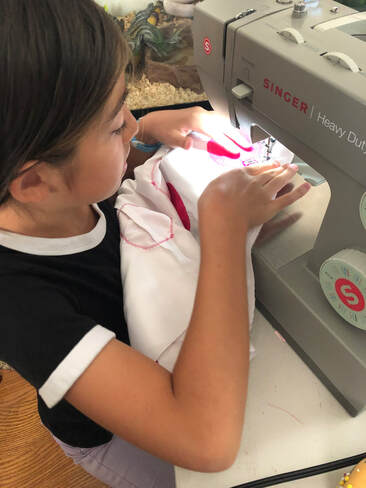
Teaching Sewing I began Iyska's Sewing Lessons by teaching her the basic functions of my sewing machine, how to thread the machine, and how to use the machine to stitch. Iyska was a natural! Soon she was perfecting straight stitching, and using her creativity to create patterns and shapes using thread and machine stitching! As Iyska continued to get familiar with the machine functions, she was soon ready to create her first sewing project! For her first task, I recommended creating a simple tote bag or purse. Iyska looked through my fabric bins, and chose a lovely tealish colored stretch taffeta, which she then used her new-found stitching skills, to create a sea-themed motif made with machine stitching. Iyska spent a lot of time on this project, and it really shows! I then taught her how to turn her decorated fabric into a bag, by stitching the side seams, and then adding a strap, hand stitched lining, a zipper, and her own label! Fairly advanced stuff for a beginner! Check out her finished Cross-Body Purse: (perfect for Field Trips, or day trips to her Grandparent's House!) 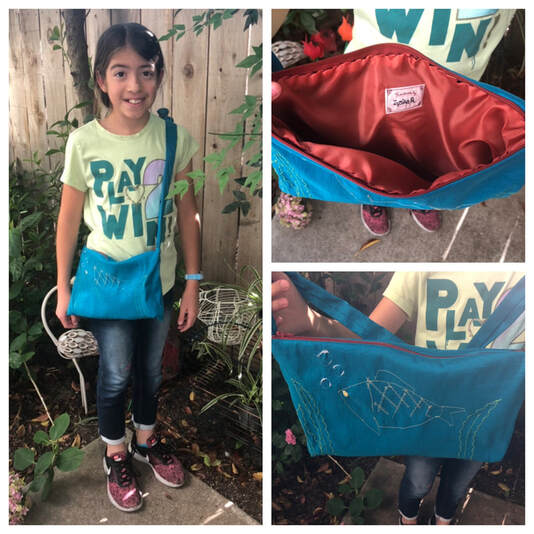 My oldest daughter, Iyska, posing with her first completed sewing project: a lovely Cross-Body Purse, with a machine stitched sea creature motif, hand sewn lining, zipper, strap, and label!
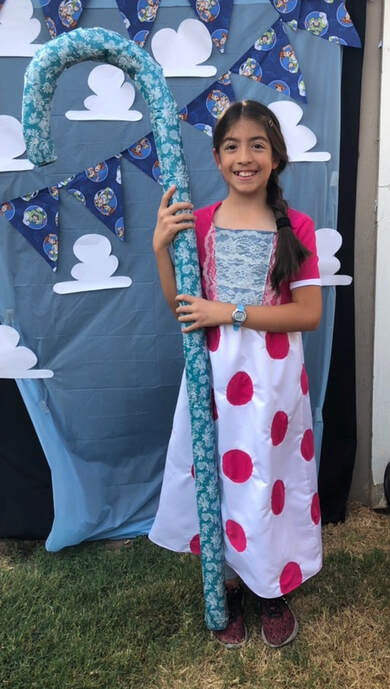
What was the hardest thing about sewing that you have done so far? And, what was the easiest? The sleeves on the dress was hardest, because I had to be careful not to mess up, especially near the shoulder. On the bag that I made, the decorative sewing, the squid and the fish that I put on there, was easiest, because I could make anything that I wanted, and couldn't really mess up. What did you find different in constructing your two recent projects: the Purse and the Dress? The dress was so much bigger, with way more fabric. We did more stuff with the sewing machine, because on the bag, I hand sewed, but the dress I used the sewing machine more. I had to sew on each circle to the skirt. Especially the skirt, when we did that weird thing where we pulled the string... Oh, when we gathered the waist? Ya, when we gathered it, it was different then the bag was, a lot more steps. What other things, related to Sewing or to Fashion, would you like to learn next? Making pants. You have to make pants more to the shape of your leg. It can't be too tight, so I think it would need to fit perfect. Now that you can sew, are you inspired to create more sewing projects? Yes, because now that I know how to do that, those were the more basic steps to making other stuff. Like, learning to sew a hem. It isn't only used for dresses, you can hem pants and skirts, and all kinds of stuff. A lot of the things that we did, like the zipper too, you can put it on a lot of stuff, not just only the projects we did. What will be your next Sewing Project? I think either I will make a jacket or another bag... but if I do another bag I would want to add pockets. Is there anything you would like to tell other people who are learning how to sew? Perhaps people who have never sewed before? Well, if you are learning, it is best if you learn from someone else, and not teach yourself. There is a whole bunch of techniques that you might not have even thought of, like... If you just don't know how to sew at all, and you put the fabric together the wrong way, you might not know, and your project will turn out weird. You might not know you did a mistake until you are already done!
Thank you for reading my Blog! Related Links:
Welcome to My Sewing Journal! Today I am reflecting on embroidery pieces that I created as embellishments on clothing that I designed. The selected embroidery pieces that I would like to share with you today were created in the years 2015-2018. "Embroidery is the craft of decorating fabric or other materials using a needle to apply thread or yarn. Embroidery may also incorporate other materials such as pearls, beads, quills, and sequins.” - https://artsandculture.google.com 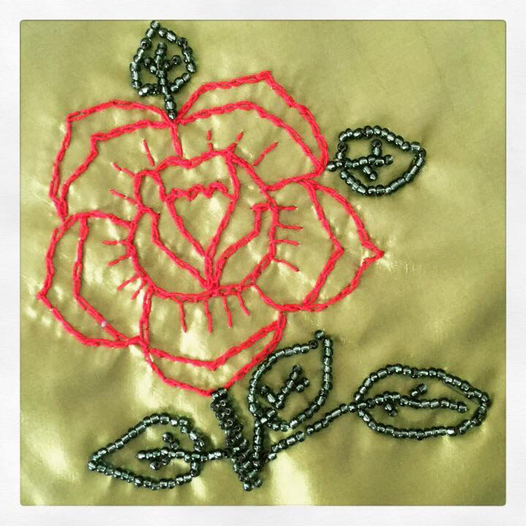 Figure 1: Hand-Stitched Embroidery with Hand-Stitched Beadwork, by Roxanne Rodriguez Rangel, 2018. Figure 1: Adding hand sewn details such as embroidery or beadwork to my fashion designs is not only fun to create, but it adds an interesting artistic element to my designs that I really enjoy. I created this hand-stitched rose (Figure 1) with red embroidery thread and green hand-stitched beads for the leaves. This particular design was featured on a green capelet that I created for my 2018 Fall Collection. Check out the photos from that collection here: A Look Back: Fall 2018.
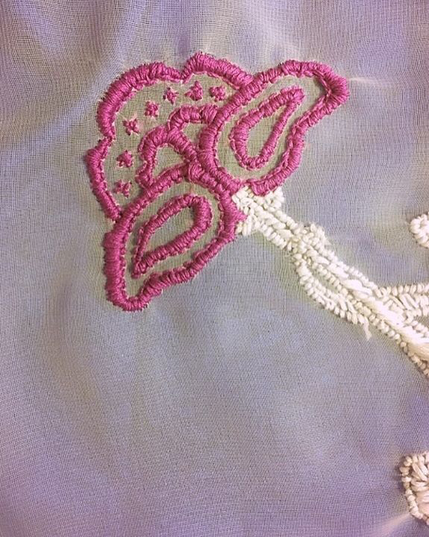
Figure 3A and Figure 3B:
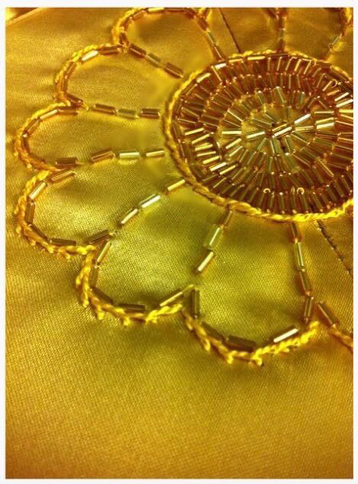
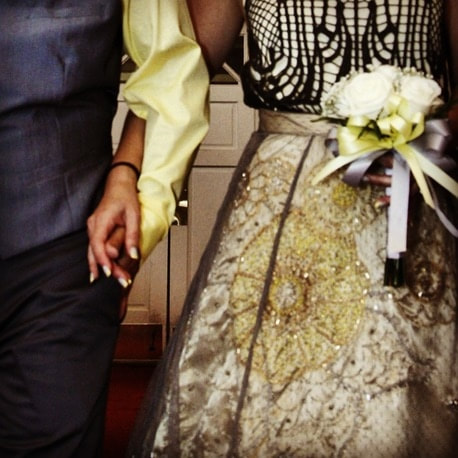
This gold toned hand-stitched flower was something I came up with for the hand-beaded design on my 2015 Wedding Ball Skirt. The skirt featured a wide variety of hand-stitched embroidery and beadwork detail. The overall design included a gold floral motif on gold satin, as well as silver beading for the accompanying leaf motif. The beaded gold layer was over-layed with a grey swiss knotted netting. Although time consuming to create, these one-of-a-kind details add elegance and regalness to any formal gown. See more photos of this final Bridal look here: "My Whirlwind Wedding Engagement: From The Cliff House to Las Vegas in Four Months and Three Dresses!" Figure 4A and Figure 4B:
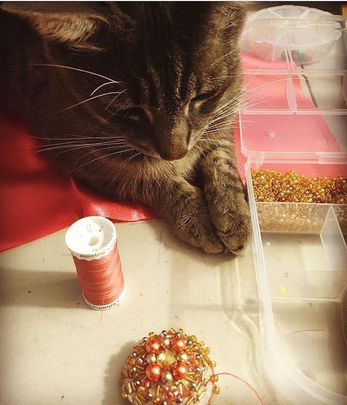
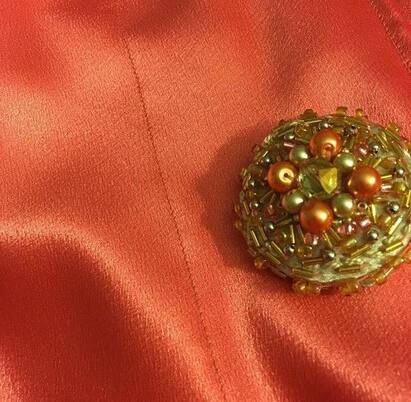
One of the design details that I was inspired to create for my 2016 collection, was this hand-beaded fabric covered button. I had never created a fabric covered button before, and greatly enjoyed learning something new with this technique. This button was one of three, featured on my 2016 Summer Collection: Pink Flamingo Halter Pencil Dress. Check out photos of this dress, along with the rest of my 2016 collections in my article, "RAW San Francisco Presents: Reveal!" 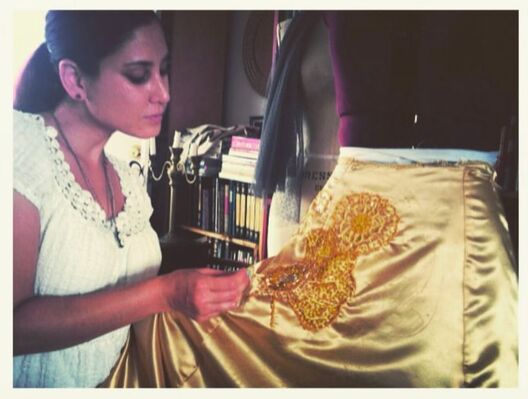 Designer Roxanne Rodriguez Rangel: hand-stitching in progress, 2015. I am continually inspired by hand-stitched embellishments on clothing and in fashion! I greatly enjoy reading books about sewing and fashion from my own personal library, and look forward to applying the techniques I learn in many more of the garments I create! Thank you for taking the time to read about my hand-stitched embroidery and beadwork! Leave me your thoughts in the comments below! RELATED LINKS:
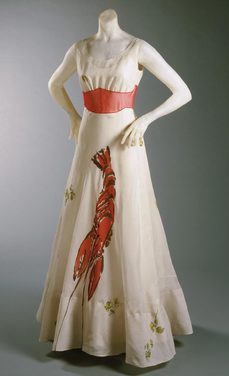
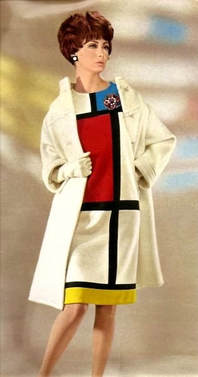
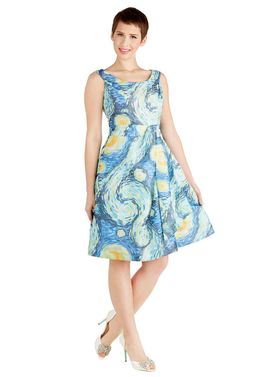
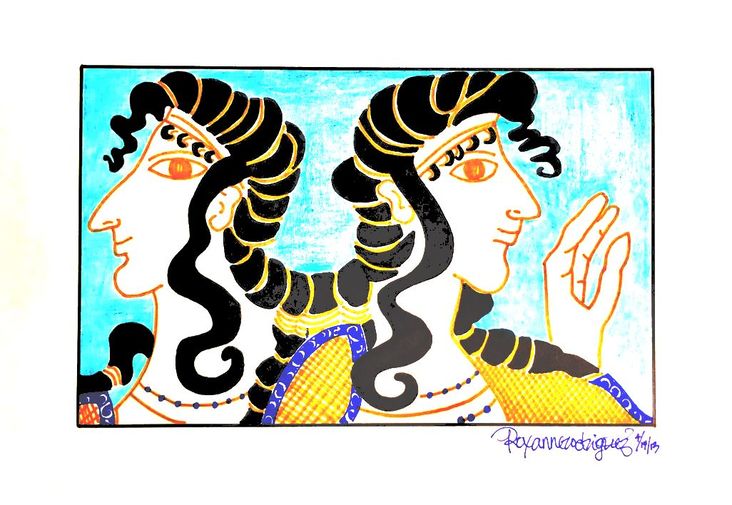 Minoan Inspired Illustration by Roxanne Rodriguez, 2013. While studying Art History in college, I was continually inspired by art works of the past to create fashion of the future. Today, fashion influenced by art is a familiar concept. The examples of art and fashion in Fashion's Modern History is plentiful. Looking back, Elsa Schiaparelli collaborated with Salvador Dali in 1939, creating several Haute Couture pieces, including her famous Lobster Dress, worn by Wallace Simpson (The Duchess of Windsor). In 1965, Yves St. Laurent created a couture collection inspired by the fine-art work of Piet Mondrian. Recently, popular clothing e-commerce retailer, ModCloth, has created dresses inspired by Vincent VanGogh, with his famous Starry Night Painting printed on the fabric.
Examples of Minoan Frescoes As I learned about the ancient Minoan Culture, which was located on the island of Crete, now in modern day Greece, I became inspired by the lovely Minoan Frescoes that were depicted in my history book. The beautiful hues of blue, brown, and gold, alongside stark black and red, were striking and distinctive... 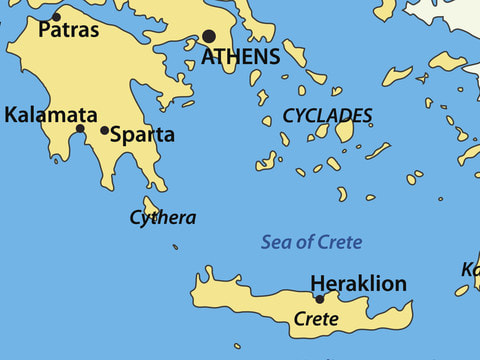 A Map of Ancient Greece during the Bronze Age. The word fresco, is an Italian word that means 'fresh'. The term fresco refers to an art work where the artist has used water based pigment applied to the plaster on a wall while the plaster is still wet. As the plaster dries, the paint that has penetrated the plaster becomes fixed, or bonded to the wall. Frescoes were popular in the ancient world, and were quite common for painting large murals during the Renaissance. Leonardo da Vinci, used this method while creating The Last Supper, as did Michelangelo while painting the Sistine Chapel. Here are a few examples of Minoan Frescoes that I found to be quite beautiful, and inspiring: 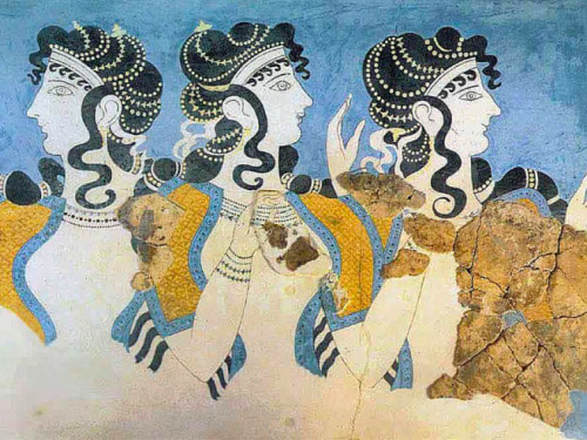 Minoan Fresco 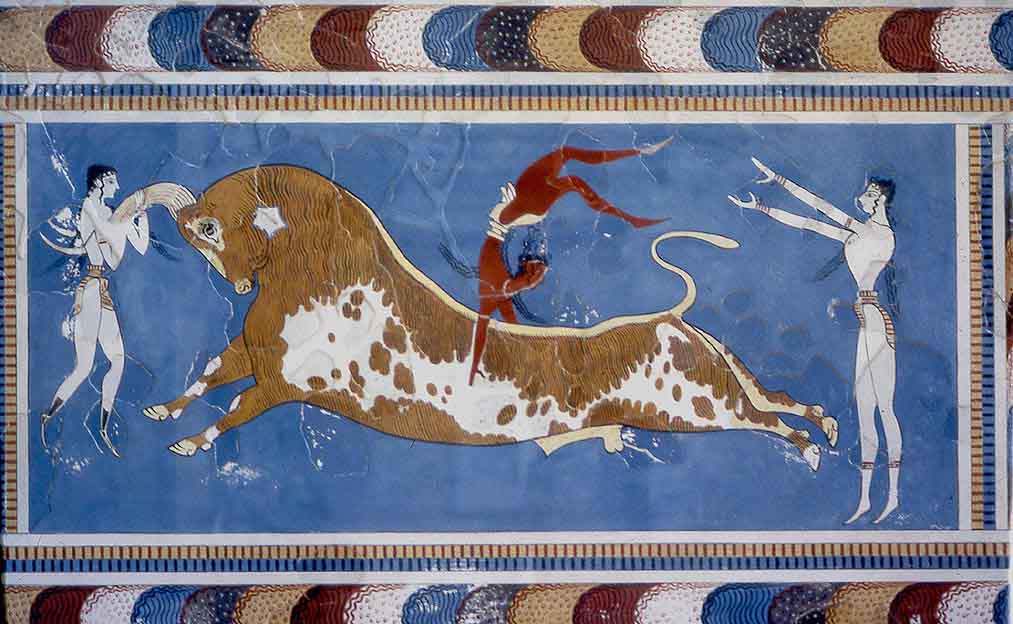 Minoan Bull Leaping Fresco. Conceptualization
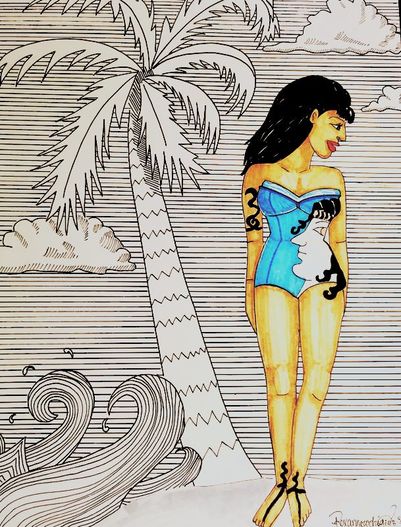
Creating a Minoan Inspired Hand-Painted Skirt Later on, in my college career, I decided to create an article of clothing inspired by the Minoan Fresco of the women, for my final project in Art History Class. For this project we were asked to create something inspired by the Art History we had learned about during the semester. The options were endless. Some students who were working towards a degree in Graphic Design decided to recreate historical artworks through their use of photography, while I myself wanted to re-create an artwork using my education in fashion. I decided instead of creating the Minoan Inspired Swimsuit I had illustrated previously, I would create a Hand-Painted Minoan Inspired Skirt. To create this look, I first assembled the front panels of the skirt, made of canvas, and then, laying the fabric flat, I Hand-Painted the Minoan Inspired design using Fabric Paint. I then layered a sheer aqua blue Organza over the painted canvas to create dynamic dimension. I wanted the final look of the skirt to be just as striking as the Minoan Fresco that had inspired me. Check out the photos I took as I Hand-Painted, free-handedly, my rendition of the Minoan Woman: 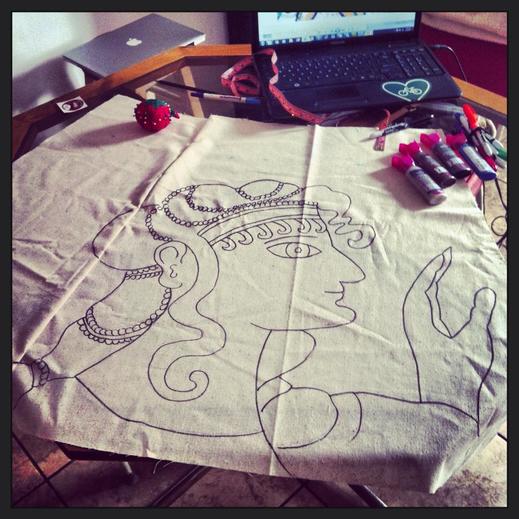 Creating a Minoan Inspired Hand-Painted Skirt! Hand-Painted by Roxanne Rodriguez. 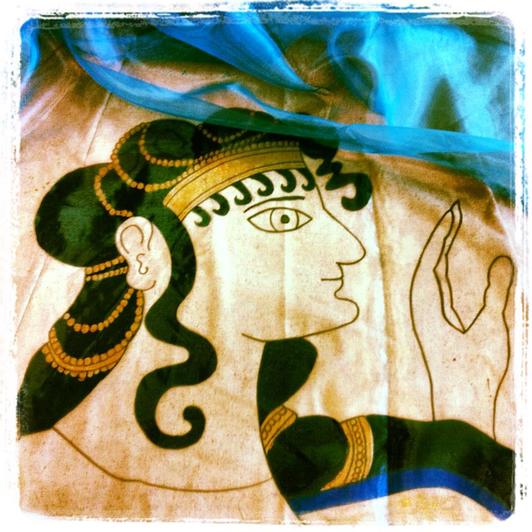 Creating a Minoan Inspired Hand-Painted Skirt! Hand-Painted by Roxanne Rodriguez. 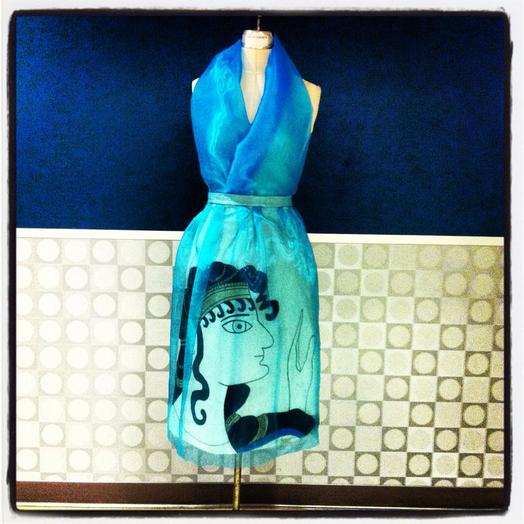 Creating a Minoan Inspired Hand-Painted Skirt! Hand-Painted by Roxanne Rodriguez. Here I am wearing the finished skirt during a Student Showcase at my college: 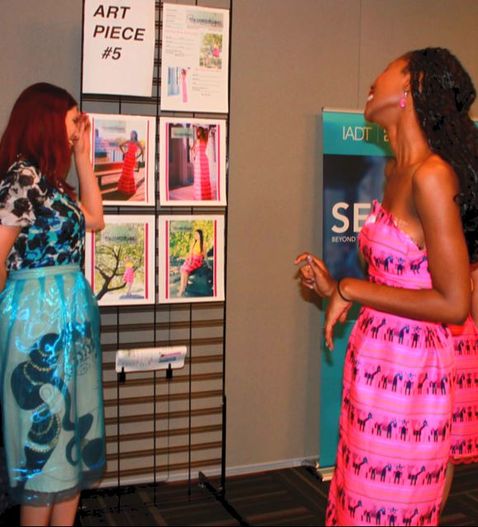 Designer, Roxanne Rodriguez (pictured Left), wearing Minoan Inpired Hand-Painted Skirt, with her models, at the IADT 2014 Student Showcase. Here is a photo of the lovely model, Marisa Johnson wearing my skirt on her trip to Greece! 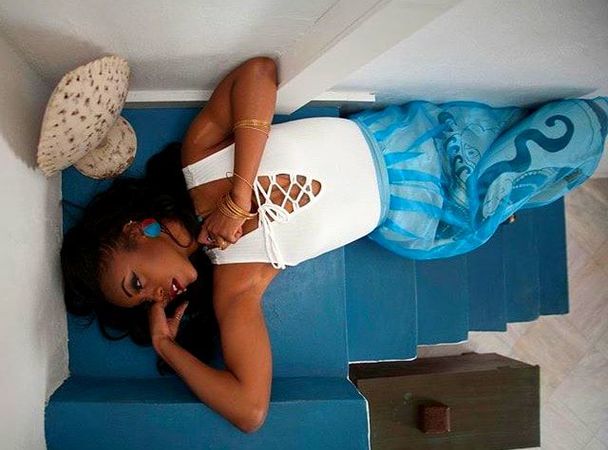 Photo of the lovely model, Marisa Johnson, wearing Minoan Inspired Hand-Painted Skirt by Roxanne Rodriguez, on location in Greece! I hope that you enjoyed this Blog Post about my fashion inspiration, and creating a Hand-Painted Minoan Inspired Skirt! I was very pleased with the final result, and have since used the technique of hand-painting motifs on other outfits I have created. I would love to hear your feedback, on my Blog Post, my skirt, or what historical art has inspired you. Leave me a comment below! 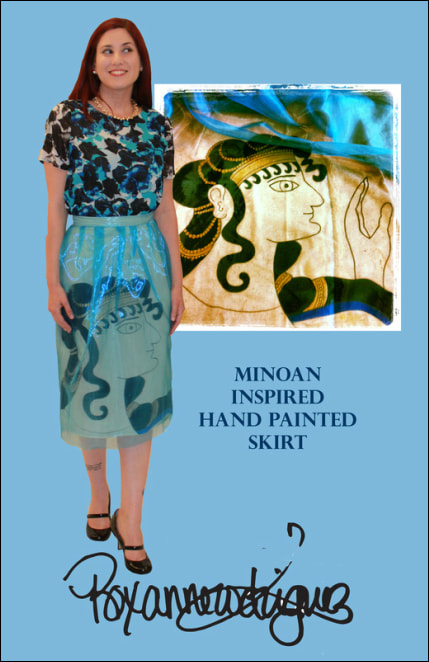 Designer, Roxanne Rodriguez wearing Minoan Inspired Hand-Painted Skirt. I look forward to sharing with you more adventures of fashion creation, in my upcoming Blog Articles! Until then... Have a extraordinary day! Related Links:
|
AuthorHello Readers! Welcome to my Blog! I am Roxanne Rodriguez Rangel, a Fashion Designer from Northern California. I love all things Fashion, particularly historical fashion! Join me, as I take you around Northern California, covering fashion events and related topics! 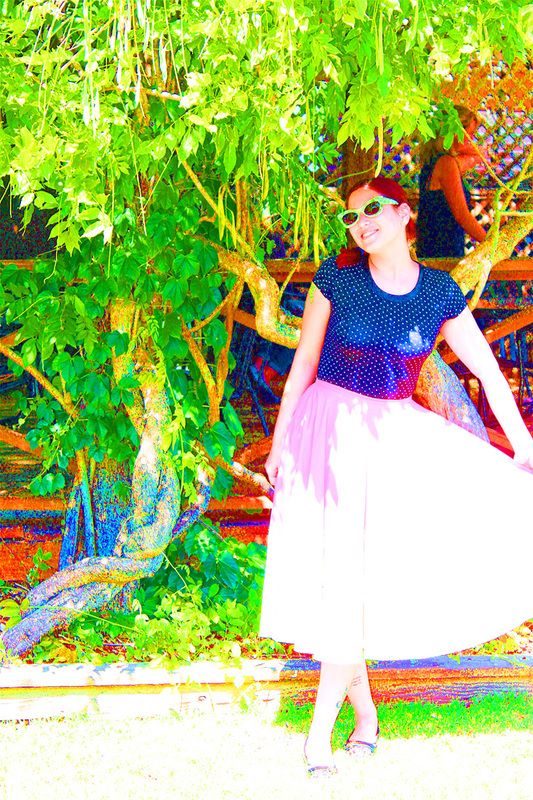
Categories
All
|
 RSS Feed