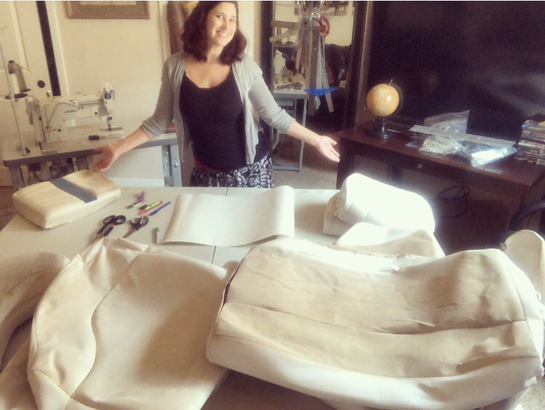
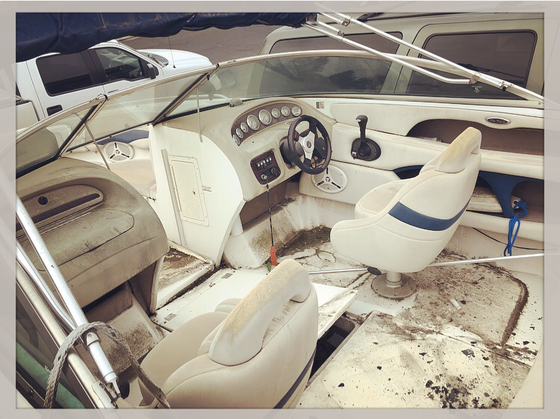
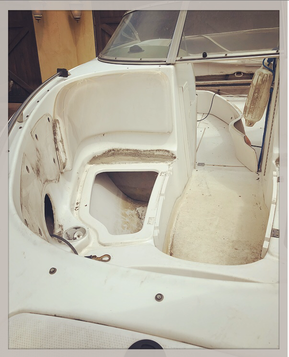
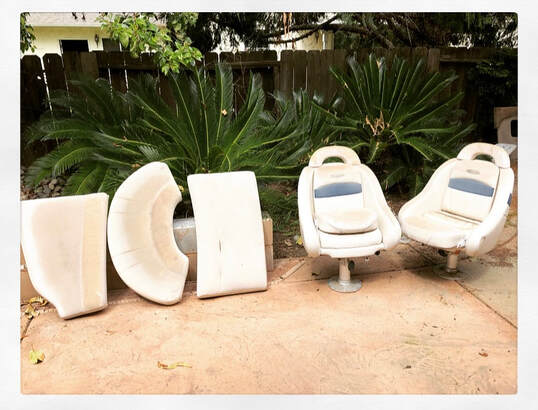
 This is me, Roxanne, working on reupholstery as part of a boat restoration project! This month, after being temporary laid off from my Saturday Job, as an Alteration Specialist for the retail store, The Buckle, I began to use my Saturday Work Day (outside of the home) to start a large reupholstery project! I am working Saturday’s for my Dad, helping him with his boat restoration! I have never done this type of work on such a large scale before, so I’m really excited for the opportunity and experience. When my Dad offered me this job, and I accepted, he purchased a brand-new industrial Juki Sewing Machine, designed specifically for upholstery! My Dad set up a Sewing Workroom for me in his house, and every week, I work there!  My Dad's NEW Juki! This is the boat that I am working on prior to any repairs: 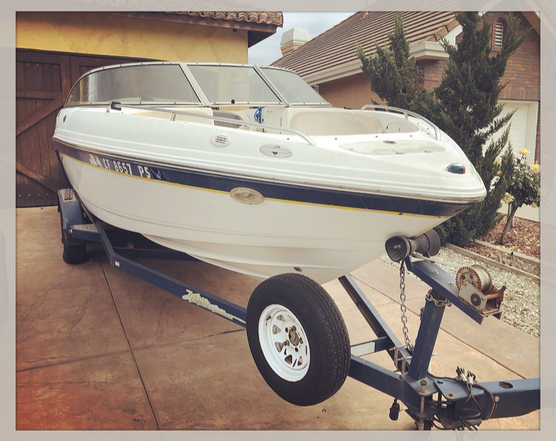 My Dad's Boat. It is a 2001 Model, we have had some great summers with this boat! Sadly, this lovely boat was left out in the elements, uncovered, for a few years. The upholstery and interior have been severely damaged. On my first day of work, my Dad pressure washed the interior, then began removing piece by piece of the seats, cushions, and side panels...
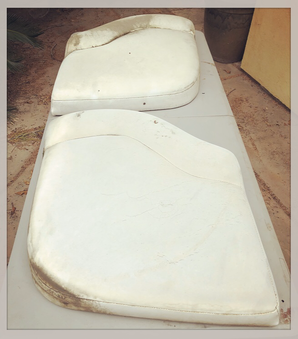
I began my upholstery task by taking each seat section and cleaning them as thoroughly as possible. I then began to remove the old upholstery, in preparation for my next step: Pattern Drafting!
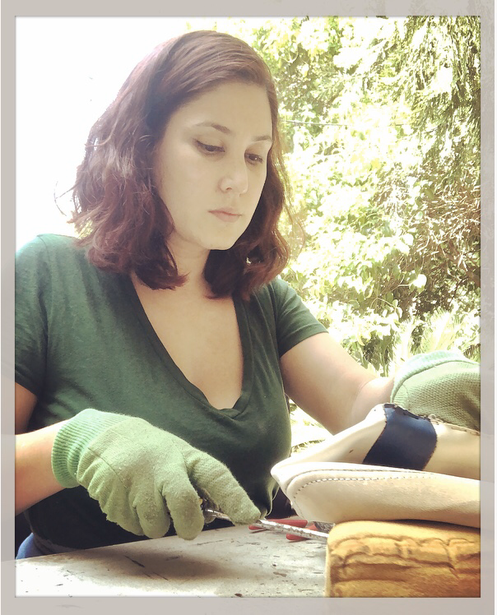 This is me, removing many many staples, so that I can remove the upholstery from the seats and panels 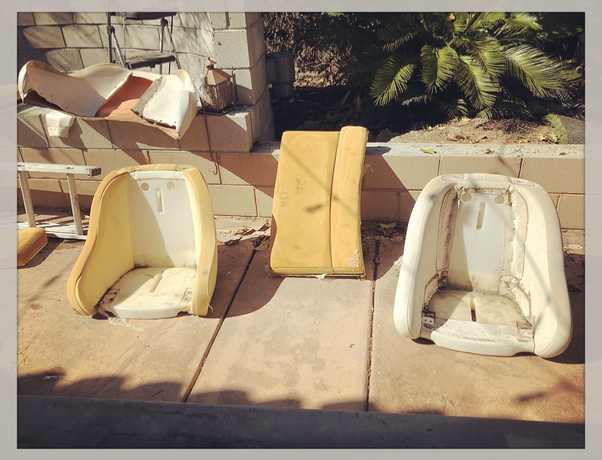 Progress! After cleaning and removing the old upholstery, I then took apart each individual upholstery piece by piece, such as I did here with this Captain Chair Backrest, I drew a rough technical sketch with any notes I might want to remember when reassembling the new upholstery pieces later. All hardware that has been removed is also labeled and bagged for re-attachment later. Each section of each fabric piece is marked, and labeled ready to be reproduced! 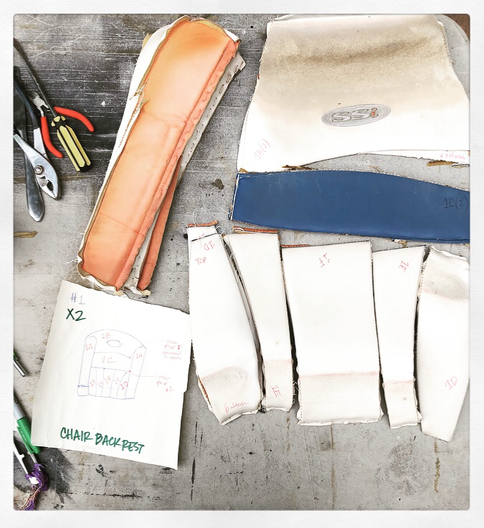 Pattern Drafting Prep for Reproduction of Upholstery Pieces! As you can imagine cleaning and taking apart each boat piece is taking some time to complete. Next Saturday I will start drafting the patterns! Then I will sew together the new upholstery! I will keep you updated on my progress! 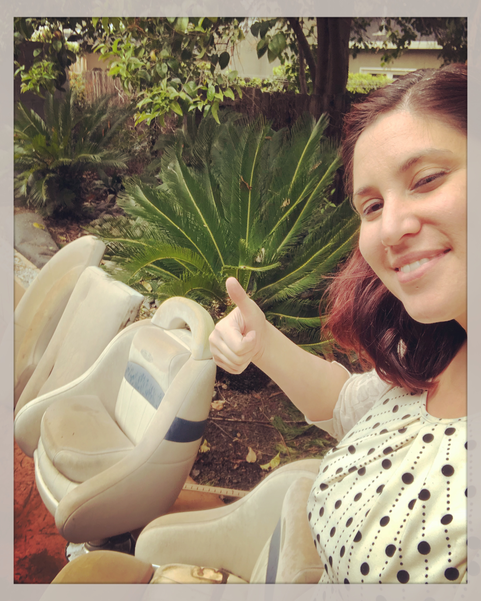 Thank you for reading! Related Links:
1 Comment
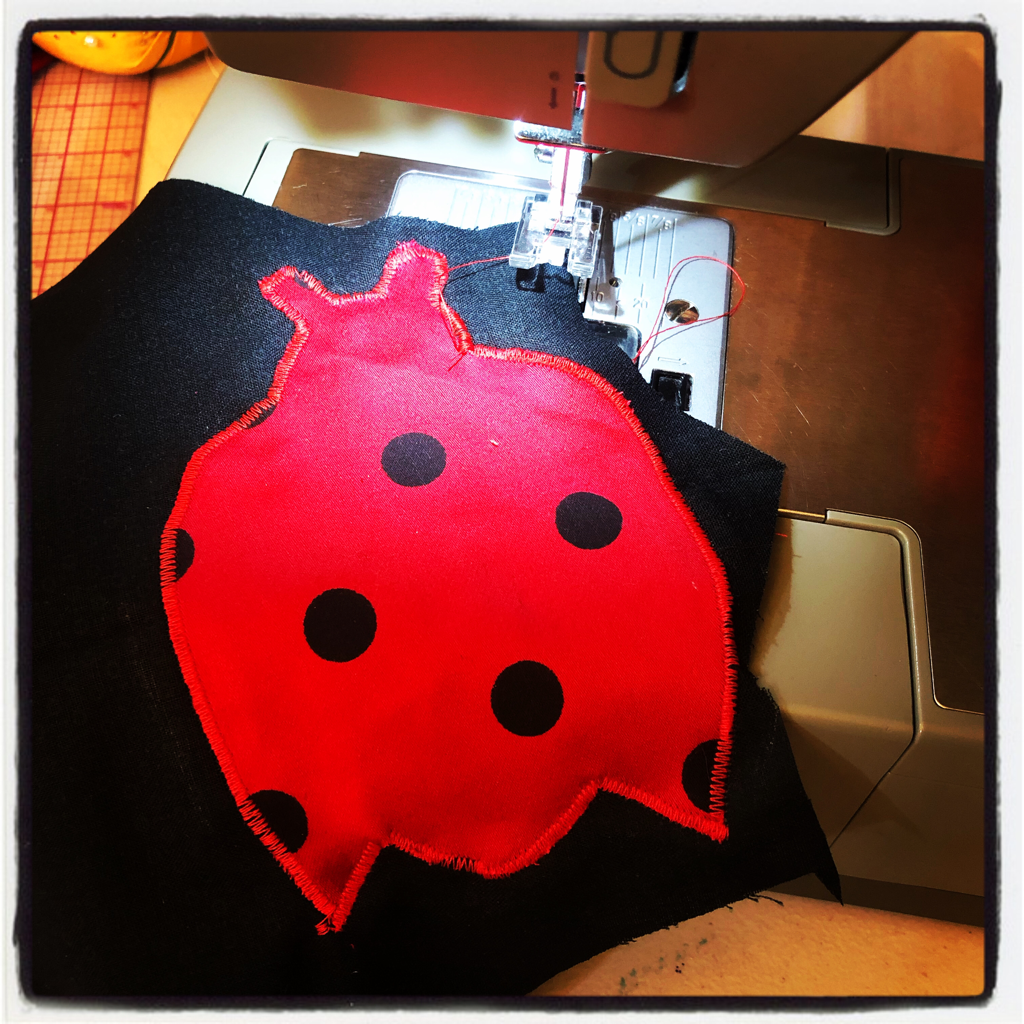
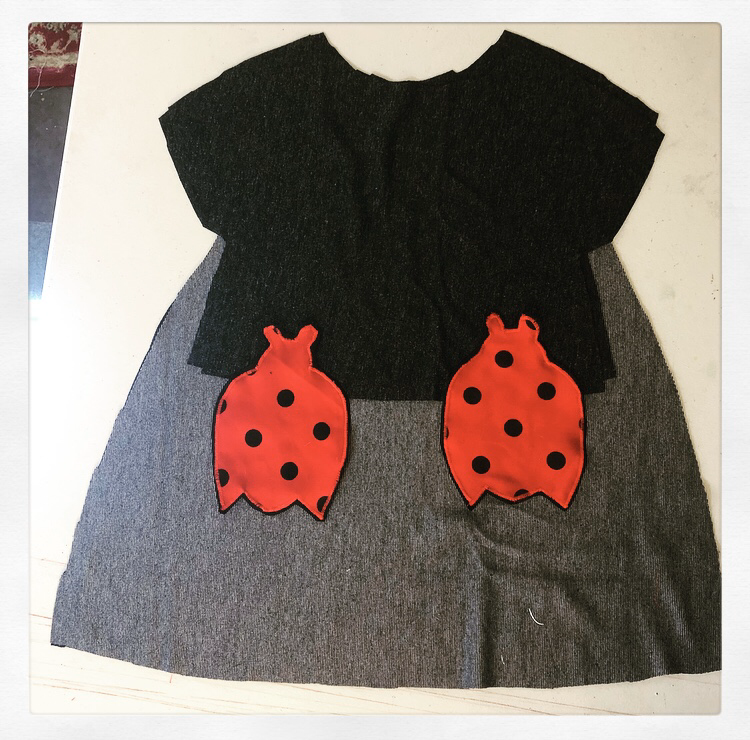
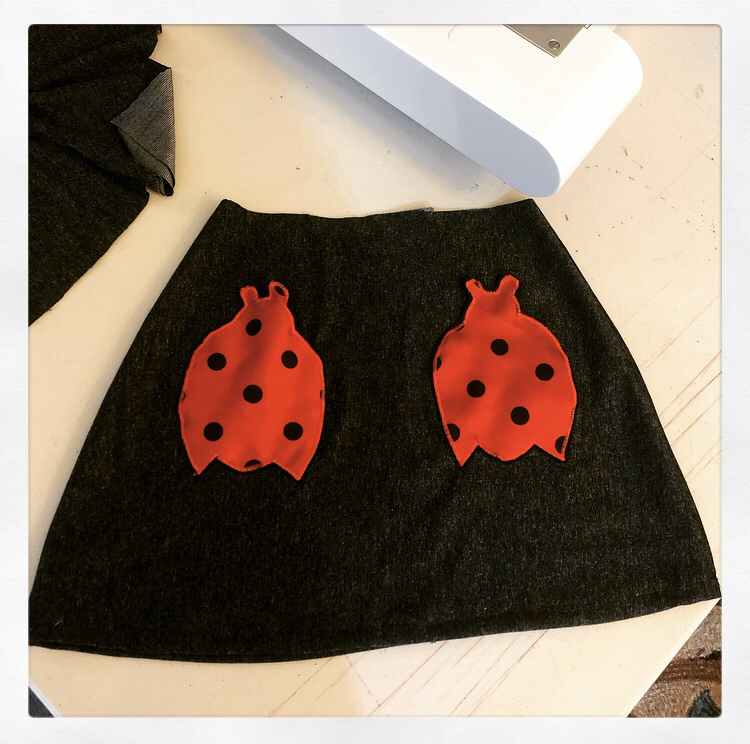
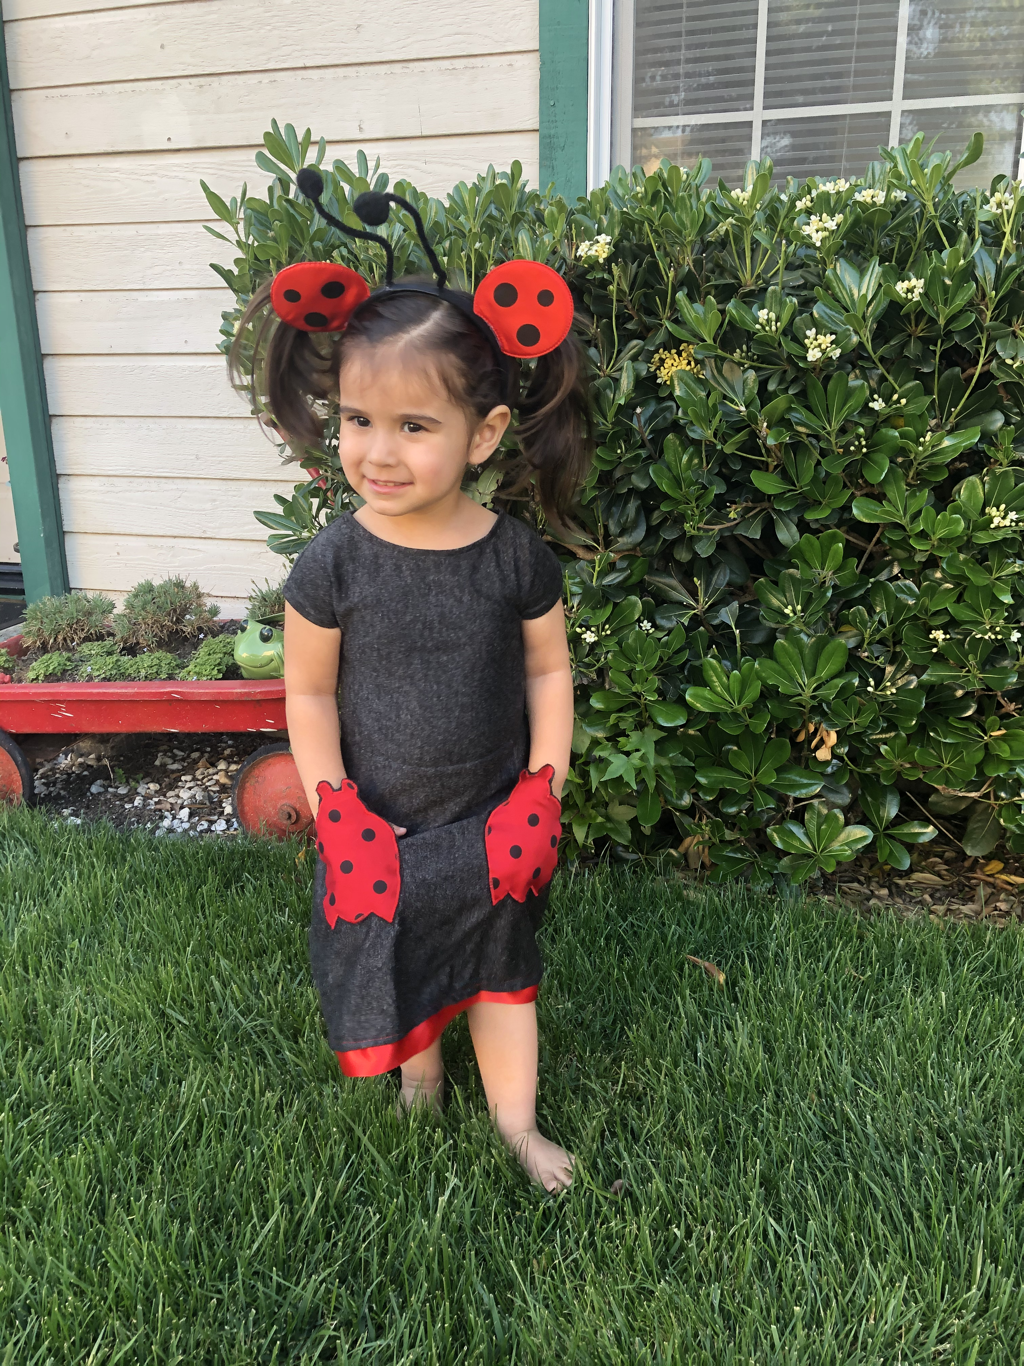
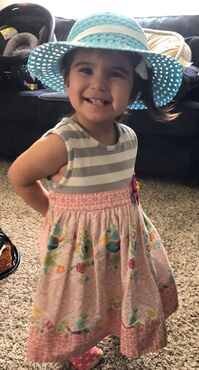
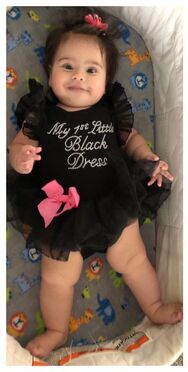
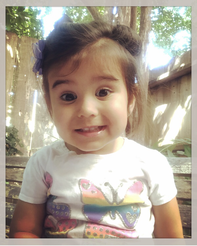
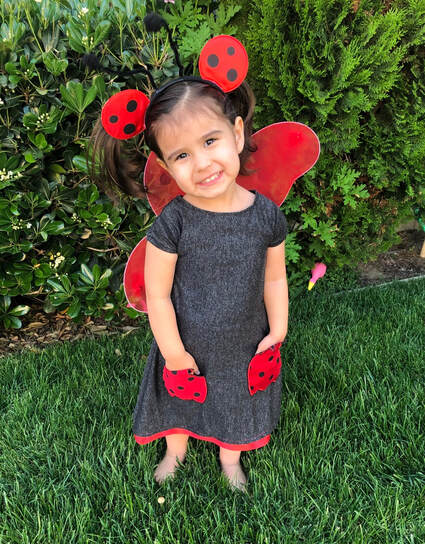 My 2 1/2 Year Old Daughter in the Ladybug Dress that I created for her! Her accessories include a Ladybug Headband and Ladybug Wings that we purchased last year at our local The Dollar Tree: Must haves for a little girls "Dress Up" Bin! For the last 2 1/2 Weeks, I have been sewing FaceMasks non-stop, every single day! Ok, maybe not exactly non-stop, but it sure feels like it! Over the last few weeks, my little darling daughter has seen me creating masks with a red and black polka dot fabric, that she calls "Ladybug Girl"! She has asked me several times if the fabric was for her, if the masks are for her, and if Mommy is making a dress for her... I told her that I would make her a Ladybug Dress sometime this week... As my FaceMasks orders have been coming in, more people are choosing the red and black polka dot fabric for their mask order, and it is adorable! I knew I had to make her something out of this darling fabric before I ran out! Today, I decided to take a short break from Mask Making, and create something for my little one. While she and my 1 year old baby were taking their afternoon nap, I made my toddler the cutest 3T Ladybug Dress! The dress took me about an hour and a half to make, and I love how it came out! 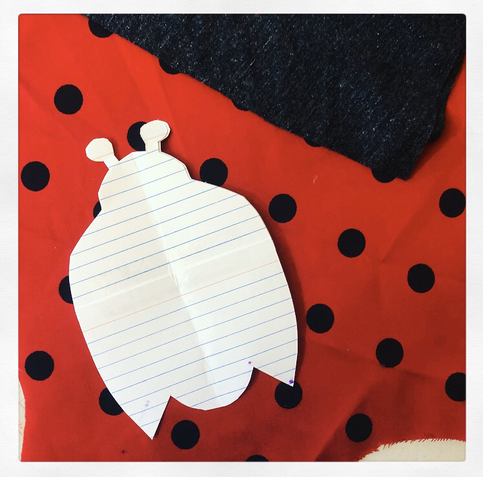 This is my Applique Template of a Ladybug that I drew freehand on an index card. I used this template to create applique Ladybug Pockets on my daughter's new Ladybug Dress. Earlier last week, I received my long coveted Singer Sewing Machine Accessory Kit, that I ordered from Amazon. This Presser Foot Kit has been on my Wish List for years! The Presser Feet included within this kit are: Blind Hem Foot, Cording Foot, Darning/Freehand Embroidery Foot, Even Feed/Walking Foot, Gathering Foot, Narrow Rolled Hem Foot, Overcasting Foot, Satin Stitch Foot, Straight Stitch Foot, plus a Twin Needle. Imagine the creative possibilities with these amazing accessories! In March, I found a fantastic book at my local library's annual used book sale, Encyclopedia of Sewing Machine Techniques, by Nancy Bednar and JoAnn Pugh-Gannon (1999). This book explains how to use all of the various presser feet along with step-by-step instructions! When I bought this book (for ONLY $1.00!), I knew for a certainty that I needed, absolutely needed, to buy the Singer Sewing Machine Accessory Kit that I had found on Amazon so long ago... So I bought it! I already love it! The Encyclopedia of Sewing Machine Techniques is a must have companion to the kit! 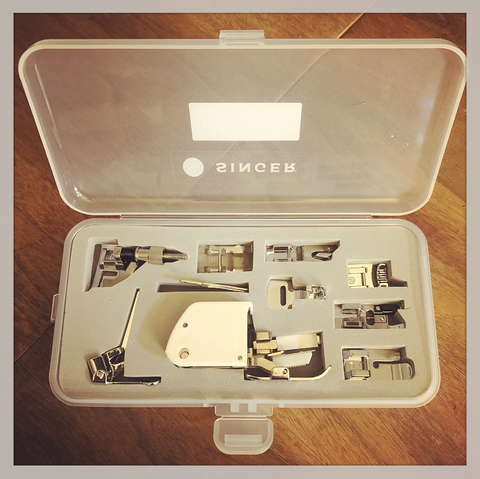 My NEW Singer Sewing Machine Accessory Kit that includes 9 Presser Feet! 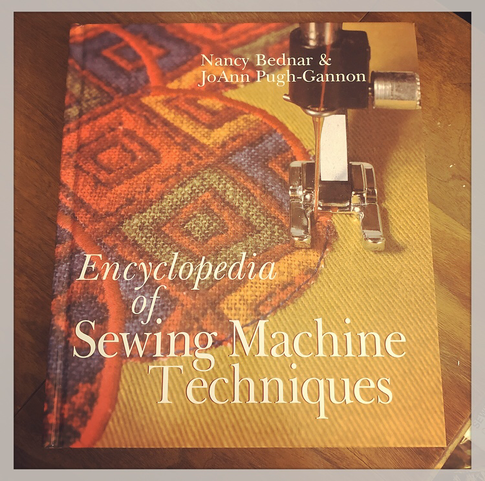 The Book, Encyclopedia of Sewing Machine Techniques, by Nancy Bednar and JoAnn Pugh-Gannon (1999). While on my sewing break from Mask Making, and with my babies peacefully asleep, I thought it would be fun to check out my accessory kit, by trying out the Satin Stitch Foot, and making my daughter her Ladybug Dress... I knew I could not make my daughter a dress entirely out of the red and black polka dot fabric, because I am running low. So I decided to make a Ladybug Applique out of the fabric, and attach it to a lovely charcoal grey stretch knit fabric that I had on hand. I was inspired by the design of a Carters Dress that I recently bought for my daughter online. The Carters Dress is a size 3T, fits her perfectly, and has little kitty cats as pockets on the front. I took the Carters Dress and traced the Skirt and Bodice on Pattern Paper, I added the seam allowances, then cut the new dress out of the charcoal stretch knit fabric. I also cut out the ladybug applique. With page 22, of my Encyclopedia of Sewing Machine Techniques open, I setup my new Satin Stitch Presser Foot following the Machine Set-Up Instructions on the "Applique, Basic Satin Stitch" Section of the book. How handy it is to have this tangible resource! 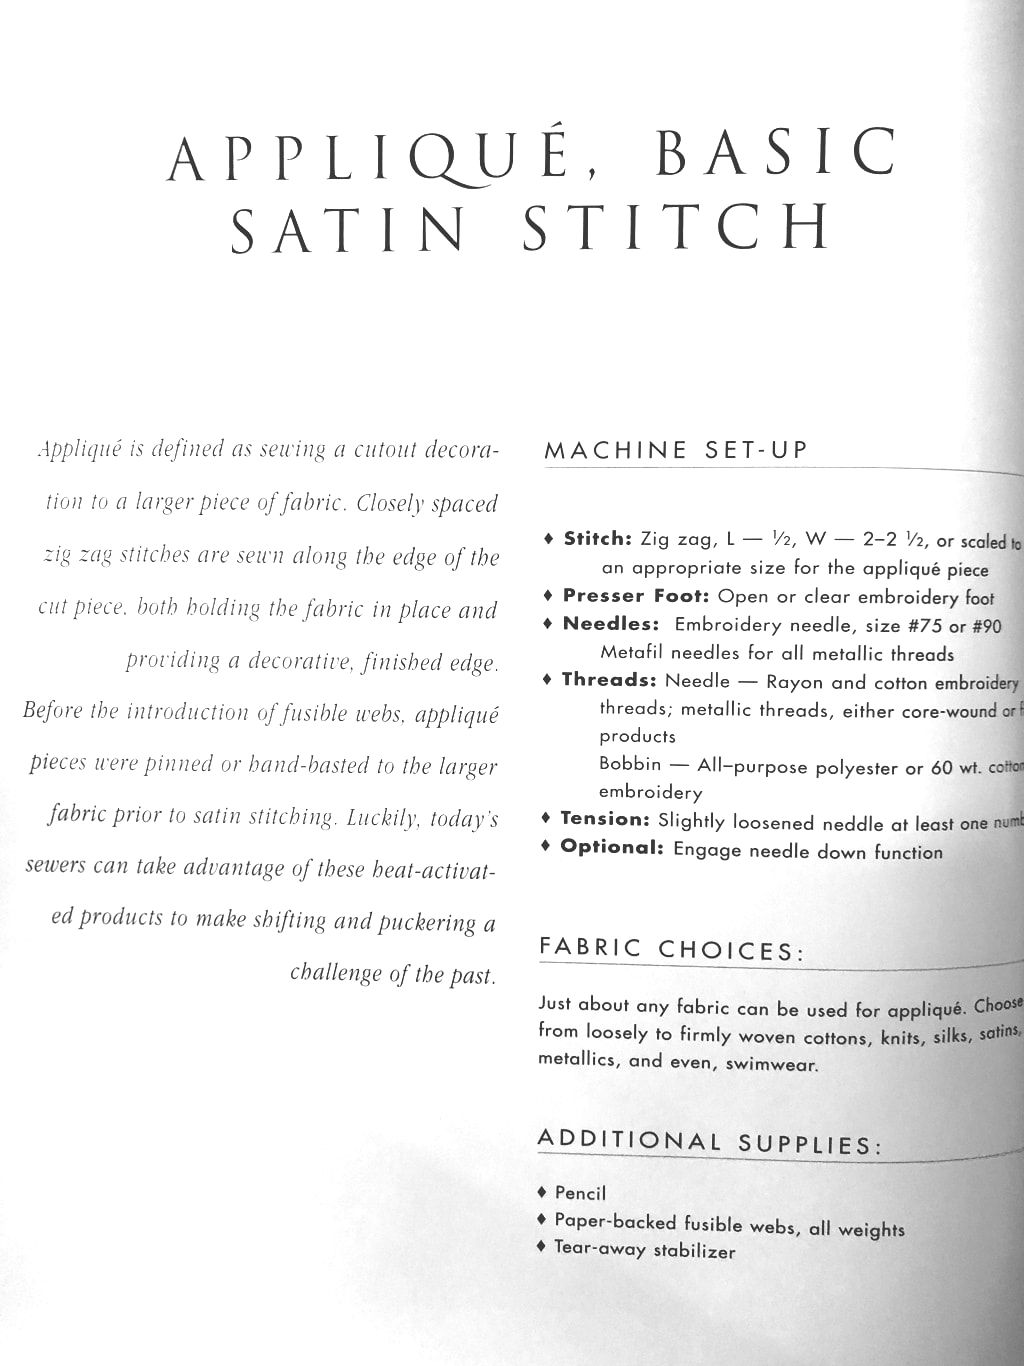 Page 22 of Encyclopedia of Sewing Machine Techniques. Check out my work in progress...
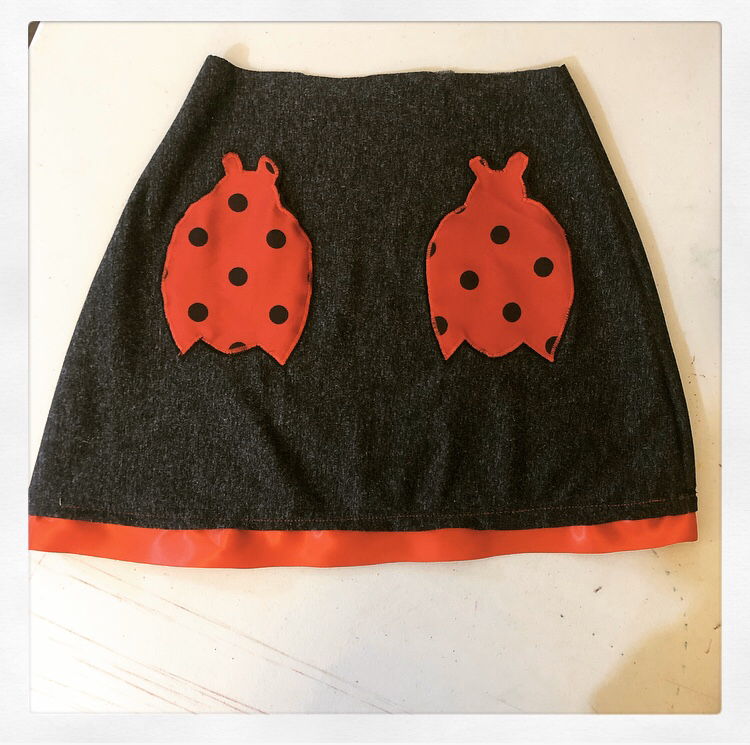
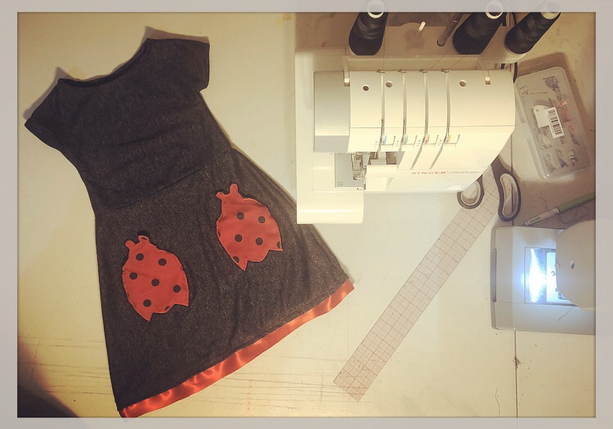 After sewing the front and back of the bodice together, I finished the arm holes and neckline, then attached the dress bodice to the skirt. Finished! Nap Time is over, and the dress is ready! She loves it!
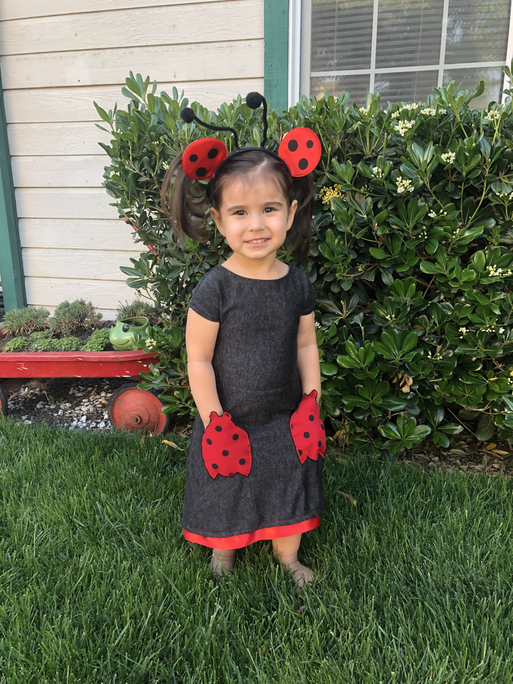
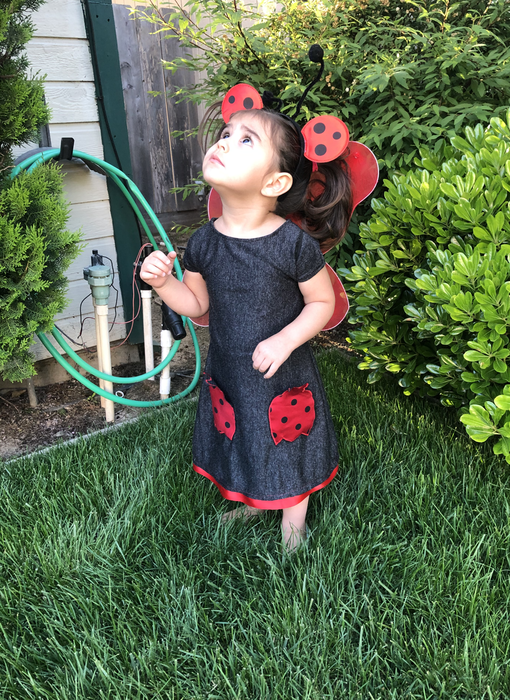 Here she is in her new dress, gazing at the bugs flying in the yard! Thank you for reading about my latest project! I am excited to try out the remaining 8 presser foot accessories in my accessory kit. I will be sure to tell you all about it once I do! GoodNight! Related Links:
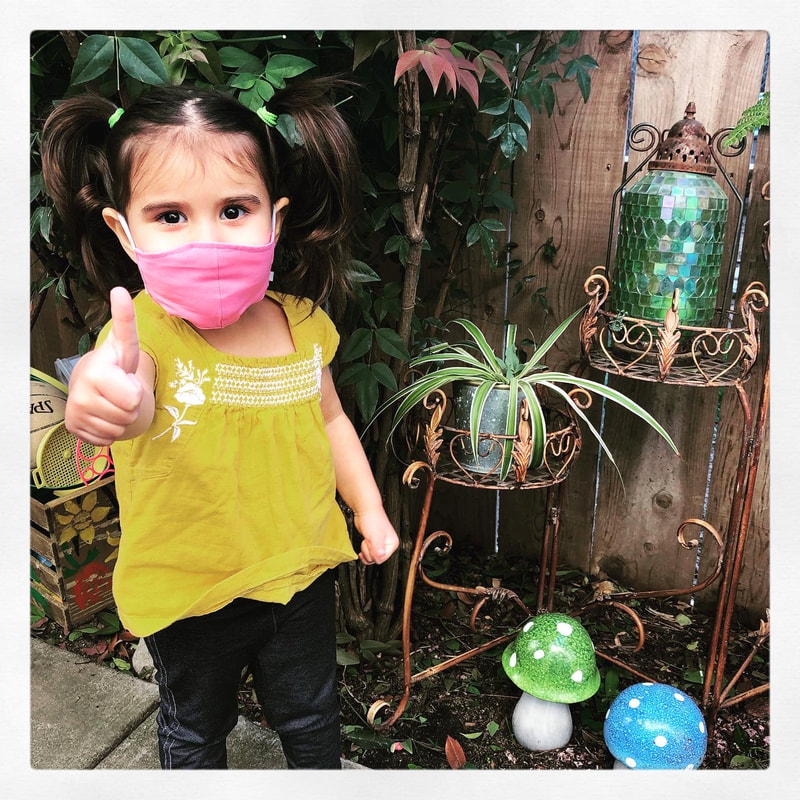
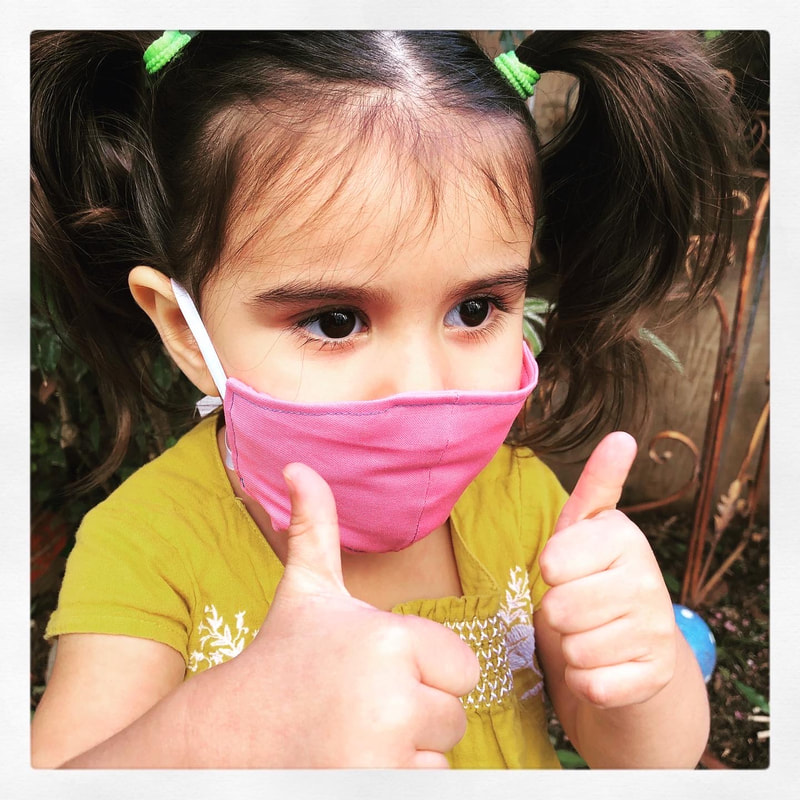
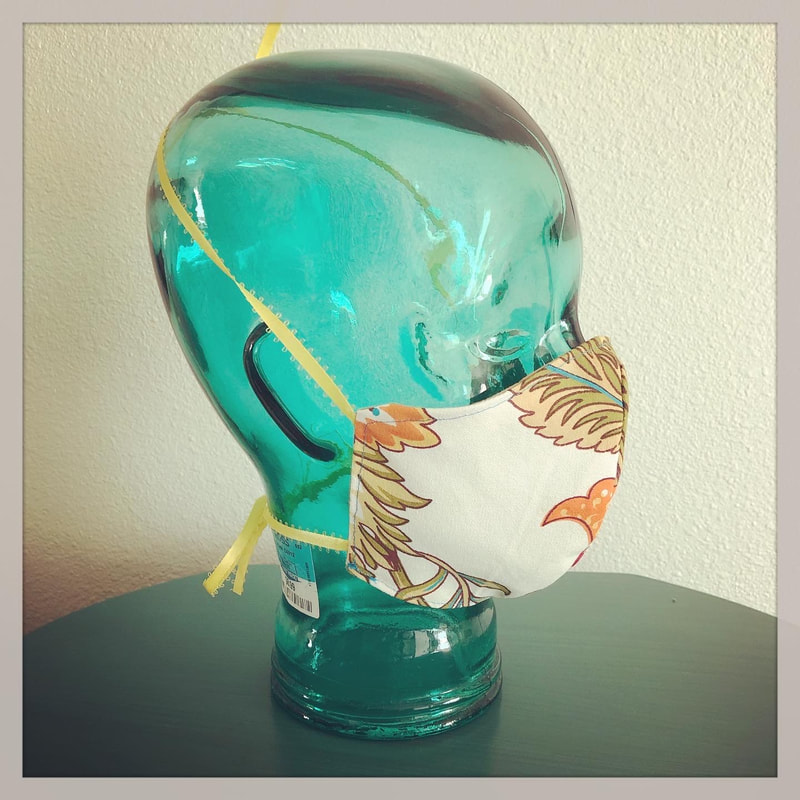
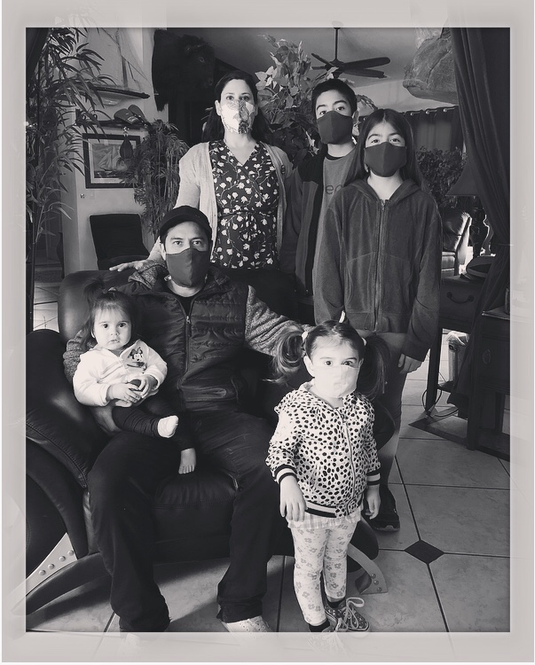 My FaceMask Wearing Family Portrait- The Rangel Family- Coronavirus Pandemic 2020 (My one year old baby wouldn't keep a mask on long enough for a photo!) Last week, my sister Desiree, tagged me in a Facebook Post that was created by her friend who works at UCSF. The post was searching for people who can sew in hopes that they could make Homemade FaceMasks for Hospital workers, who are running low on their supply. Currently, most of the world is on some sort of Shelter In Place or Home Quarantine requirements, due to the recent outbreak of the COVID-19 virus. Oddly, this is tale we’ve seen or heard so many times in futuristic, science fiction, or horror films, and novels... Schools and places of worship have shut down, more businesses continue to close, and home goods and groceries are flying off the shelves quicker than they can be re-stocked! For many of us, this is a surreal experience... Sadly, the shortage of supplies, especially Face Masks for Hospital workers, is all too real. In intense times as these, it is important that we continue to come together as a community, and do our part to help others when able. As a person who can sew, I decided to help these Front-Line Medical Workers as much as I can, by sewing Fabric N95 Style Facemasks to donate to those in need of them. My sister, Desiree, donated material, and ribbon, and I completed the sewing on 24 Face-Masks as a donation to the hospital at UCSF! 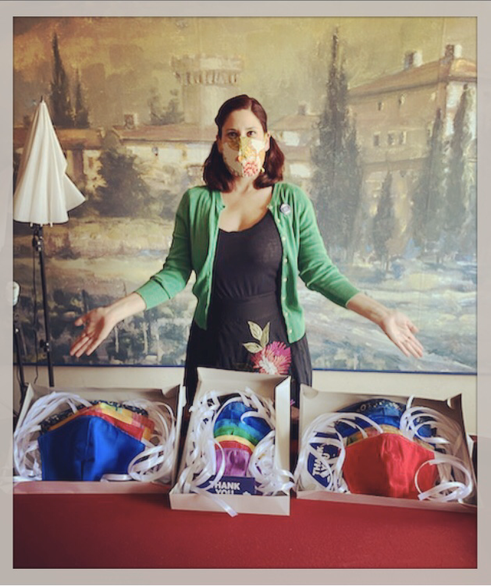 This is me, Roxanne, and my 24 FaceMasks that myself and my sister, Desiree, sent to UCSF for front line hospital workers.
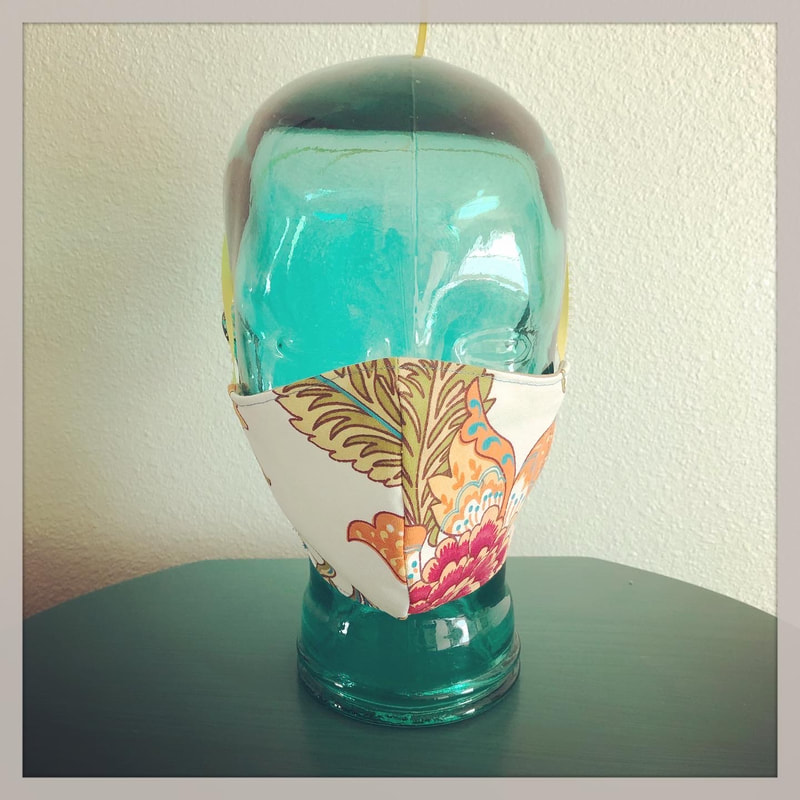
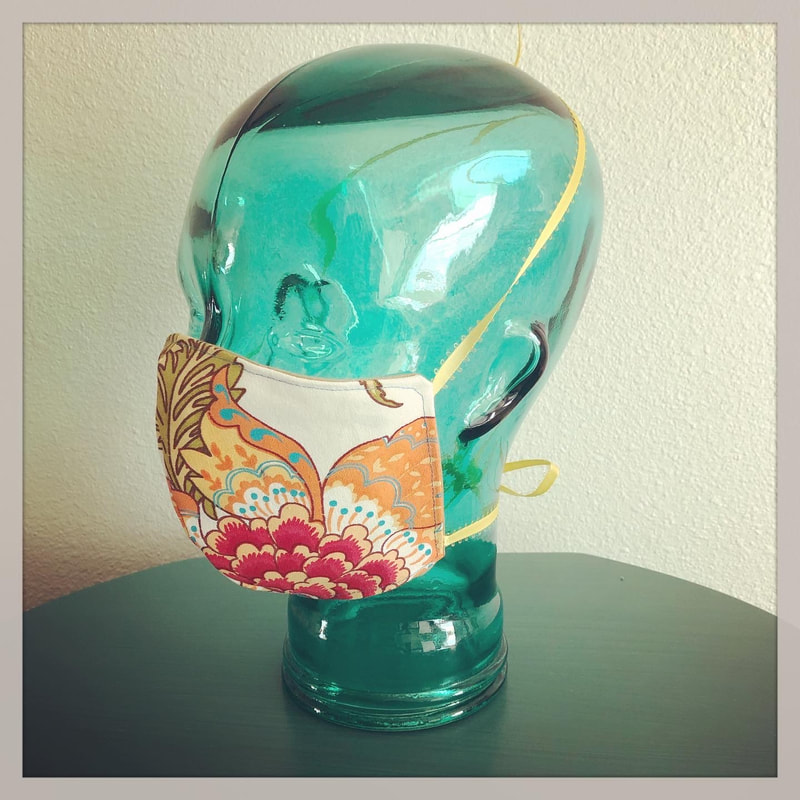
Mask Making
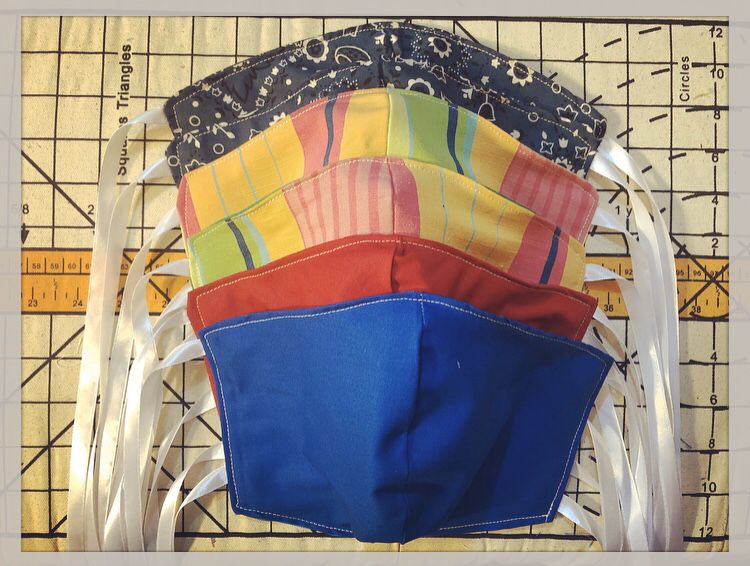
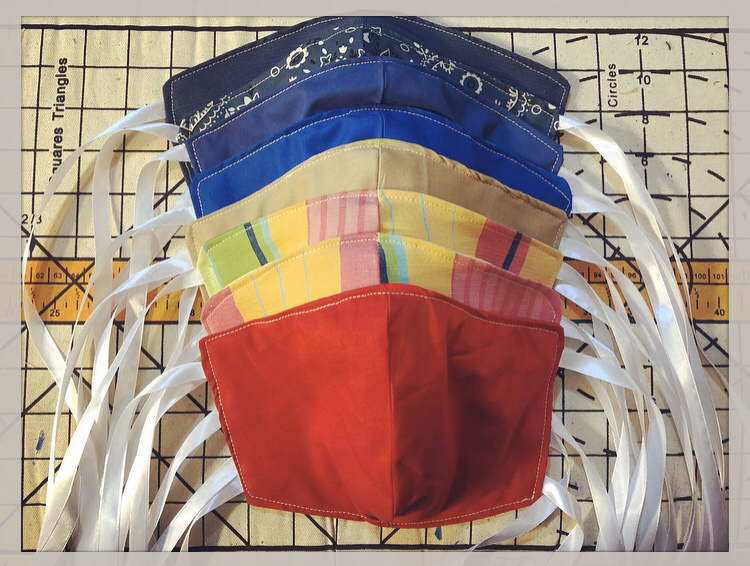
It's hard to believe that just a month ago, Face Masks were something I never would have imagined I would be producing in large quantities today. Just one month ago, I was consulting with one of my clients about creating a custom ball gown, for a now cancelled formal event. I was preparing an upcoming fashion collection for the now cancelled Oakland Fashion Week 2020. I was working Saturdays as an Alteration Specialist for the retailer, The Buckle, which is now temporarily closed... but then I posted a few photos of FaceMask Making... since then, I have received numerous messages, phone calls, and text messages, asking if I make FaceMasks, and if I sell them! The overwhelming need of the community has been keeping my sewing machine running non-stop! 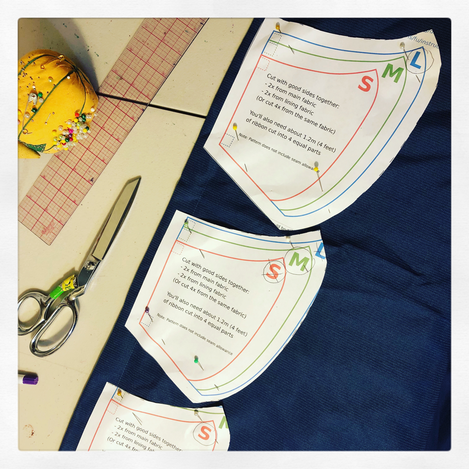 Work in Progress: Making Homemade N95 Facemasks As the past week continued, I have sold many FaceMasks! I have at least a dozen orders prepped and ready to be made as the next few days unfold. Everyday I have received more orders! Check out a few photos of some of my completed orders: 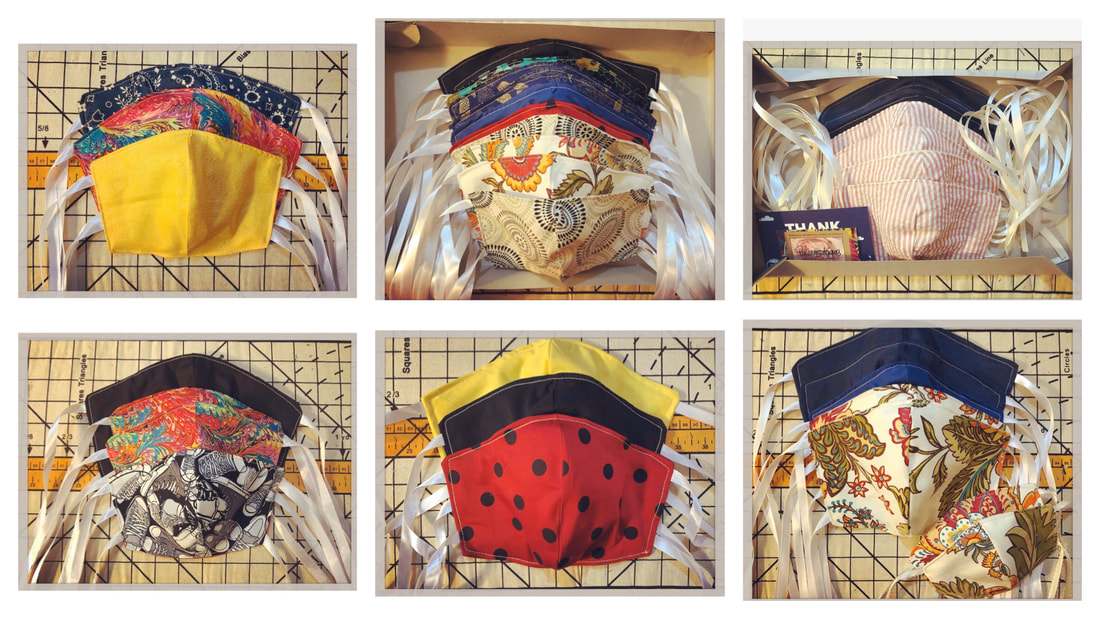 A few orders of FaceMasks that I made and delivered this week... Do Homemade Face-Masks Work? Over the past week, I have seen and read many articles and links posted on social media and news pages about the effectiveness of Fabric FaceMasks. Some of these articles will tell you that Fabric Face Masks are at least 50% effective against creating a barrier of germ protection, while other published statistics quote higher or lower effectiveness depending on the material used, and the amount of layers of fabric. Most Fabric Mask Making tutorials, or patterns, recommend use of 100% woven cotton. Other articles encourage everyone to wear FaceMasks, reasoning that wearing them protects others from your germs. If everyone in the community is wearing FaceMasks when conducting "Essential" business out in public, than it could, possibly, drastically reduce the spread of the virus. Regardless of what you might believe regarding the use of FaceMasks, I believe FaceMasks made of fabric is better than nothing. Some counties across the US are now requiring the use of FaceMasks when out in public. 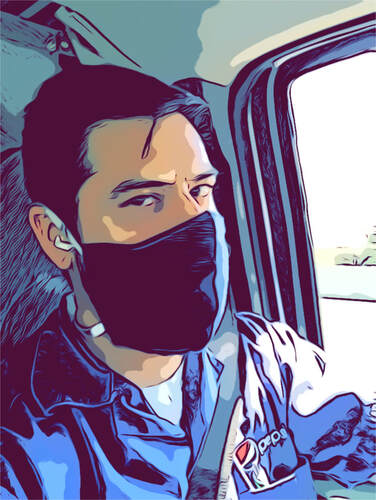 This is my husband, who is an "Essential Employee" Here he is wearing the FaceMask that I made for him. I have made FaceMasks for a few of his co-workers, as well as many other "Essential Employees", such as those who work in grocery stores. #SewingTogether I follow many fellow Fashion Designers and creators on all the social media platforms... over the past week my newsfeed is post after post of photos and videos of everyone who can sew creating FaceMasks of various styles. It is amazing! I love that we have many talented and skilled persons who can sew right here in the US! I also love the support of the community in shopping from their local FaceMask Maker! In addition to the individual Mask Makers, there have been some big names who have began producing FaceMasks, such as Fashion Designer, Christian Siriano, as well as Nordstrom! How inspiring! Although these times are unexpected and kinda crazy, I strongly feel that this is the beginning of a new Zeitgeist: bringing Production back to the The United States! 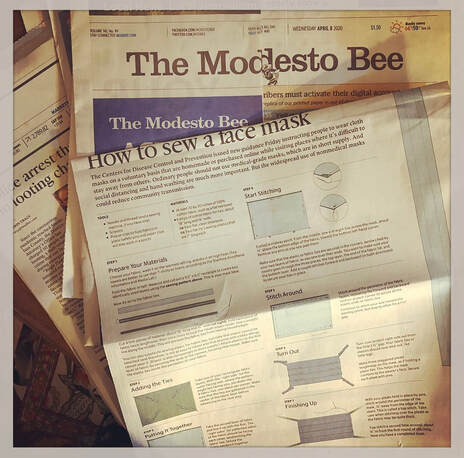 A full sewing pattern of a Pleated FaceMask as well as Sewing Instructions were printed in The Modesto Bee this week. If you are interested in joining the Sewing Production of FaceMasks too, You can Download this Free PDF Pattern for a Fabric N-95 Type Face-Mask HERE. HERE are the Pattern Sewing Instructions. If you would rather donate material to be sewn into FaceMasks, I am accepting donations of fabric, ribbon, or elastic, and thread. All donated materials will be used to sew donated masks that will be given to our front line workers locally. You can contact me many ways, so check my Contact Page, and send me a message in whichever way is most convenient to you! Sewing and Shipping
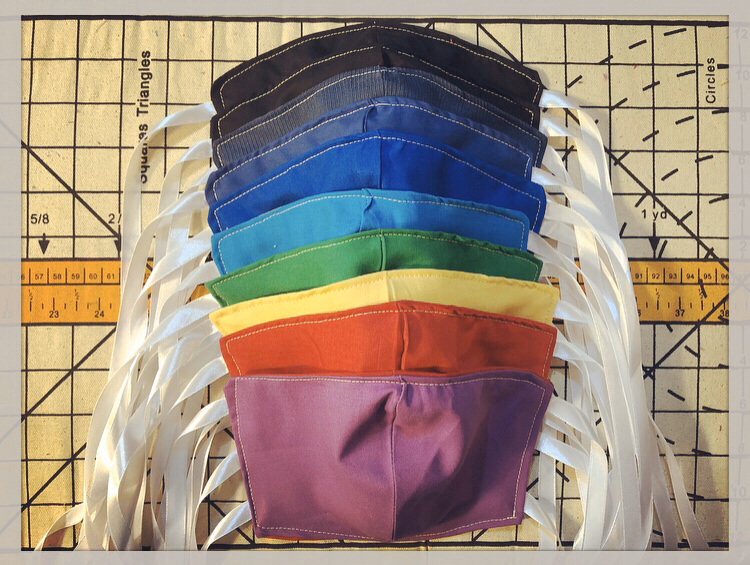
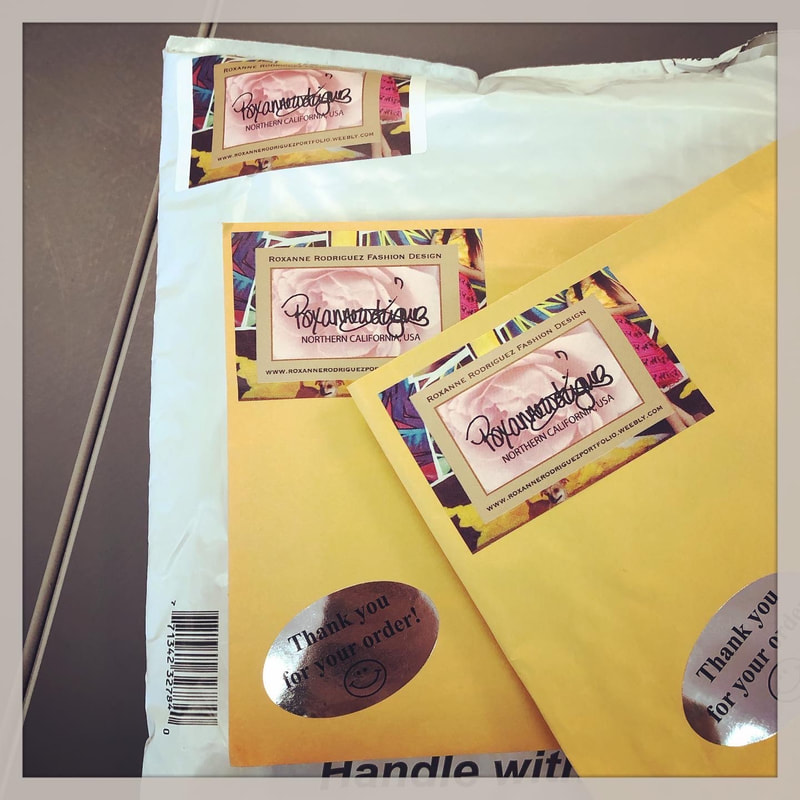
Each day I am working to finish my FaceMasks Orders, and am completing them in the order received. I am trying to get them out as quickly as possible, but because I am only one person, my production is limited. Every day, I am sending out the orders finished the day before. It has been crazy how many orders I have shipped out or delivered in just one week! I expect that in the following weeks I may even see a surge in orders, as more people need them.
I wanted to write this Blog Post as a continual series of articles documenting my FaceMask Making Memoirs! I expect that FaceMask Making will continue to be needed in the upcoming weeks or even months ahead, and this platform is a great way for me to combine my photos and experiences together for your reading pleasure! I appreciate all of your support! Whether you have purchased a FaceMask from me, or just shared a FaceMask Making Post that I have published, you all give me the energy I need to keep on keeping on! If you need me, I will be right here, at my sewing machine! 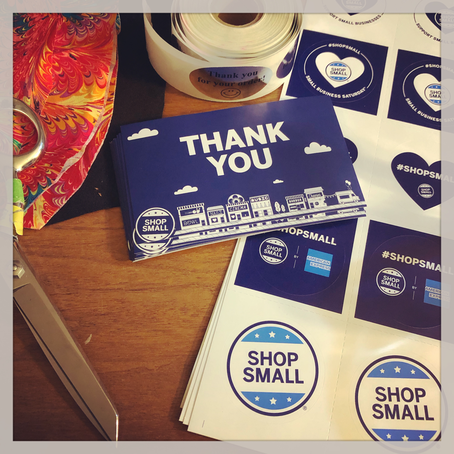 Thank you all for your support in my Face-Mask Production! Thank You for reading my Blog!  Some Face-Mask humor for my Movie Lovin’ Readers! Related Links:
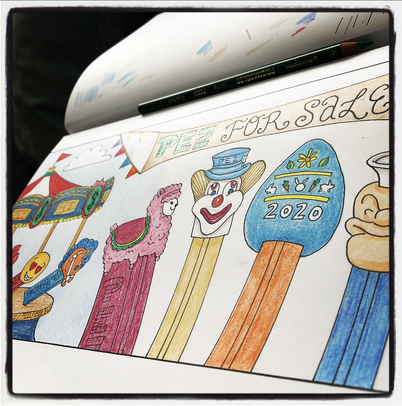
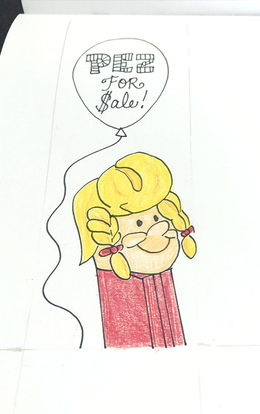
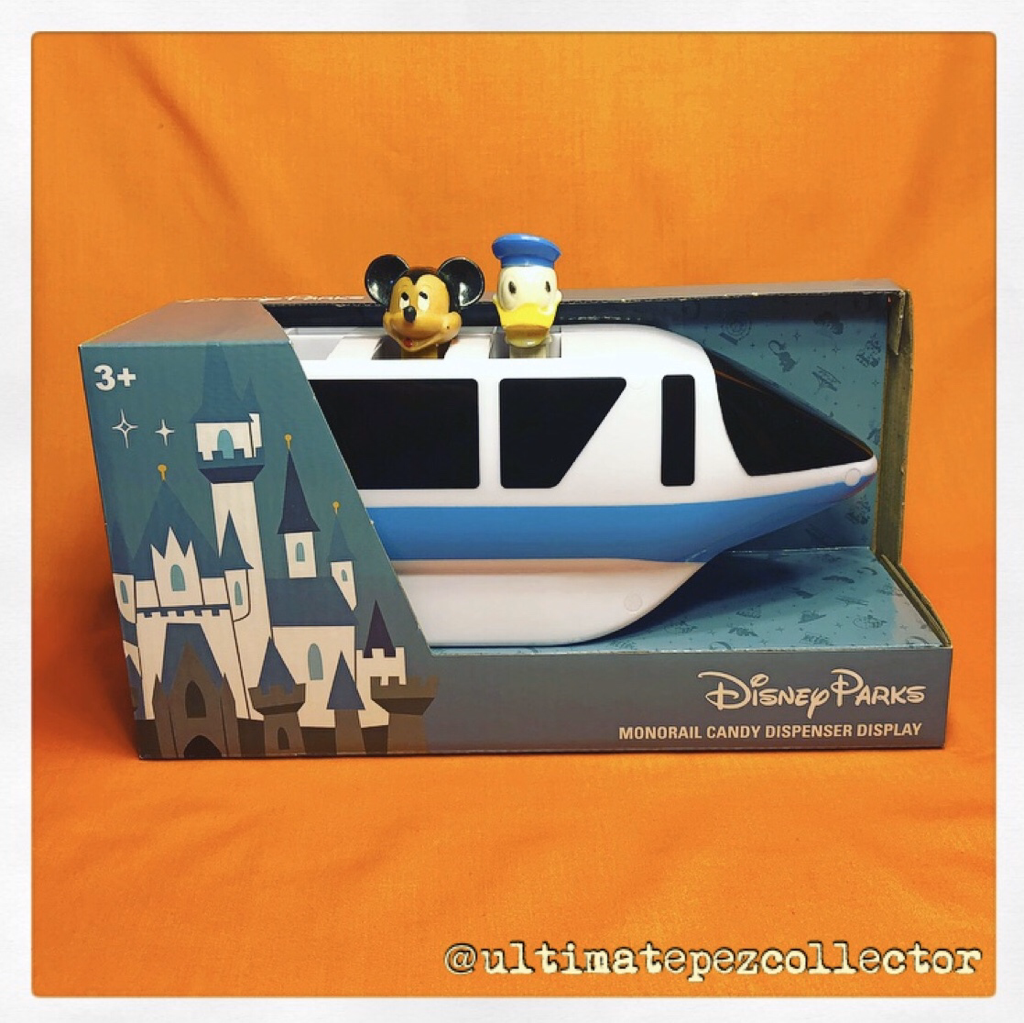
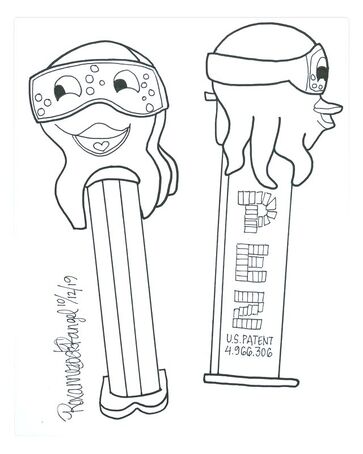
On March 10th, 2020, the winner of a Facebook Group Art Contest was announced... and...Surprise! My artwork was the grand prize winner! Check out the drawing I created specifically for this contest: 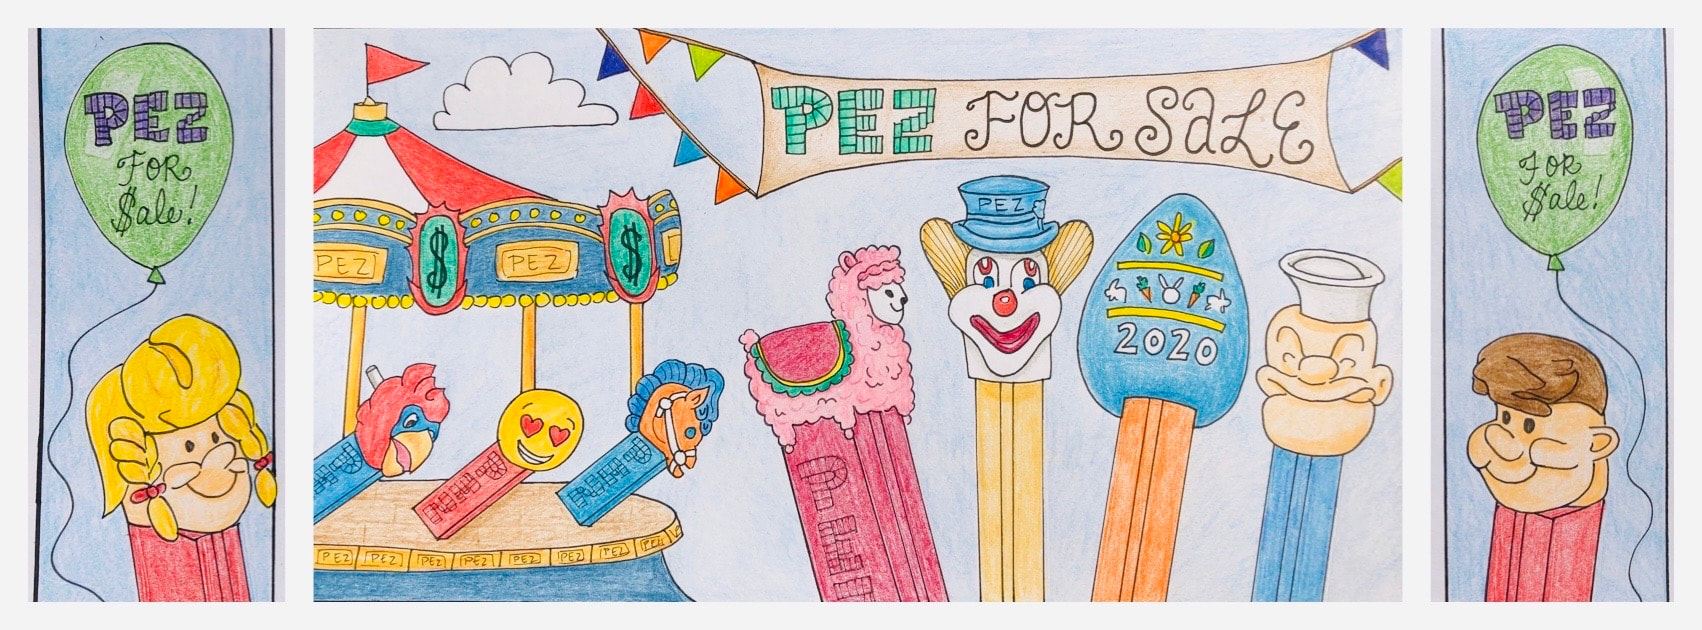 My First Place Winning Artwork! A "PEZ FOR SALE" Drawing in ink and color pencil, by Roxanne Rodriguez Rangel. Two weeks ago, a contest was published on a Facebook Group that I belong to called, "PEZ For Sale". This group allows group members to sell or buy PEZ Dispensers. PEZ Dispenser Collecting has been a lifelong hobby of mine, I currently have over 1000 PEZ Dispensers along with other PEZ merchandise and memorabilia! You can check out my growing collection HERE. As a member of the "PEZ For Sale" Facebook Group, I have purchased some great pieces over that past year or so, and have gotten some great deals. When the contest was announced, I was very intrigued, and definitely wanted to participate! Landon Proctor, one of the group administrators, posted a video on the "PEZ For Sale" Group Page, explaining that he wanted to hold an art contest so that group members would create an art piece that he could use as a Cover Photo for the Group's Page. All entries must meet the size requirements of a Facebook Cover Page, and include the words "PEZ For Sale". Other than that the artwork could be created in any way, it could be a digital artwork, a photograph, a drawing, anything really. The contestants were given several days before the deadline of submission. Once the deadline approached, Landon Proctor would judge the entries by choosing the art that he liked the best as The Grand Prize Winner. The grand prize would be two (one red and one blue) of the NEW Disney Parks Monorail Pez Dispenser Display! Click here to read an article, about these new displays, published on WDW News Today's Website: New Disney Parks Monorail PEZ Dispenser Display As you can imagine, I was super excited to have an opportunity to win these unique PEZ Displays! I do not plan on visiting Disneyland soon, and the California Park is the only place these are currently being sold. I immediately began brainstorming ideas, knowing I would draw something by hand for my entry. I then busted out my trusty pencil, eraser, sketch pad, Copic Multiliner Ink Set, and my Prismacolor Color Pencils! Work in Progress... 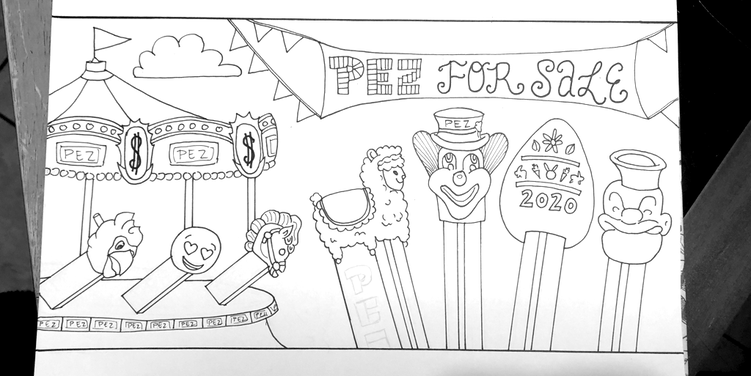 I drew my "PEZ For Sale" Sketch first in pencil, then in ink. I later added the PEZ Girl and PEZ Boy to the sides, to make the drawing fit Facebook Cover Photo dimensions. Here is my drawing in just ink. I love drawing, and find PEZ Dispensers especially fun to draw the likeness of! I decided for my entry I would draw something festival inspired, with a carousel, that had (instead of the traditional horses), PEZ Dispensers! I also thought it would be cute to add a festival inspired banner with the words, "PEZ For Sale", along with some iconic and newly released dispensers. I particularly loved drawing that (oh so cute) Hello Kitty Llama PEZ Dispenser! I then added a PEZ Girl and a PEZ Boy to each side of my main drawing to widen my artwork so it would meet the dimension requirements for a Facebook Cover Photo. I spent a good several hours on my drawing over the span of two days... then I uploaded it to the entry site...
My Prize Arrives! 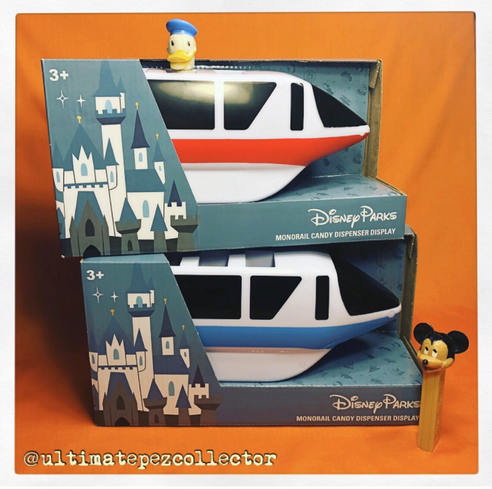 My NEW Disney Parks Monorail Pez Candy Dispenser Displays, shown here with my charming Vintage Donald Duck and Mickey Mouse PEZ Dispensers... www.instagram.com/ultimatepezcollector Today, Wednesday, March 18th, 2020, a package arrived from Burbank, California! It was my fabulous Grand Prize from Landon Proctor of the "PEZ For Sale" Facebook Group! My two oldest children huddled around me anxiously, as I opened the box revealing these lovely Disney Parks Monorail PEZ Candy Dispenser Displays! It is so exciting to add these unique pieces to my collection! I am so grateful to Landon Proctor for choosing my drawing as the winner, and for offering such a generous prize! Check out a few photos that I took, using my Vintage Mickey and Vintage Donald Duck PEZ Dispensers as models!
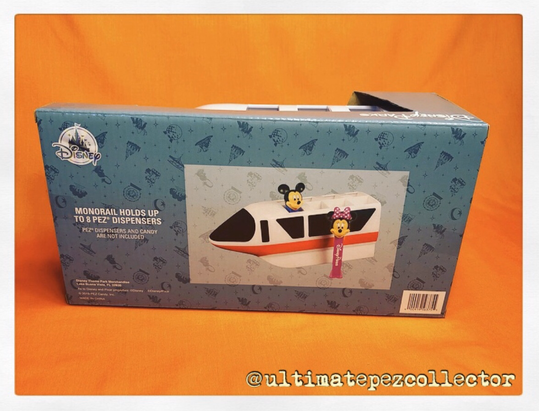 The back of the Monorail box! www.instagram.com/ultimatepezcollector.com 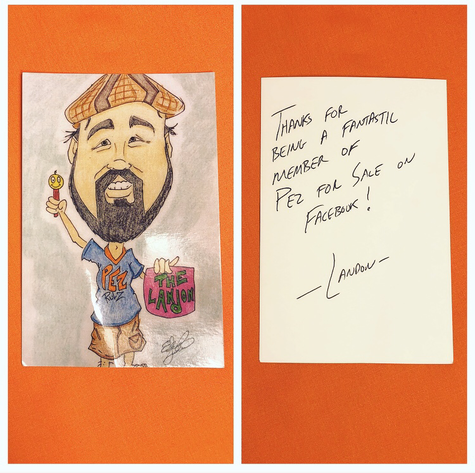 A lovely card included in the package from Landon Proctor! Surprisingly, there are many contest that I have found on Facebook, and other Social Media sites, through various pages that I 'Like" or groups that I am a member of, especially in the PEZ Collecting Community! In the past year or two, I have entered several contests. Check out a few of my past Contest Entries: 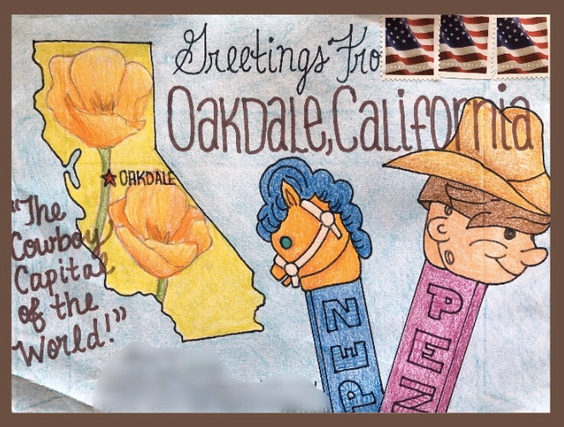 Envelope Art that I created for The Portugal Pez Gathering. This is the Envelope Art that I created in May of 2019, and submitted to an Envelope Art Contest held by The Portugal PEZ Gathering. Contestants were invited to participate from all around the world, and were asked to send their entry by mail all the way to Portugal! I thought it was such a clever idea to have entries arrive this way! Imagine the interesting effect of postage and post office stamps on the Envelope Artwork! Although my envelope was not a winner, I was sent a participation gift, along with someone else's Envelope Art that was created at The Portugal PEZ Gathering of 2019. This was a really awesome contest to be a part of!
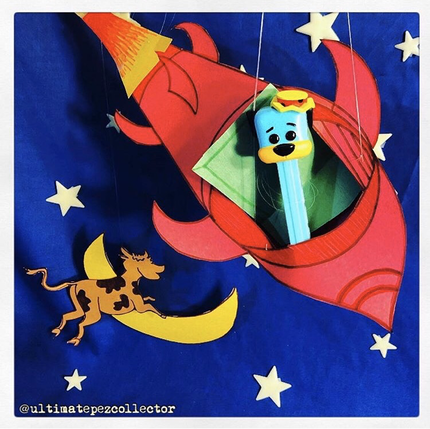
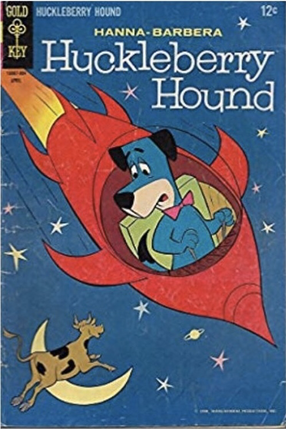
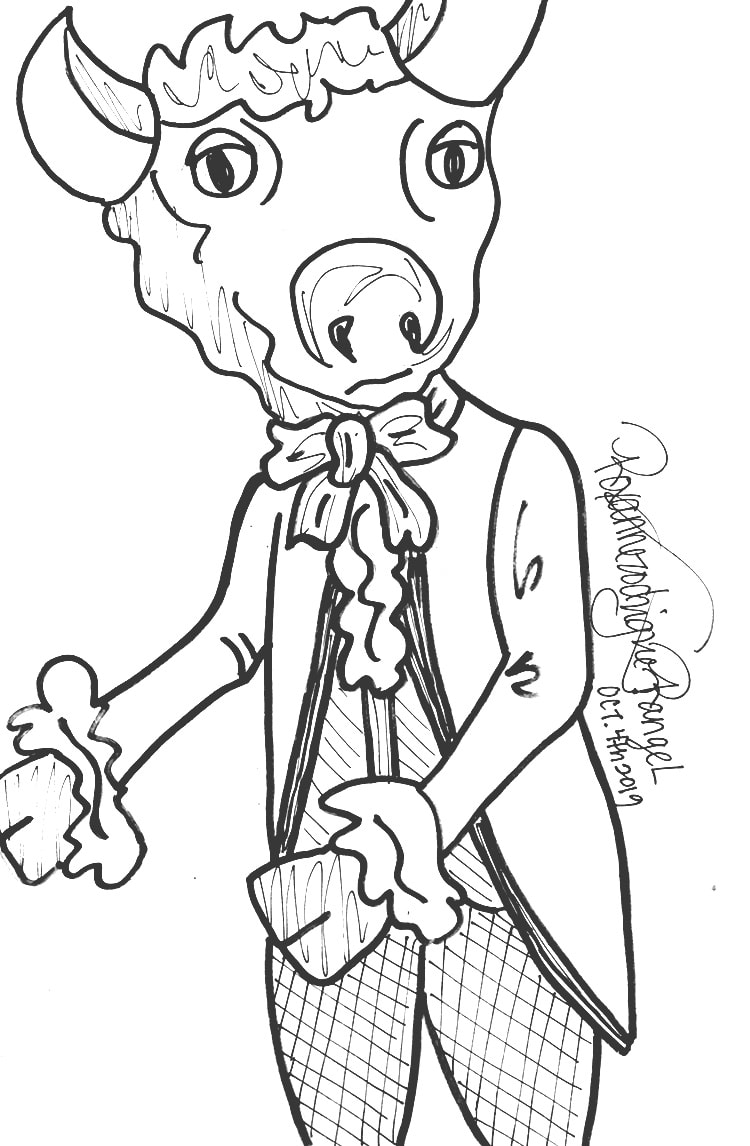
This is my entry into a Funko Pop! PEZ Photography Contest, with a prize of a Gold Huckleberry Hound Funko Pop! PEZ Dispenser, sent to the winner directly from Funko! For my entry, I used a mixed media approach, and re-created a cover of a Huckleberry Hound Comic Book! I drew the cow, moon, and spaceship, and then I cut them out, suspending them with thread, over blue fabric, with my Funko Pop! Huckleberry Hound PEZ Dispenser inside! I was really happy with the effect, but unfortunately, this was not a winning photo... In the future I plan to continue to use my artistic abilities to enter as many contests as offered! I have found it extremely fun to create art for these contests, even if I have only won once (which is awesome enough for me!)! Thank you for reading about my Winning Artwork for the "PEZ For Sale" Art Contest! I look forward to sharing with you many more art and fashion projects in the months to come! 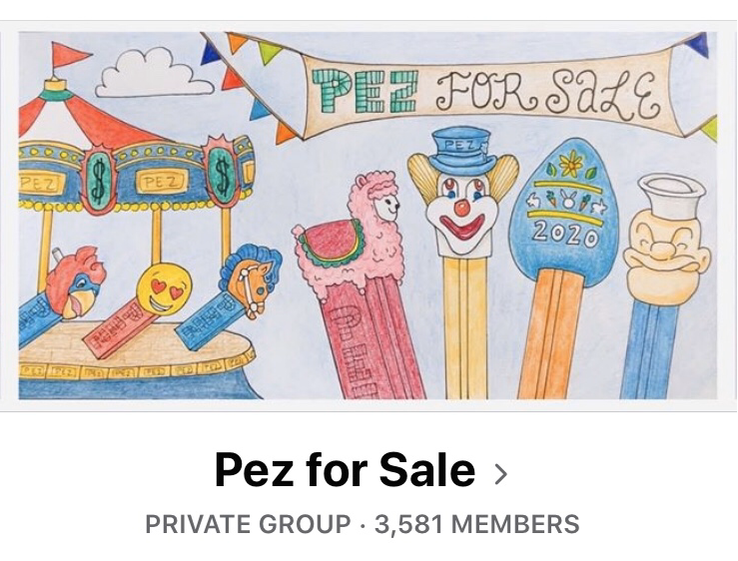 This is a Screen Shot of the "PEZ For Sale" Facebook Group Page, that now has my artwork as its cover photo! My drawing will be displayed as the group's cover photo for one month! After the month is over, all other entries to the contest will be rotated as the group's cover photo. Have a very PEZZY Day! Related Links:
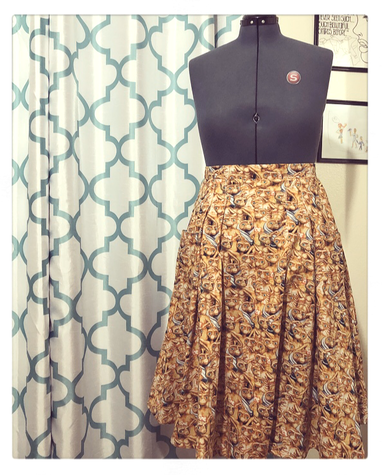
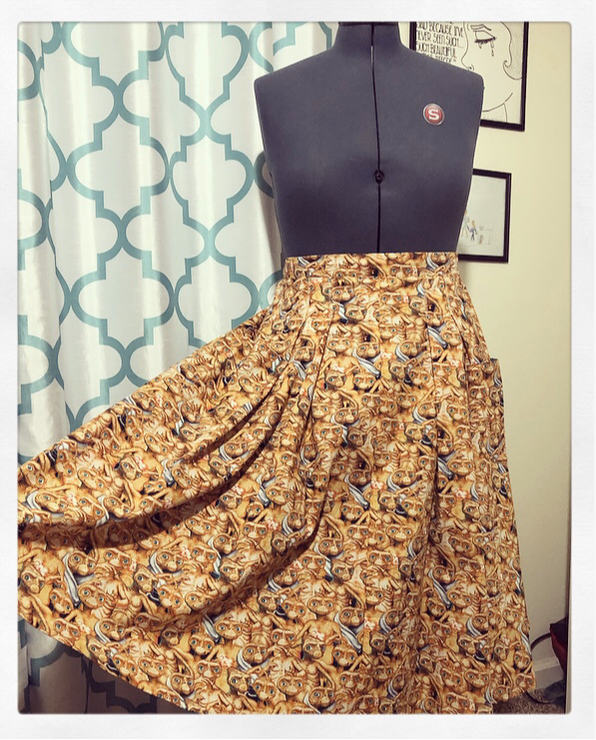
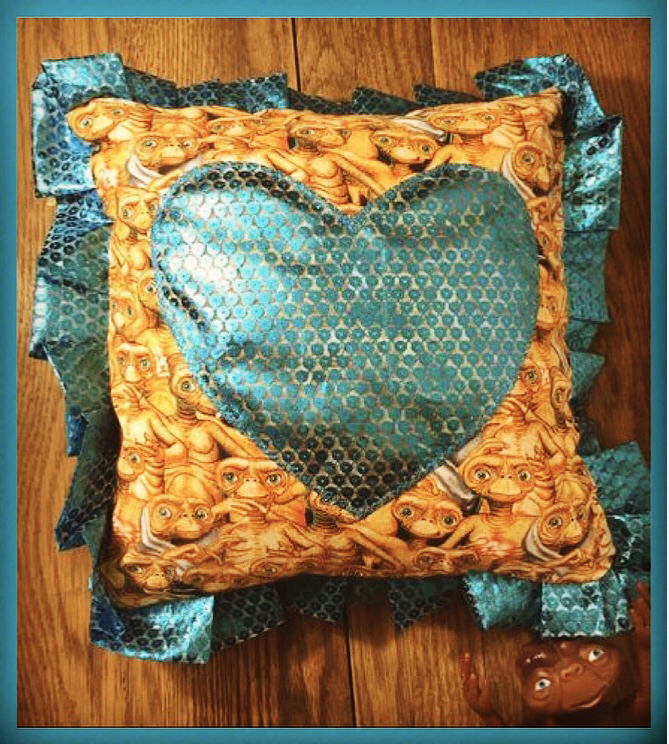
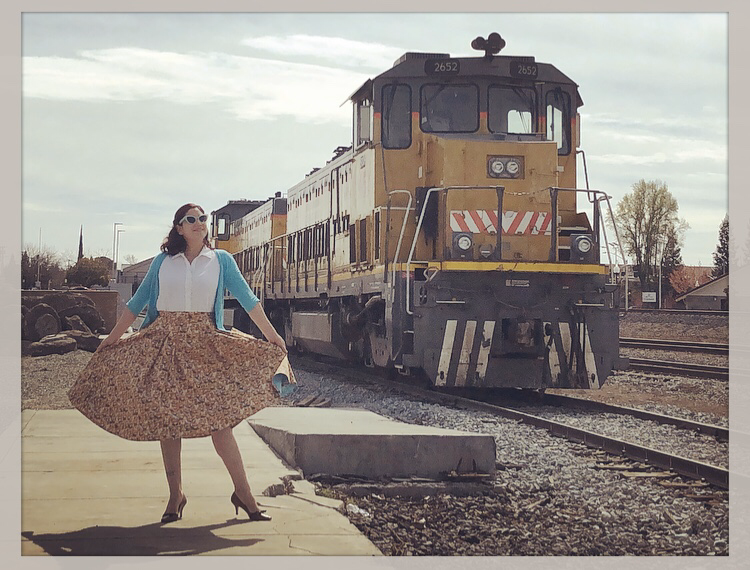 This week I finally finished a Vintage Inspired Skirt for myself that I created with E.T. Novelty Fabric! 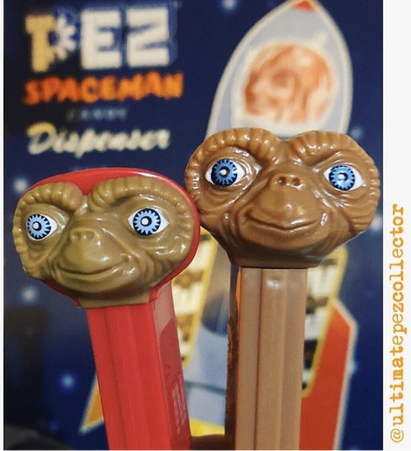 This is a photo of my E.T. PEZ Dispensers, posed in front of my PEZ Spaceman Metal Sign. I am a PEZ Dispenser Collector, and have an Instagram Account dedicated to my entire PEZ Collection! You can find me at www.instagram.com/ultimatepezcollector Ever since I was a child growing up in the 1980’s, I have loved all things E.T.! Over the many years, I have owned E.T. Dolls, E.T. Posters, E.T. PEZ Dispensers, an E.T. Watch, and a bar of E.T. Soap! Not surprisingly, when I spotted E.T. Fabric at Jo-Ann's Fabric, two summers ago, I couldn’t help but purchase several yards! I had planned to make myself a skirt with the fabric, but was delayed about a year and a half, due to finding out that I was pregnant with my youngest daughter. I had the skirt about half way made, when I decided to pause the project until after my baby was born, knowing I wouldn’t be able to wear it, with a growing baby-bump, followed by a post pregnancy body! Check out a close-up photo of the fabric that I found: (Isn't it bizarrely exquisite?!) 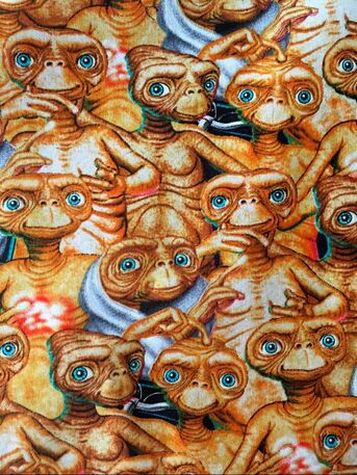 Novelty E.T. Fabric that I purchased at Jo-Ann Fabrics. Just recently, I found myself caught up on most of my ongoing projects... I pulled out my partially completed E.T. Skirt, and began to finish its construction! I rarely have time to make clothing for myself, so it is exciting for me when I finally do! I cut out contrasting lining, created a waistband to fit my current waist measurement, and I assembled the skirt to completion! I was very happy to find that I had just enough fabric remnants to add lined pockets! Check out the completed skirt:
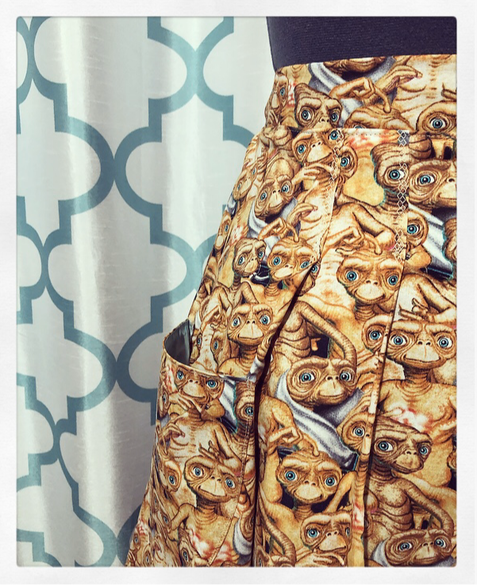 Close-Up photo of Lined Pocket and Pleats I absolutely love the design of this High-Waisted Full Skirt! To create this look, I used the skirt pattern pieces of Butterick Retro '56 Dress Pattern, B5813, and then created my own customized waistband, and pockets. I also love how this fabric isn’t instantly recognizable as an E.T. Print until one looks a little more closely! Check out a few more photos: 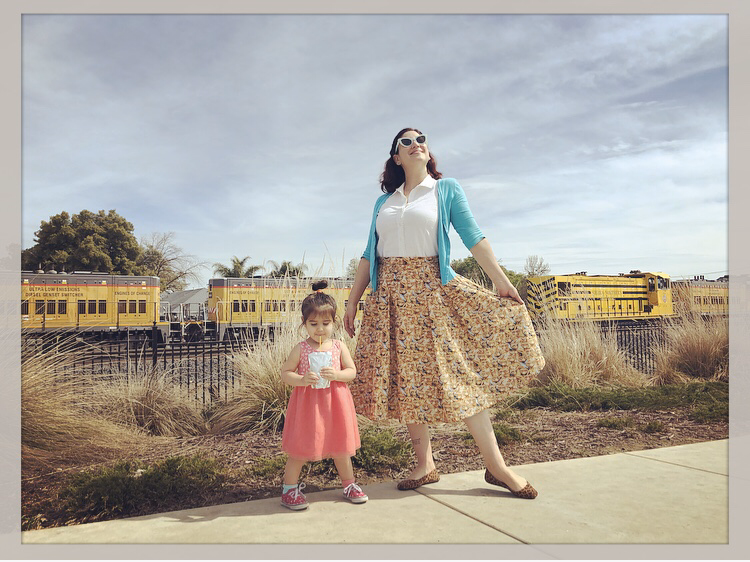 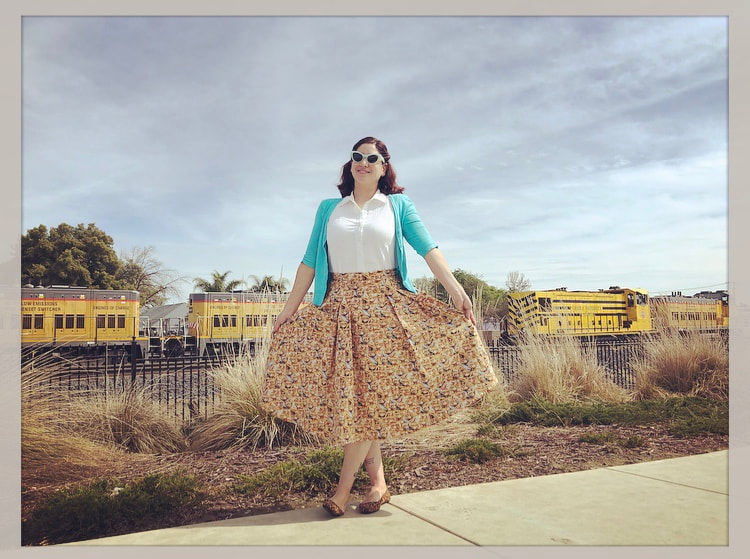 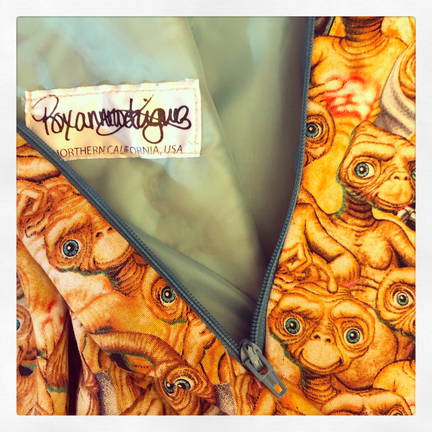 Close-Up photo of back zipper, and contrasting lining. Thank you for reading about my latest creation, my Vintage Inspired E.T. Skirt! I am looking forward to creating several more skirts and dresses for myself in the near future, as well as a 1930's Girdle! More Blog Posts coming soon! 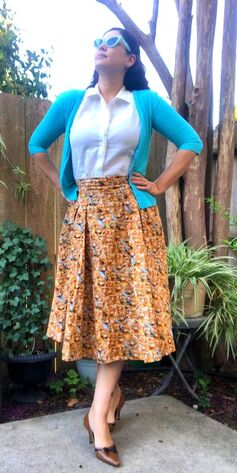 Related Links:
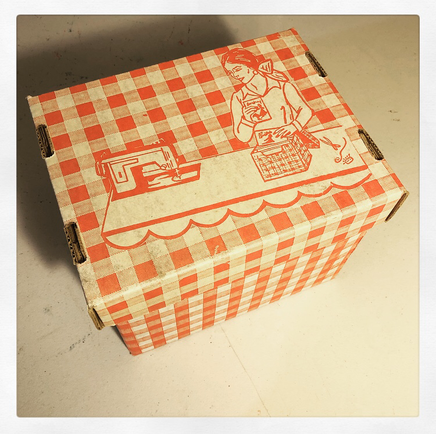
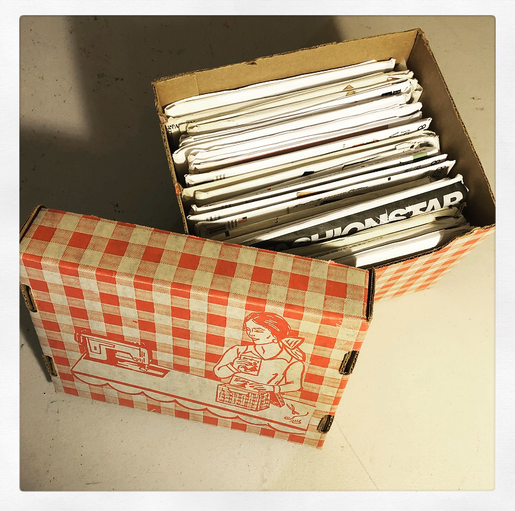
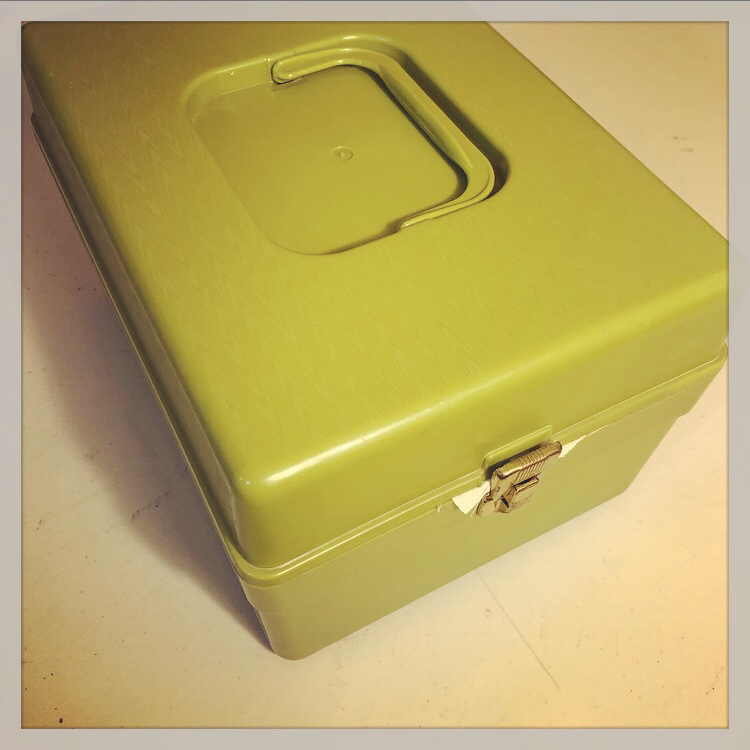
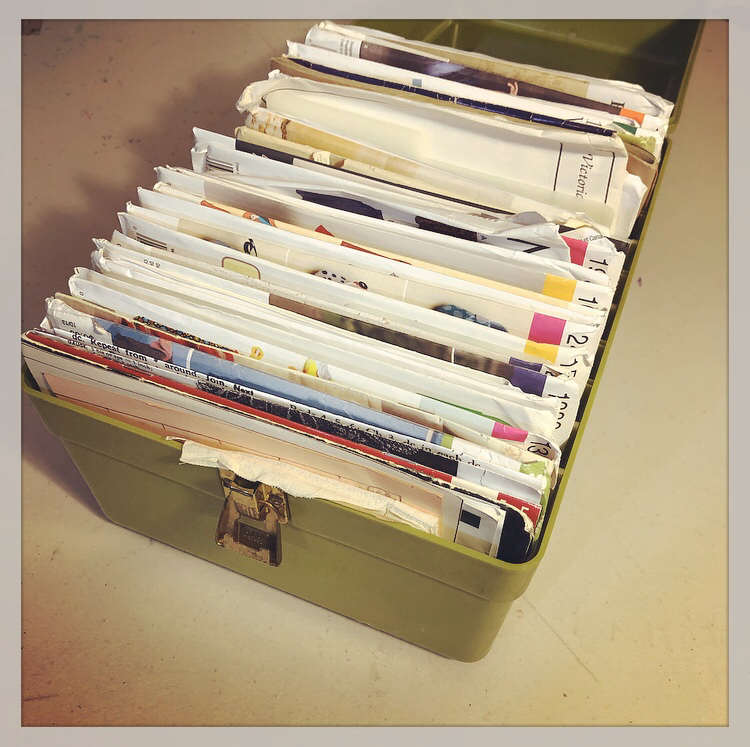
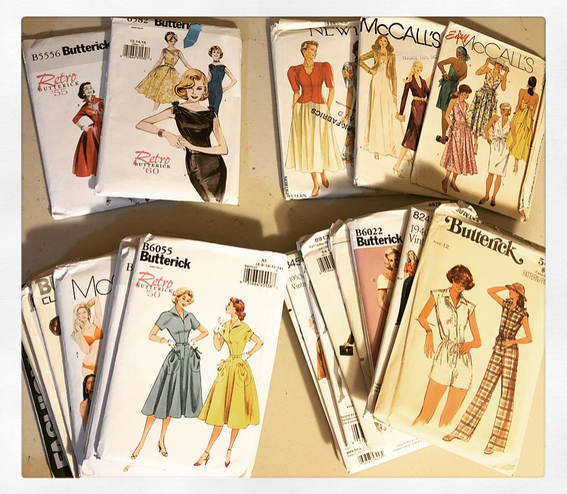 Just some of the many Commercial Sewing Patterns that I have acquired over the years. I have at least a hundred! As a busy mother of four, working mostly from home, I try to keep myself, my home, and my work space as organized as possible. By staying organized, and having a place for everything, I am able to save time finding exactly what I need when I need it, as well as not having to remember where every individual thing is: it is where it should be. Often, my friends or family ask me for tips on keeping their sewing space, or crafting area, organized and tidy. Today, I would like to share with you a few ways that I organize my Commercial, or store bought, Sewing Patterns. My organization tips in this regard, are sure to make finding the perfect pattern within your collection, or locating a specific design detail, very fast and with ease! Take a look at this charming Vintage Cardboard Sewing Pattern Holder of mine! It is great for storing my unused Commercial Sewing Patterns.
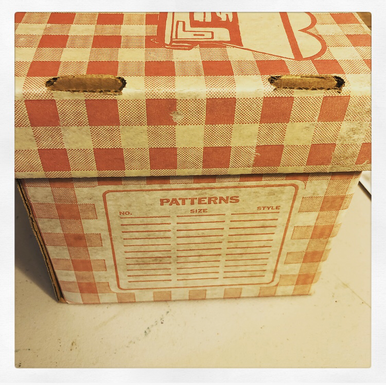 My Vintage Cardboard Sewing Pattern Holder This is my second Vintage Sewing Pattern Box, made in durable plastic:
When I began learning to sew, I began to accumulate Commercial, or store-bought Sewing Patterns for use in my sewing projects. I bought two Sewing Pattern Boxes over time, that I used to store them in, but I found that once I used a Commercial Pattern, it was hard to fold them back up and stuff them back into the pattern envelope it originally came so neatly folded in. If you also sew, you most likely know exactly what I mean... The delicate tissue that the patterns are printed on, can be challenging to fold as flat as they once were, especially after being cut and used! I found myself wrinkling or damaging my patterns! 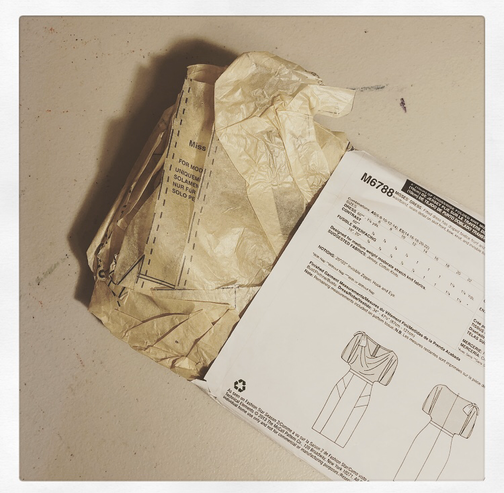 Stuffing a used Sewing Pattern back into its original envelope proved to be less desirable than I would have liked, so I store my used sewing patterns a different way... As I began attending Pattern Drafting classes in Fashion Design School, I learned a far more organized approach to storing patterns, and found that this proved useful in archiving my growing collection of Commercial Sewing Patterns. Although I draft, and drape, my own patterns for my original designs, when I am creating specific garments for clients, or for myself, I sometimes am able to use Commercial Patterns, and may modify them occasionally to fit my purpose, or my client's size. As a Fashion Design Professor once told me, "There is no need to reinvent the wheel!", and if I am making a garment that already exists as a pattern, why not save time and use the pattern available? This is a Pattern Drafting Binder from my Fashion Design School days! I started this binder while taking a Pattern Drafting Course in College. My Professor had us store our drafted patterns in plastic sheet protectors, neatly organized in a binder. Pictured here are Collar Variations I drafted back in college. It is easy to see what patterns I have on hand, and it is easy to access them this way! 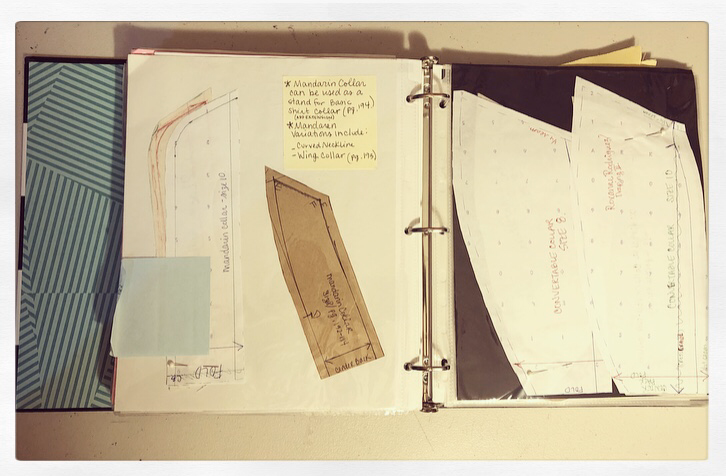 My Pattern Drafting Binder from College. The pages shown here are sheet protectors holding Collar Variations I had drafted. After taking this Pattern Drafting class, I found that by continuing to store pattern pieces in sheet protectors held within sturdy binders, I was able to keep my used Commercial Sewing Patterns very organized. Here are some of my Commercial Sewing Pattern Binders, organized by clothing category: 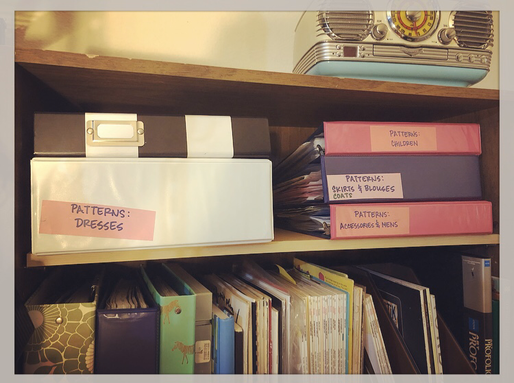 My Commercial Sewing Pattern Binders, organized by clothing category in my Sewing Workroom. In addition to my Pattern Binders, I store my hand-drafted patterns on a garment rack, organized by clothing category in my Sewing Workroom. 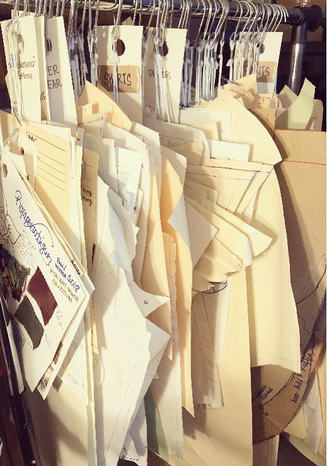 A Rolling Rack in my Sewing Workroom that holds my hand-drafted sewing patterns: organized by clothing category. Now, check out how I organize my Commercial Sewing Patterns once I use them... First, I open the pattern and cut out all the pattern pieces. Yep, all of them. Although this is a bit time consuming, depending on how many variations there are in the pattern packet, it is well worth spending the time, when going back to use the pattern in the future. The following photo is of Simplicity Sewing Pattern, #8250, a 1950’s Vintage Reproduction of a Lined Bolero, and a Skirt. As you can see, this single pattern packet contains three separate patterns: Style A, a Pocketed Skirt, Style B, a Skirt without pockets, and Style C, a Lined Bolero. 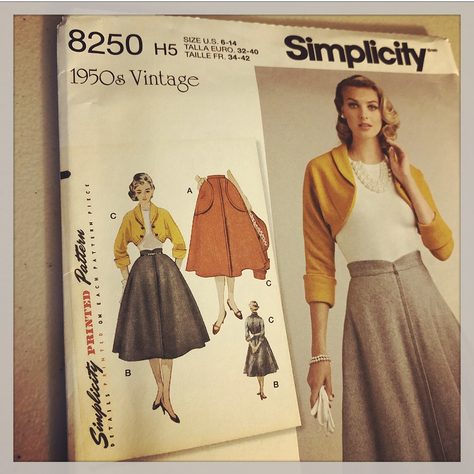 Simplicity Sewing Pattern #8250, A 1950's Vintage Reproduction of a Lined Bolero and Skirt. When I begin to cut out the pattern pieces, I separate the pattern pieces into piles. I make a pile for Style A pattern pieces, a separate pile for Style B pattern pieces, and a separate pile for Style C pattern pieces. In this case, the skirt pattern is the same for both Style A as well as for Style B. The only difference is extra pattern pieces for the pockets. I make a separate pile for pocket pattern pieces. 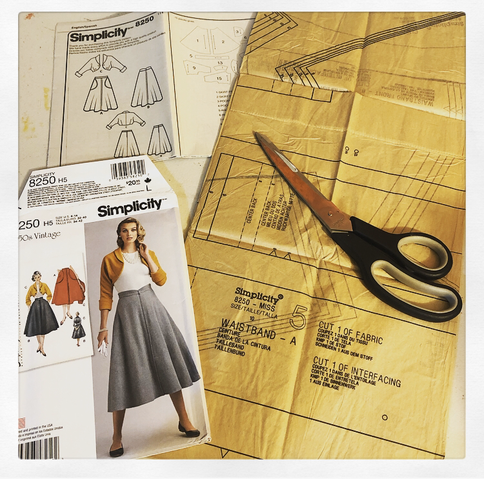 Removing the contents of a Commercial Pattern Packet: Pattern Packet Envelope with Illustrations and Notion Instructions, Pattern Instructions, and multiple Paper Patterns printed on large tissue paper. Once I have all my pattern pieces cut out and organized in separate piles, I place each pattern pile into its own plastic sheet protector. I place the Sewing Pattern Envelope, as well as all Sewing Instructions into its own sheet protector. Most patterns will use 5 sheet protectors or more. I then place the filled sheet protectors, in order, into my pattern binder. I currently, have, and use, several binders. I have a binder for Women’s Dresses, Women’s Separates, Children’s Clothes & Children's Projects, Accessories, and Men’s Clothing. Check out my Pattern Binder for Women’s Dresses. Here I have turned to the page that features Butterick Pattern #B5813, a “Retro 1956” Dress Reproduction Pattern. The pattern envelope illustrates three separate styles. Behind the pattern envelope I have stored the pattern instructions: 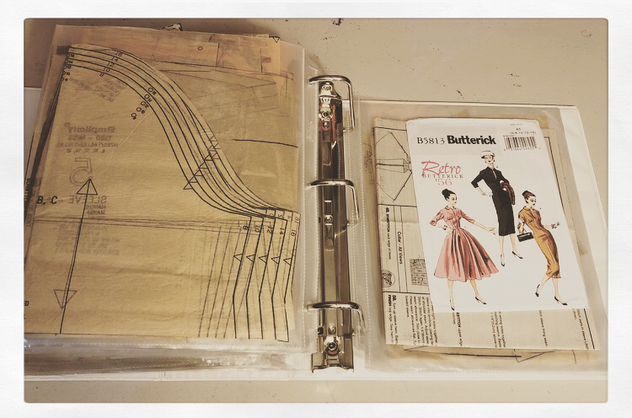 My large binder containing Women's Dress Sewing Patterns. Here I have turned to the page featuring Butterick Pattern #B5813, a “Retro 1956” Dress Reproduction Pattern. The following page in my Pattern Binder, is a sheet protector carrying all of the pattern pieces for Skirt C: 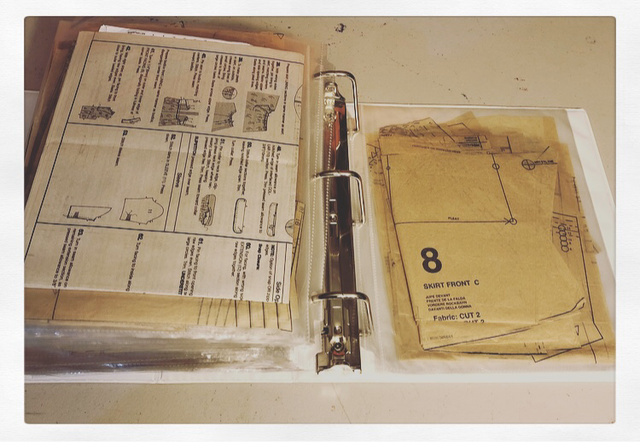 Next, I have the bodice pattern pieces for Styles A, B, and C. These are the same pattern pieces for each style. Only the skirts are different on these three pattern styles. 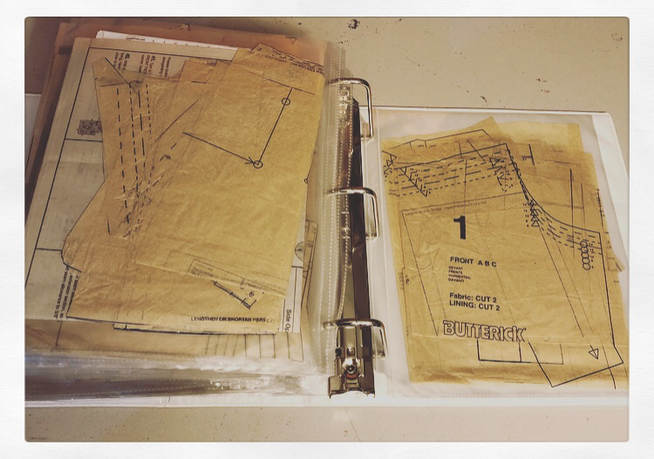 The next sheet protector holds the pattern pieces for the collar. Although this is the same collar for all three dresses, I keep this design detail separate, so I can easily pull out the collar pattern for other projects if needed. I often do this with sleeve pattern pieces as well. 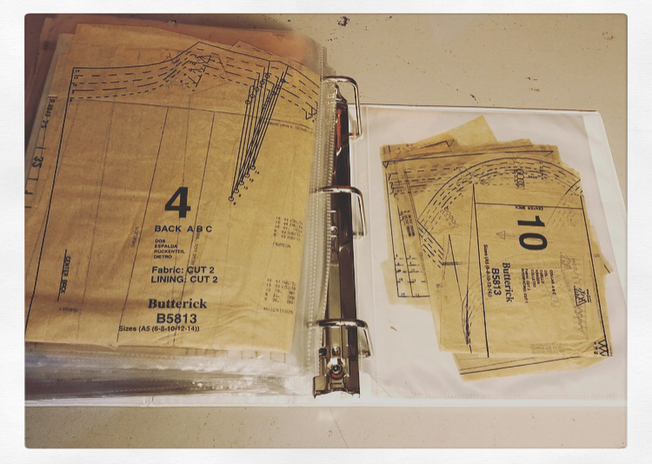 Next, I have the Side Front pieces for Style A and Style B... 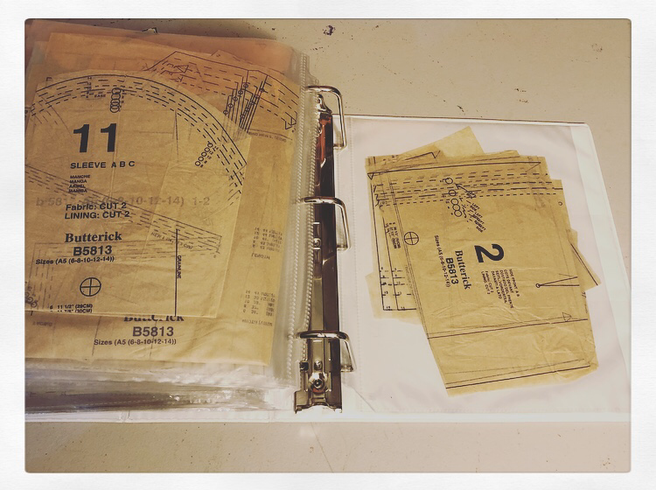 Lastly, I have the Front Band pattern pieces for Style B, and the Belt pattern pieces for Style C. 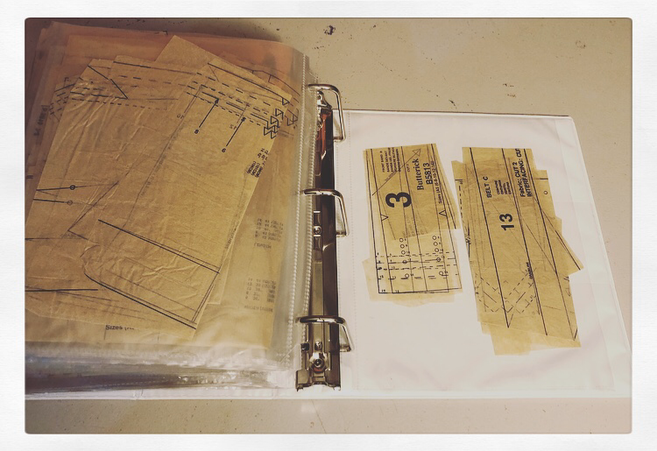 I have found that by separating each section of the pattern, it's various styles, and its unique design details this way, I can easily find the pattern pieces that I need for any project idea. For example, I may want to make only a skirt, but by using a specific dress pattern. If that is the case, I flip to the page of the sewing pattern desired, and then I turn the page to the skirt pattern pieces. I don't have to rummage through a folded wad of tissue paper stuffed into the pattern envelope to find the pattern pieces that I need! If I want to make a "Frankenstein" Creation of a dress, I can easily choose a bodice from one pattern, a skirt from another, a collar from another, and so on. This organization technique makes my imagination run wild with possibilities! I can only hope that eventually all of my hundred-plus Commercial Sewing Patterns will be archived this way! For now, I only add them to the binder as they are used. Do you find this Sewing Pattern organization method helpful? I hope that you do! Please leave me a comment and do tell how you currently organize your sewing patterns. Do you have a better way? I hope you enjoyed stepping into my Sewing Workroom and seeing how I use my Commercial Sewing Patterns. 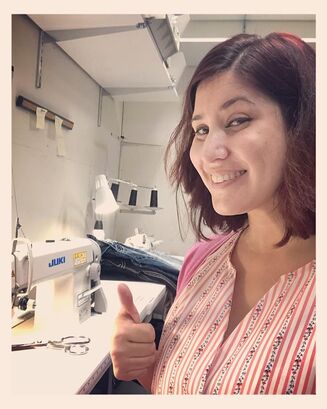 This is me, Roxanne! Thank you for reading my Blog! Related Links:
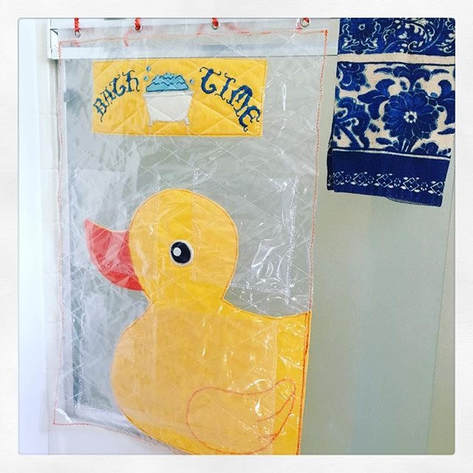
As a Freelance Fashion Designer, specializing in Women's Wear, I don't often receive client requests for Children's Clothes or for other children's sewing projects. Every once in a while, however, I do receive such a request. Recently, I finished my first sewing project of the year for a dear friend of mine, Custom Keepsake Teddy Bears, which was a first for me! As that project came to completion, along with the recent end of 2019, and the beginning of a new decade, I began to reflect back on the few Children's and Baby Projects that I have thus completed in my sewing and design career. In the last two years or so, I have only worked on a hand full of items for babies, or children. You may recall one such project, that I completed in October 2018, when I had the privilege of creating Dance Costumes for the P.R.O.U.D. Modesto Girl's Dance Group. You can check out my Blog Article detailing behind the scenes design studio details of that project by clicking HERE. In addition to the P.R.O.U.D Modesto Girl's Dance Costume project, I have created the following children's projects for my own family, friends, or for my clients... Custom "Bath Time" Baby Toy Holder 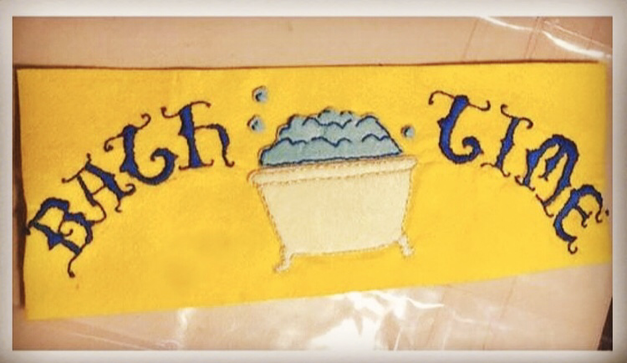 Work in Progress: Hand Stitched Embroidery, and Hand-Cut & Stitched Bathtub Applique, on Felt. By Roxanne Rodriguez Rangel.
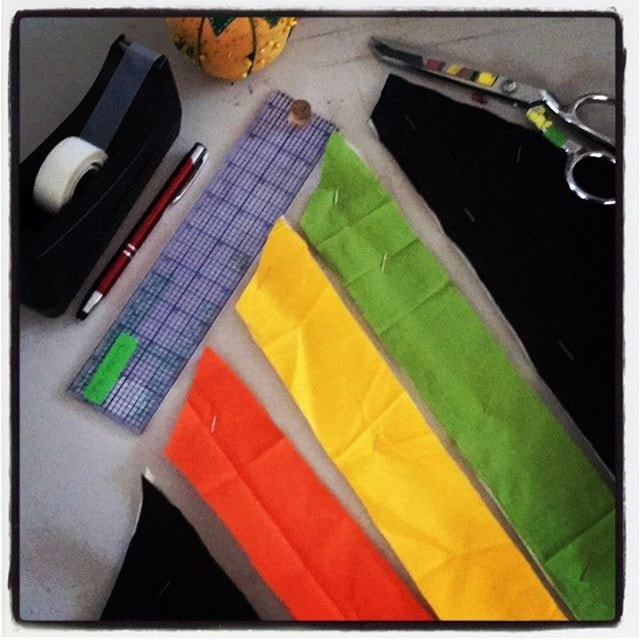
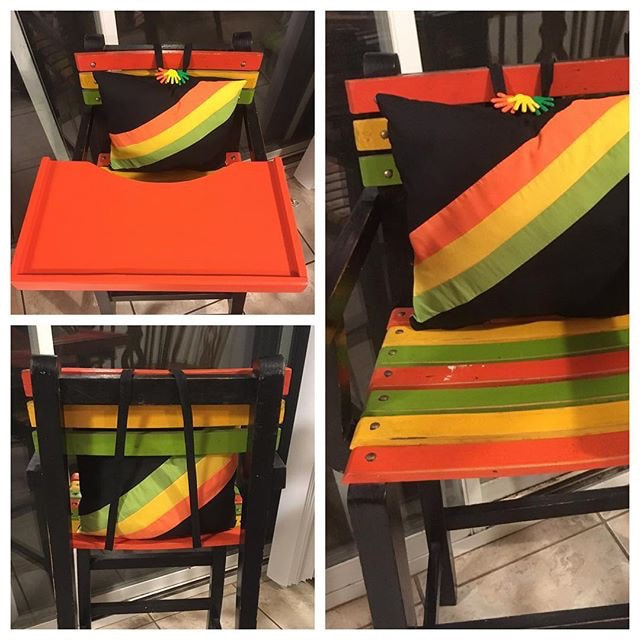
To achieve the idea I had in mind, I Hand-Stitched the words "Bath Time" in Embroidery, and I then cut and stitched a Bathtub Shaped Applique design which I attached to yellow felt. I also cut out a Rubber Ducky shape, also in felt, as well as the eye and duck-bill pieces. I sandwiched the felt details in between two sheets of plastic. On the top layer of plastic, I cut out and sewed three clear pockets, that would later be used for toy storage. The pockets have drain holes punched through the bottom to allow for drainage of wet toys. I loved the final outcome of this project! It is a fun piece to display in my children's bathroom, that is both decorational and functional! My family and I have gotten much use out of this toy holder over the past two years, and it has held up quite well! Custom High Chair Pillow After my daughter, SkyLynne was born, my Mother-in-Law, gave our family an old high chair that was my husbands when he was a tot back in the 1980's! I loved the colors, and simplicity of the 1980's design! After a fresh coat of orange paint on the tray of the high chair, and with the addition of a safety latch to secure the tray down, I then created a custom pillow to help support our growing infant. I used scrap fabric, that I already had on hand, in my fabric supply bin, of the same colors, black, orange, yellow, and green, that the High Chair originally featured. Take a look at the pillow that I created for our high chair! I am sure that it will be a treasured keepsake, along with the high chair for many more generations to come!
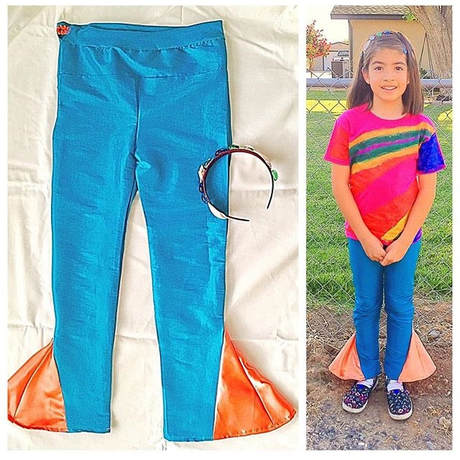
Custom Children's Mermaid Inspired Pants
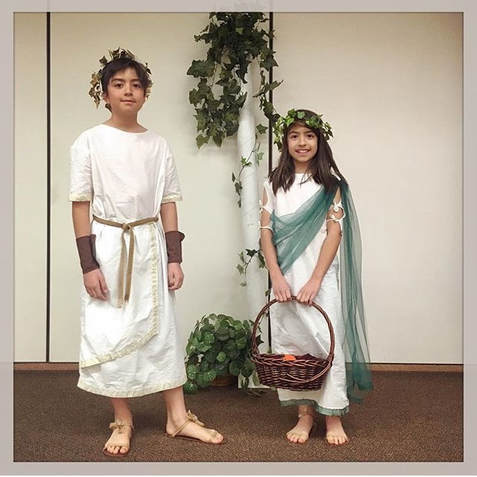
Custom Children's Greek Play Costumes
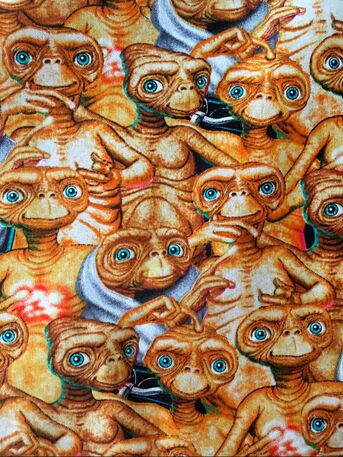
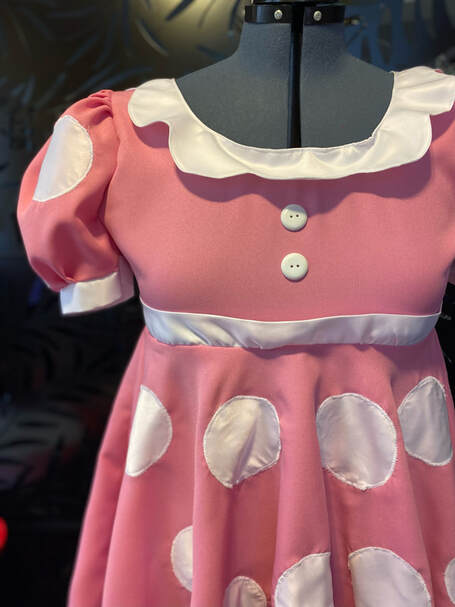
They were so happy with their costumes! Their increased confidence was evident in both of their outstanding performances! I can't wait to create more costumes for upcoming school plays! 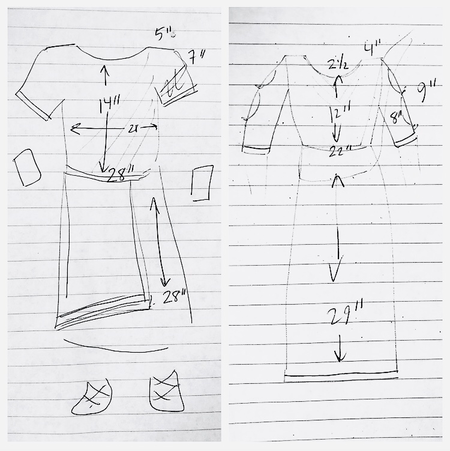 Quick sketch of measurements and design concepts for my children's Greek Costumes! Baby Couture 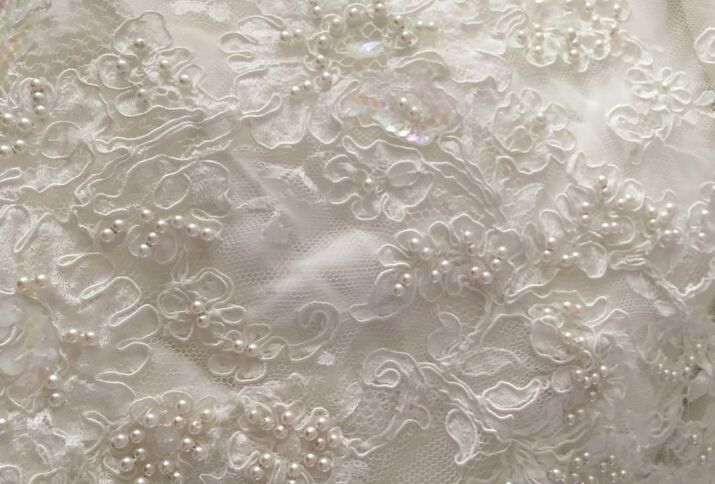 This is the lovely fabric from my clients Wedding Gown. I used the train of her dress to create a toddler's formal gown, bonnet and booties, out of the fabric! In the Spring of 2018, I was hired to create a fantastically creatively fun piece for one of my clients. The project was to create a baby's formal gown by using the material from my client's wedding dress! The wedding dress was an amazingly beautiful beaded lace gown with a long detachable train. I was honored to have been chosen for this special task! Because the wedding dress had a huge train that separated from the wedding gown, I was able to use the train fabric, leaving the beautiful wedding dress intact for future generations. The fabric included lovely beaded lace applique, that I took apart very carefully. All of the pieces I created, a Baby Formal Gown, a Bonnet, and Beaded Booties, are made of the original wedding dress material. I removed all of the beaded lace applique from the original fabric, and then reattached the beaded lace to the bonnet, booties, and dress. The final outcome was perfect! 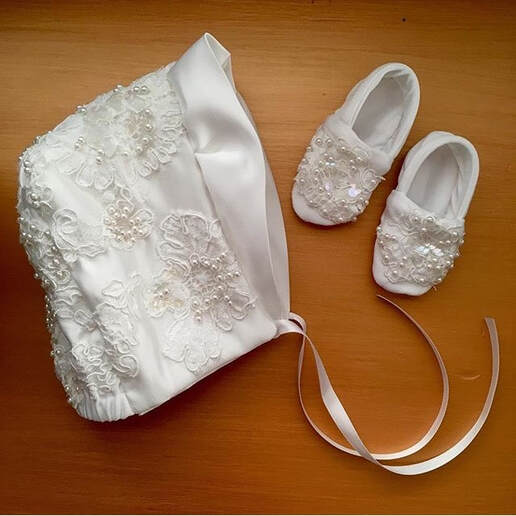 Formal Wear: Baby Bonnet and Baby Booties, by Roxanne Rodriguez Rangel 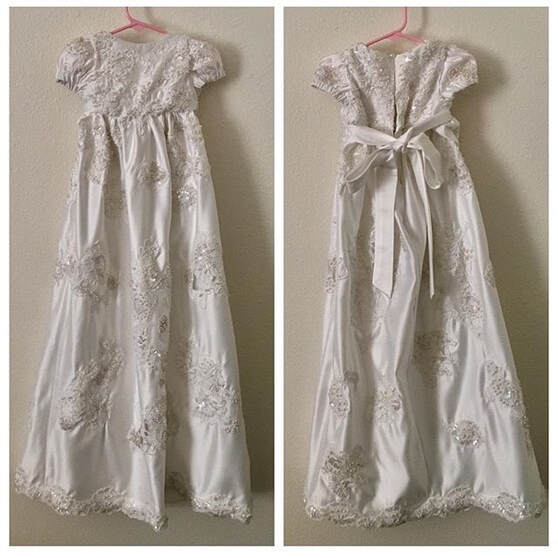 Formal Wear: Baby Couture by Roxanne Rodriguez Rangel Check out this video featuring Behind the Scenes Photos of this project in my Designer Workroom: E.T. Pillow I love all things E.T.! Last summer, I was in the fabric store, and my eye instantly caught sight of this marvelous E.T. novelty fabric! I couldn't help myself, and I bought several yards to make myself a fun skirt (Click Here to see my Vintage Inspired E.T. Skirt)! I used the leftover fabric remnants to construct a lovely little pillow for my daughter's room! I love it! (My sister, Desiree, thinks that E.T. is absolutely creepy! I can't wait to surprise Desiree by wearing my new E.T. Skirt to her house! He he...)
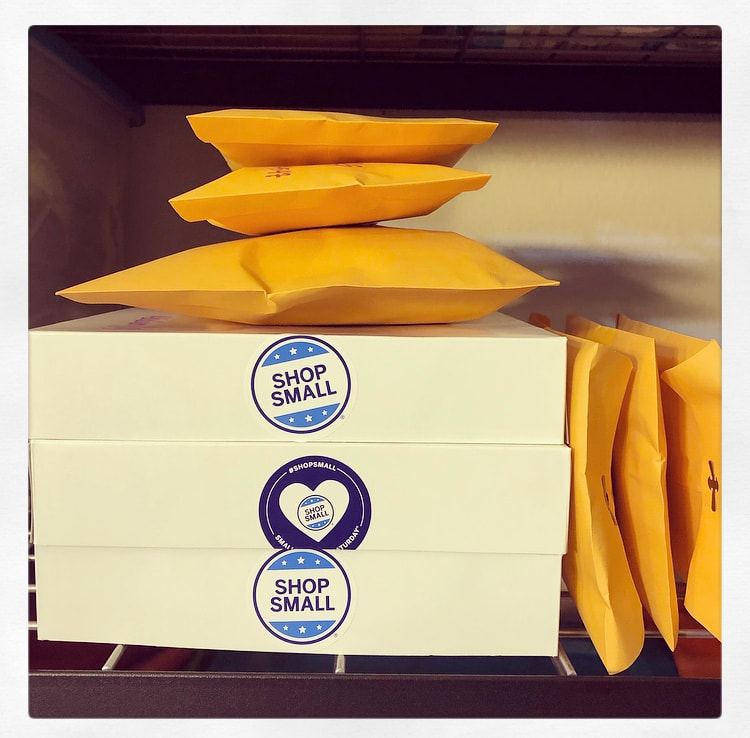
(Can you find my E.T. Doll in the photo of my E.T. Pillow? I snuck him in there just for Desiree! I hope she is reading this article and is creeped out! Muah ha ha...) And now for my most recent completed children's project... Custom Keepsake Teddy Bears A very dear friend of mine, Megan, experienced tremendous loss, when her father passed away several years ago. Since his passing, she, and her only sister, have been married, and have had children of their own. Unfortunately, these grandchildren were born after their Grandpa passed away, and the children were never able to met him personally. Megan asked me if I could turn shirts that belonged to her father into a keepsake teddy bear for her son. I loved the idea, and agreed instantly, especially since I know the family so well. When Megan brought to me her father's shirts, I was pleasantly surprised that there were four shirts, with enough fabric, that would allow me to create four separate teddy bears! I didn't tell her that I made four until I presented the final project to her. My idea was that she, her sister, as well as both of their children would have their very own keepsake teddy bear to cherish, or she can do whatever she wishes with them! She loved the idea and she loved the teddy bears! Check out my Work In Progress photos of this project, as well as what the shirts looked like before I transformed them into bears! 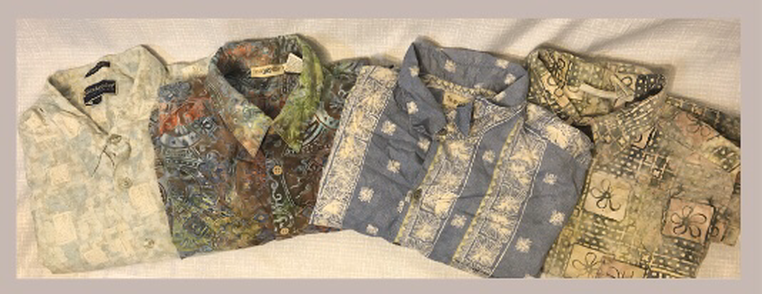 Photo of Shirts (Before) 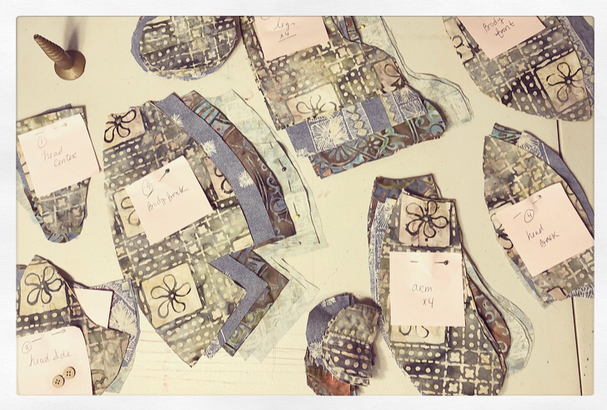 Work in Progress: Bear Pieces... 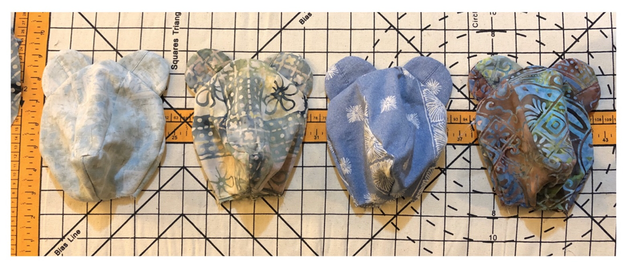 Work in Progress: Unstuffed Bear Heads 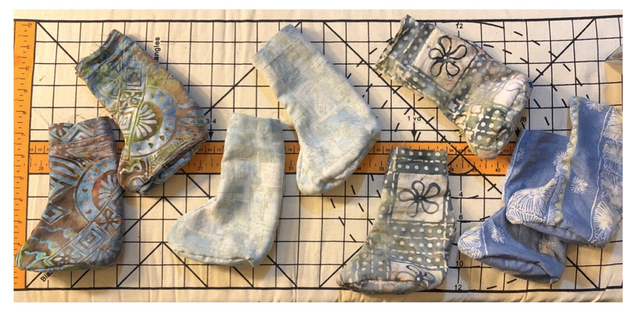 Work in Progress: Unstuffed Bear Legs... 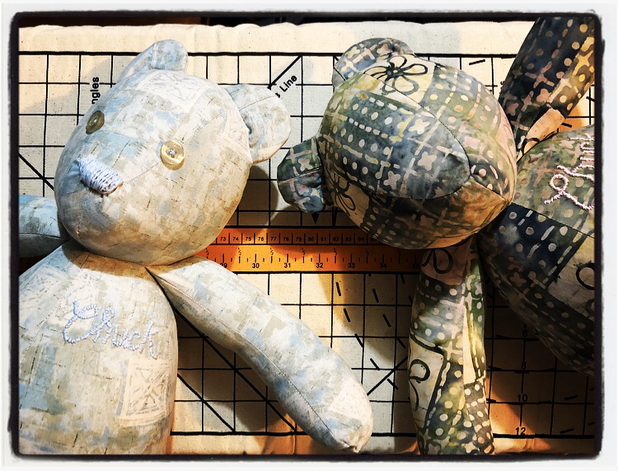 Final Details: Button Eyes and Embroidered Noses... Check out the finished bears: 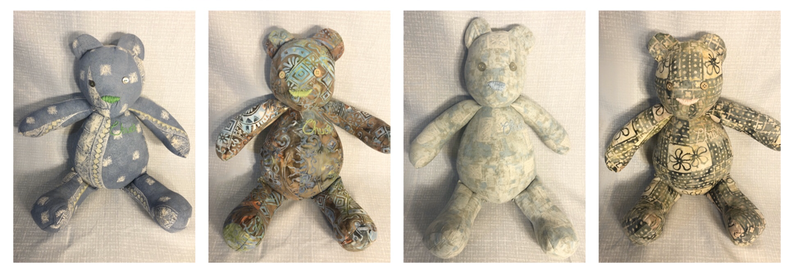 The four finished Keepsake Teddy Bears, made out of four Men's Button Front Shirts. 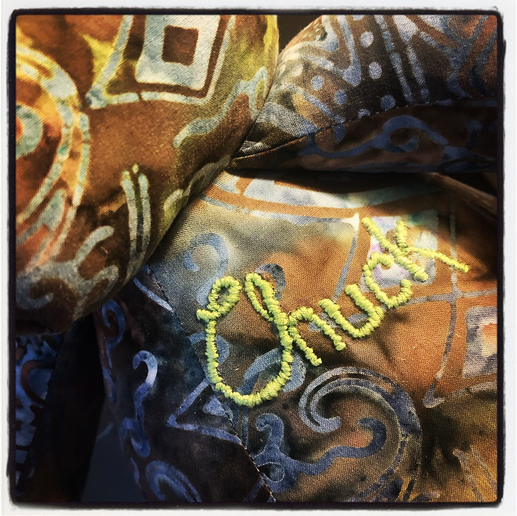 Close up of the Hand-Stitched Embroidery on the Teddy Bears chest. I embroidered, by hand, the name "Chuck" on each of the four bears. 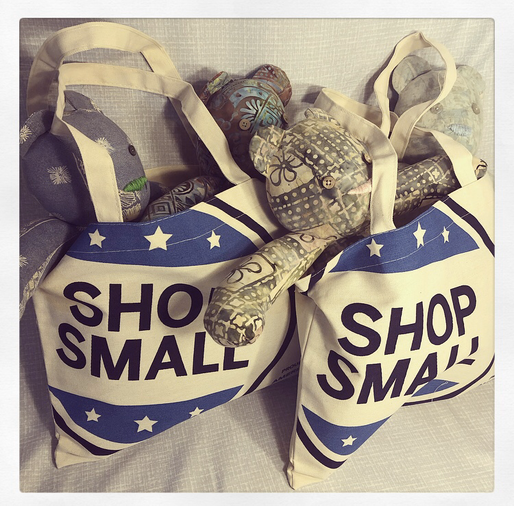 Ready for delivery! Thank you to American Express for supporting Small Businesses, and supplying me with shop supplies every year, including these "Shop Small" Totes! Making these Teddy Bears was a fun project, and I definitely learned much in how to improve my Stuffed Animal making skills! It was especially hard for my youngest two daughters, ages 2 1/2, and 1 to watch me create Teddy Bears that they could not play with! I have since been inspired to create a Fig from Tumble Leaf Doll, as well as a few Frida Kahlo Inspired Dolls! I will keep you readers updated on those projects! That completes my recap of the sewing projects that I have made for children or babies! Although these types of projects are not my professional specialty, it is definitely fun to create sewing projects that are different than what I normally do, and that are interestingly creative! I hope that you enjoyed my Blog Post! Which project did you enjoy viewing the most? Do you have any ideas for upcoming children/baby sewing or design projects? Please leave me a comment below with any of your feedback or opinions! Until we meet again, Dear Reader! Have a exceptional day! Related Links:
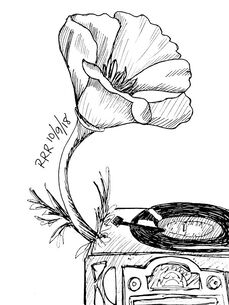
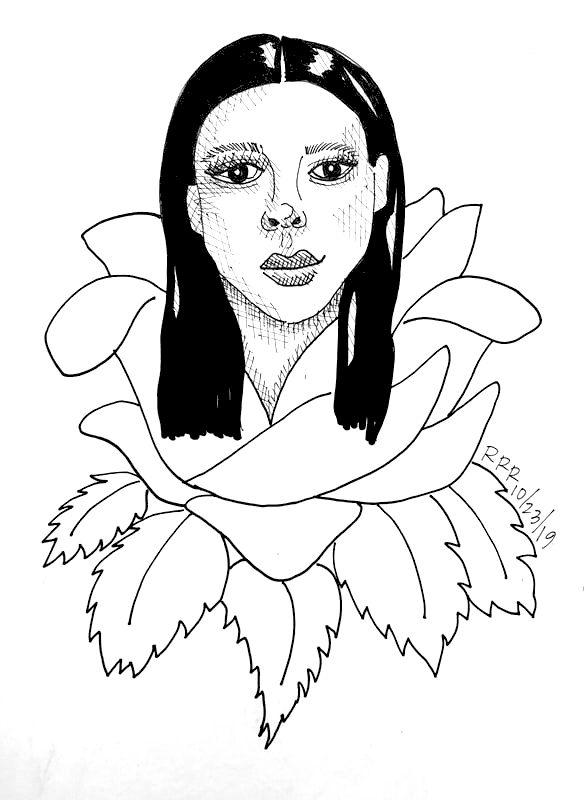
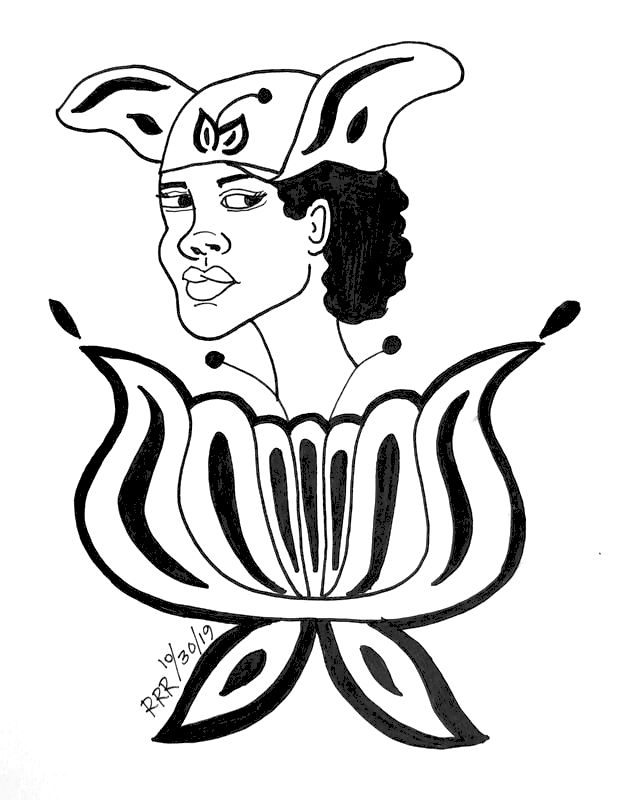
An Ink Sketch of mine from times past... Crab Rose in Ink, by Roxanne Rodriguez Rangel. My how fast the year passes by, and in a blink of an eye, the seasons change, our beloved October has come and gone, and (depending on where you live) wintery days are finally upon us!
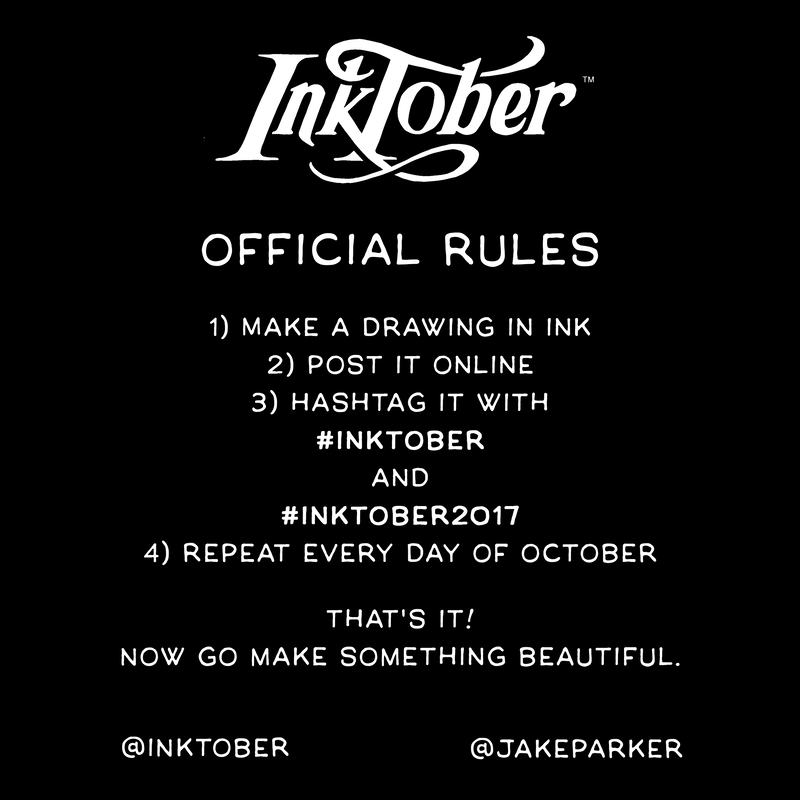
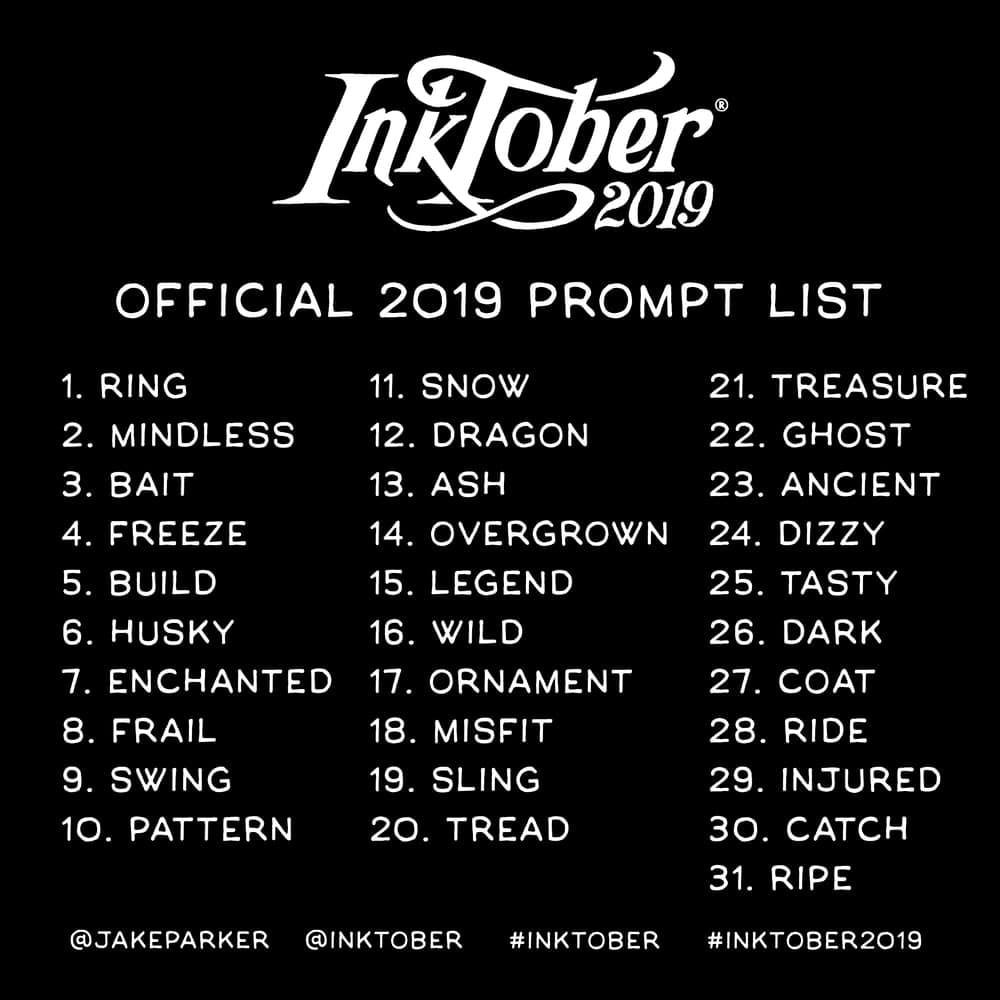
Here is the Official Rules of #Inktober, as well as the Official 2019 #Inktober Prompt List:
As for myself, this is the second year that I have decided, and been able to, participate in #Inktober. The first year I participated in Inktober was in 2017. During that year, I decided to opt out of using the provided Prompt List, and instead chose to focus my drawing mostly on Fashion Illustrations. You can check out the Blog Post that I put together about my participation in #Inktober2017, which includes each of my 31 illustrations from October 2017, by clicking HERE. Last year, during October 2018, I had fully intended on participating in Inktober once again, however, before I knew it, October 2018 came and went! I drew a measly three ink drawings during the entire month! Check them out:
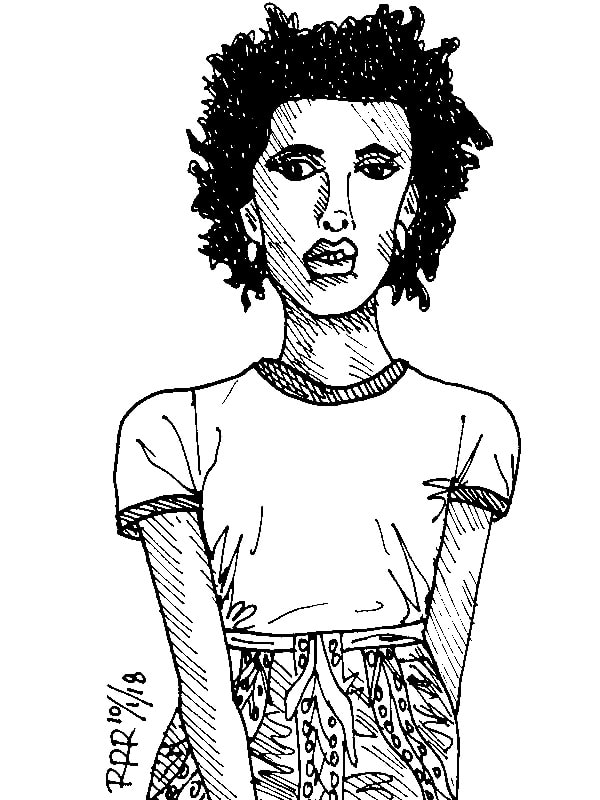
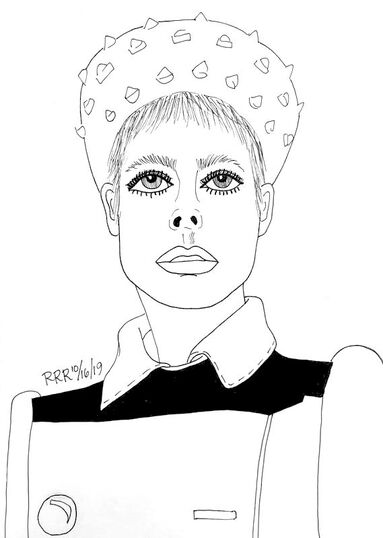
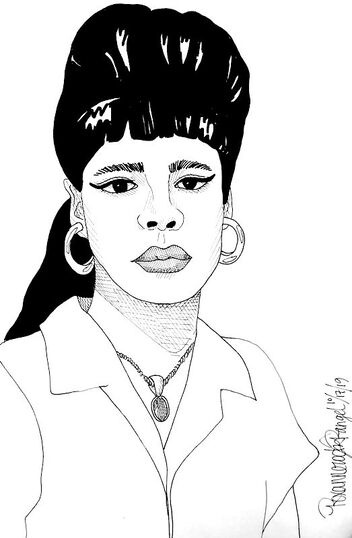
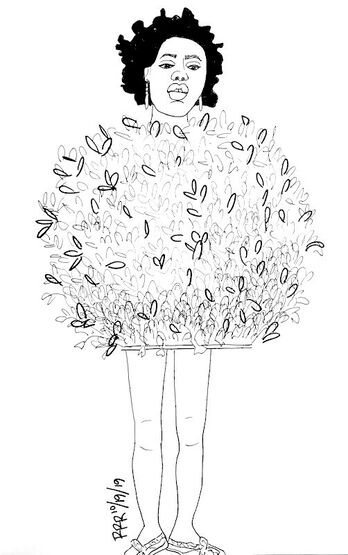
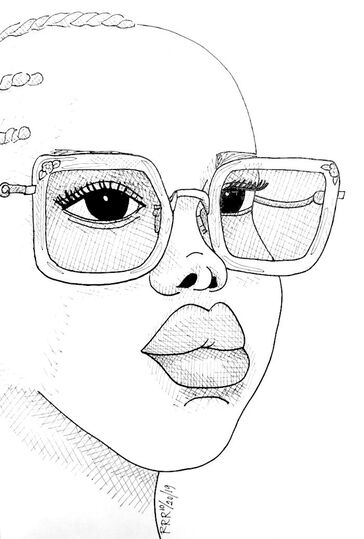
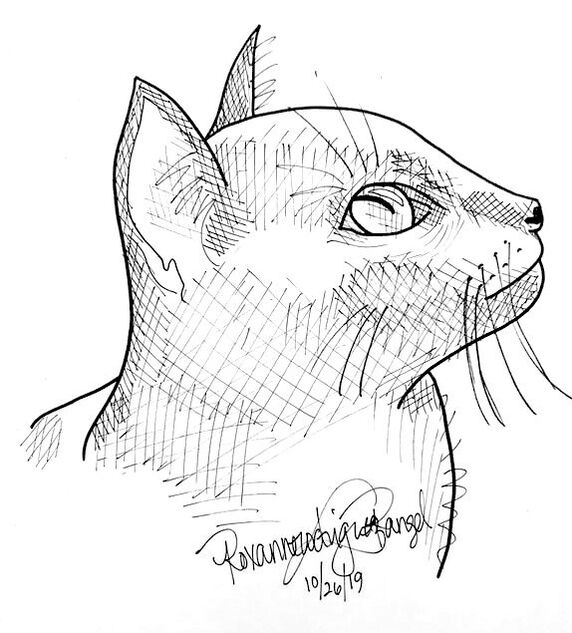
My #Inktober2019 Illustrations! Whenever I have the time to do so, which isn't very often, I love drawing Fashion Illustrations, or completing some sort of art project. Although I have been drawing all of my life, drawing women's faces has always been a challenge for me. When I took Fashion Illustration Classes in college, I began to improve in this area, but I still wasn't that good. During Inktober 2017, I began to get even better at drawing women's faces (which is the whole reason for Inktober: To improve in our inking!)! During that particular fall, I found that my rendering of a woman's face in pencil was fairly good, but then as I began to ink the drawing, my lady's faces became monstrous! My goal for #Inktober2019 is to improve in this area even more so! 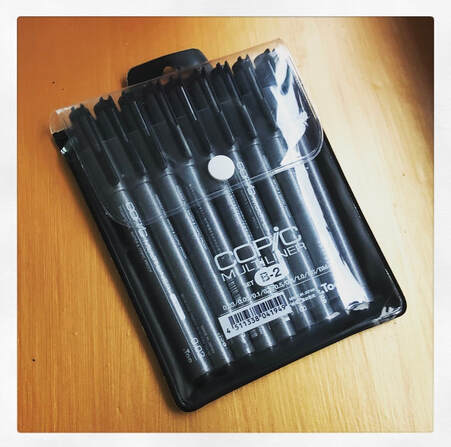 My NEW Copic Multiliner Ink Pen Set! It is Amazing! As October began to approach again this year, I made the goal to create 31 Ink Drawings, by challenging myself to draw (mostly) fashion related illustrations to sharpen, and fine tune, my inking skills! Usually, my preferred Inking Medium is Sharpies, regular and fine-tip, but this year I treated my Husband, and myself, to a new set of Copic Multiliner Ink Pens! I absolutely love them! Having this lovely fresh set of ink surely inspired me to keep on drawing! I also noticed that as I switched from Sharpies to Copics, and began using the various pens included in the Multiliner Set, I was able to keep the delicate details in my drawings of women's faces, that I was able to achieve with a sharp pencil! My drawings of women faces began to improve drastically! I hope that I can continue to advance in my face drawing, and in my inking skills! Lets see how I do! Now, continue to scroll down to view all 31 of my #Inktober 2019 Illustrations! Enjoy!
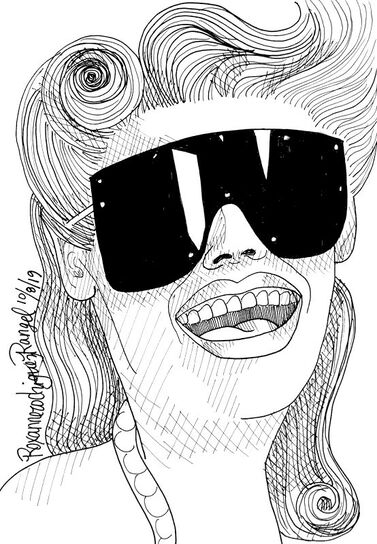
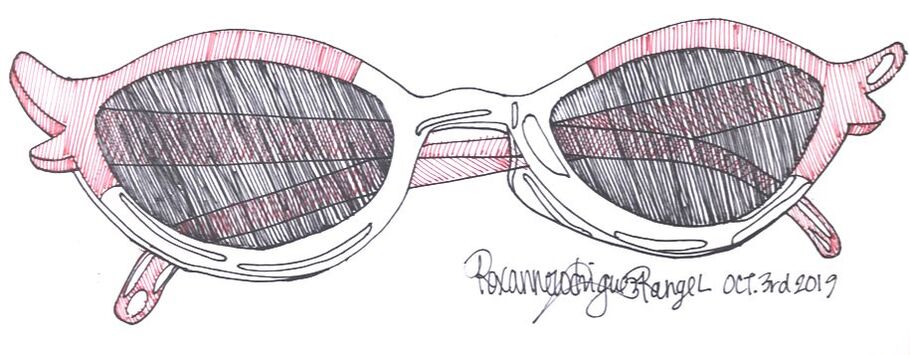 Inktober 2019, Day 3: Quick Sketch of my Sunglasses, in Sharpie
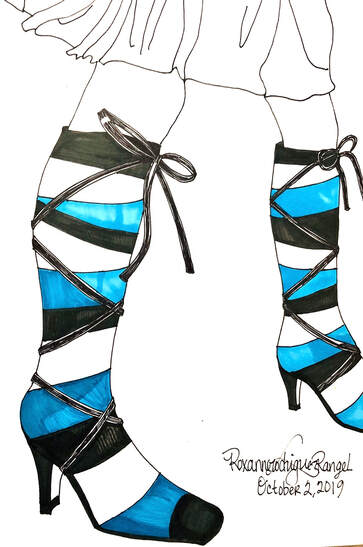
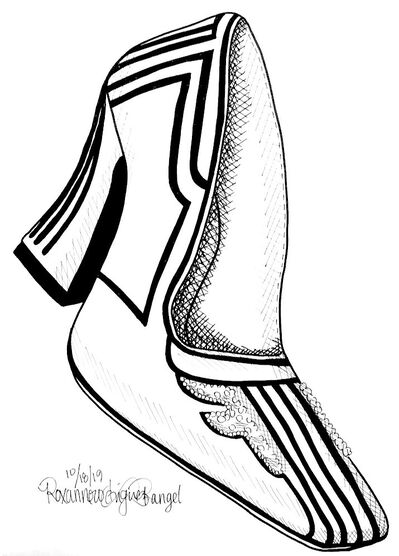
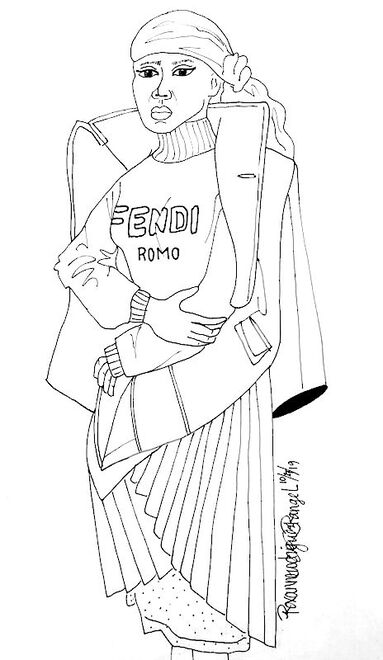
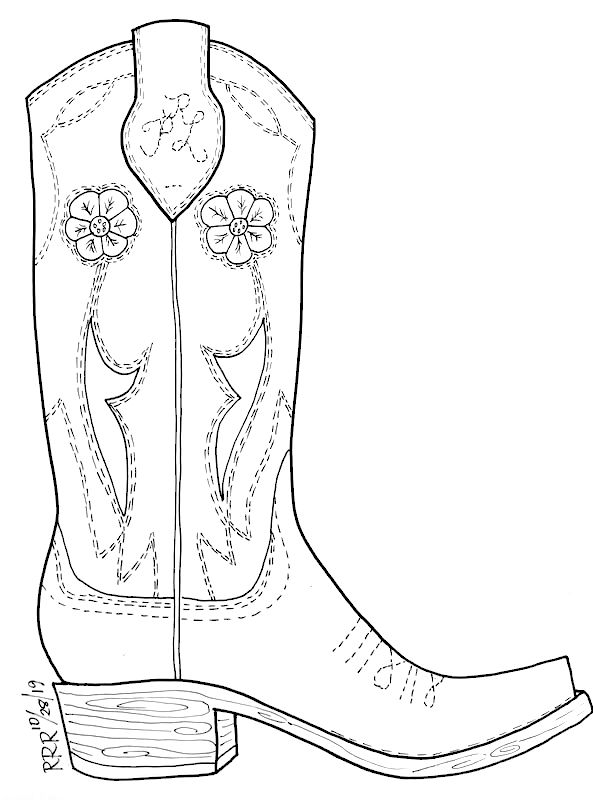
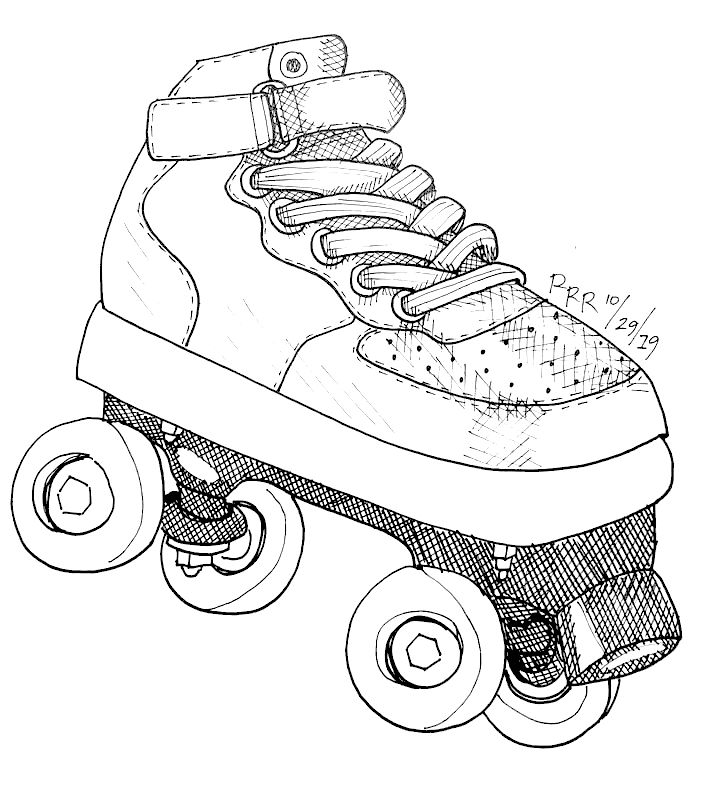
At this point, during my Inktober Challenge, I started using my new Copic Multiliner Ink Pen Set. I found that with the various multiliners included in this set, I was able to achieve much more detail in my cross-hatching and line work! Check out the following Fashion Illustration that I drew starting on Day 6. It is so much better than the illustration I completed just days before on Day 5! Also compare my drawing on Day 7, vs. Day 5: I used my Copics on Day 7 to create a full-body fashion illustration, where on Day 5 I used a Fine-Tip Sharpie. I am so excited with the outcome! 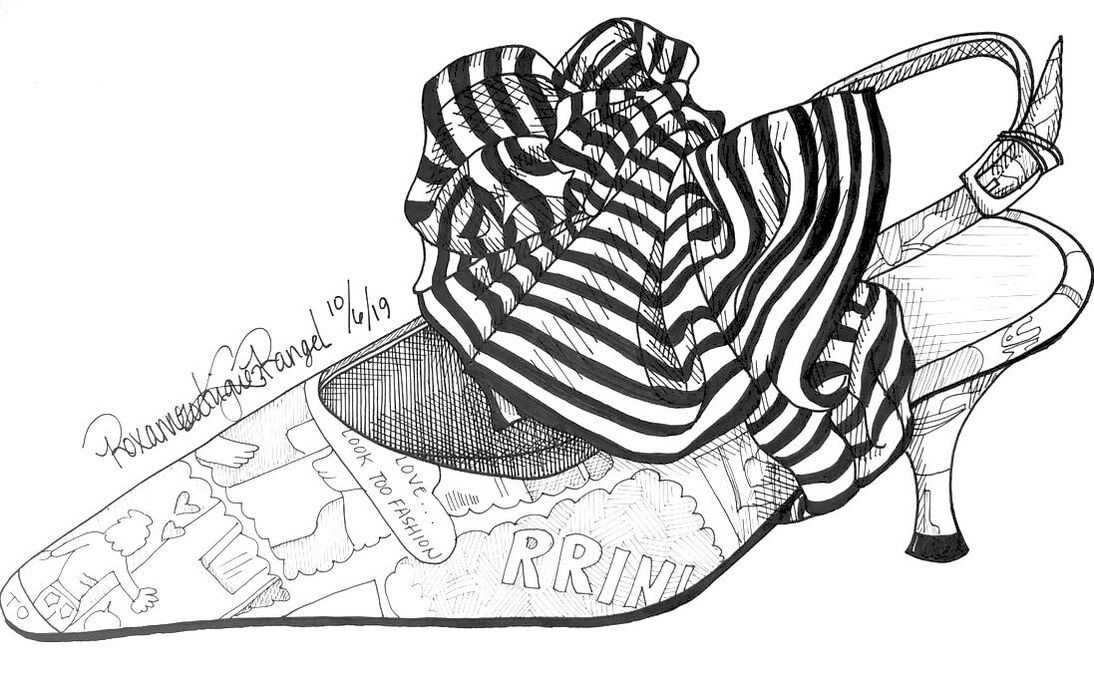 Inktober 2019, Day 6: Vogue Inspired Fashion Shoe Illustration in Copic Ink Pens
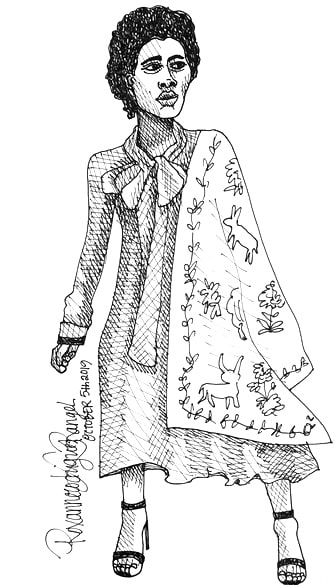
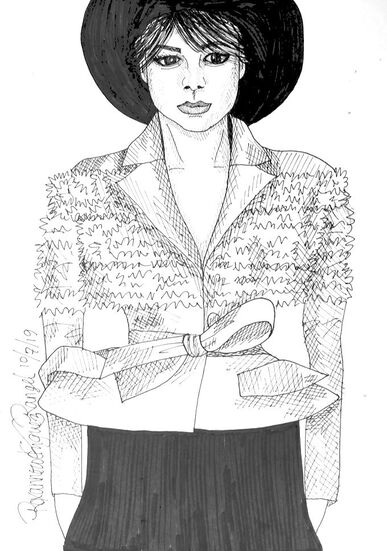
 Inktober 2019, Day 13: Vogue Inspired 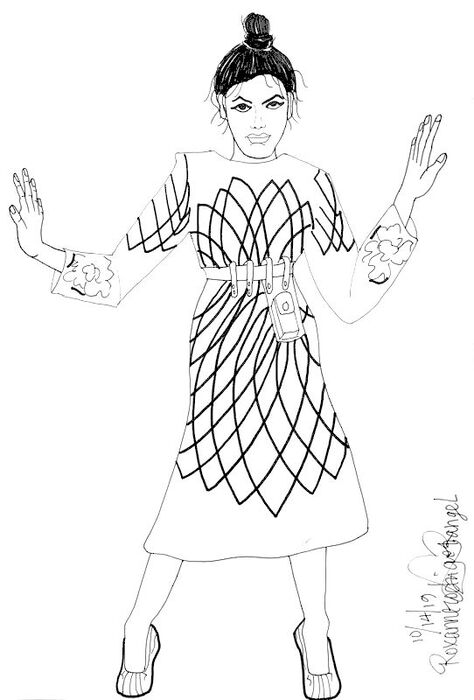 Inktober 2019, Day 14: Vogue Inspired 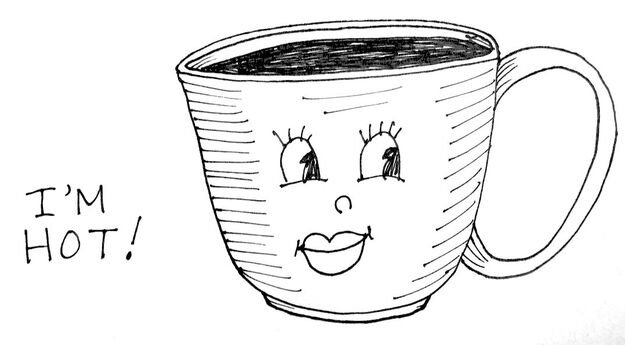 Inktober 2019, Day 15: Love Note to my Husband... "I'm Hot... For You!"
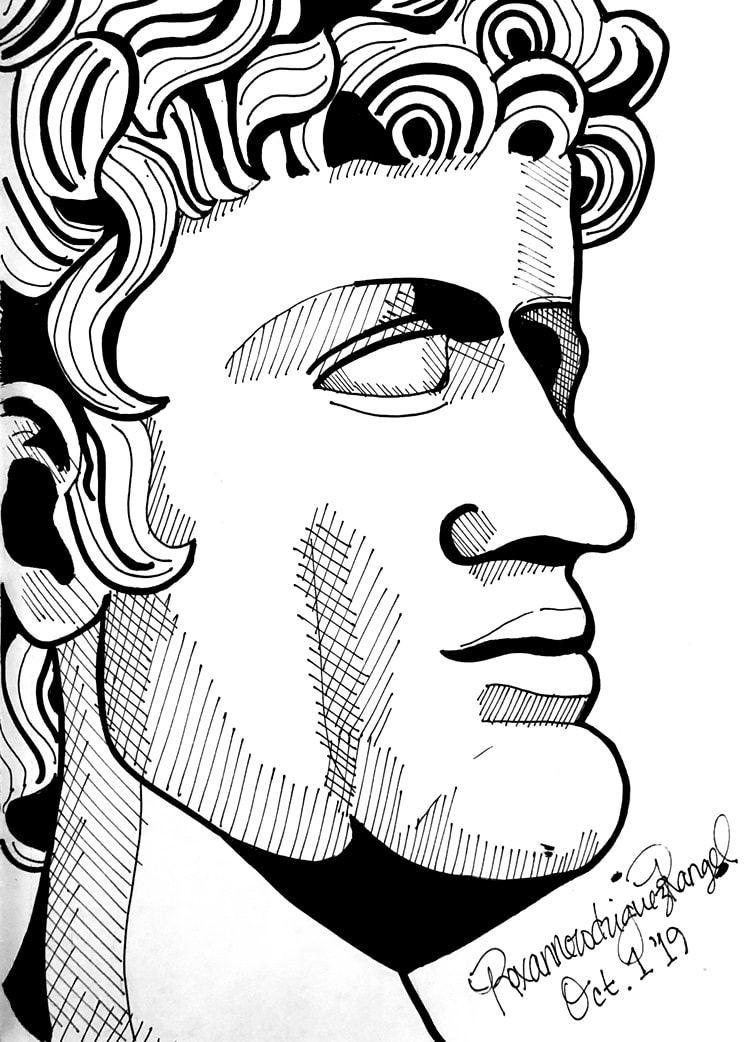
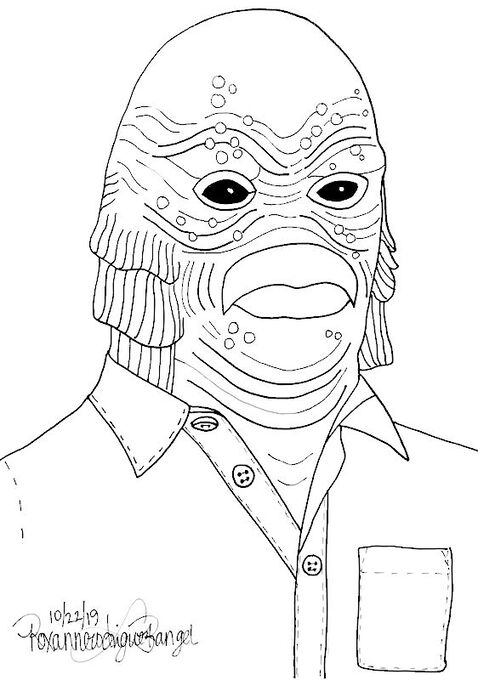 Inktober 2019, Day 22: Creature of the Black Lagoon, Inspired by the Unique Vintage Advertising Campaign- August 2019
 Inktober 2019, Day 31: The Fly, 1958 Inspired! Whew, that's all of them! I hope that you enjoyed viewing my #Inktober2019 Illustrations, as much as I enjoyed drawing and improving in my drawing and inking skills! Inktober 2019 proved again how challenging it is to find time each day to complete a drawing. I found myself simplifying my illustrations due to time. However, I am really happy with all of my artwork! Of course, I still have much improvement to grow, and I can't wait to start Inktober 2020! You know it will be here soon! I would love to hear your feedback on what you thought of my drawings! Which were your favorites? I personally love drawing Fashion Illustrations of Shoes! Which is something I never thought I would be as good at! I also found out how much I love my Copic Multiliner Pen Set! Did you participate in #Inktober2019? If so, share a link to your work in the comments below! Let me know what type of ink pens you used or prefer! I would love to see your art, and hear about your experience!  Thank you for reading my Blog! Have an Ink-credible Day! Related Links:
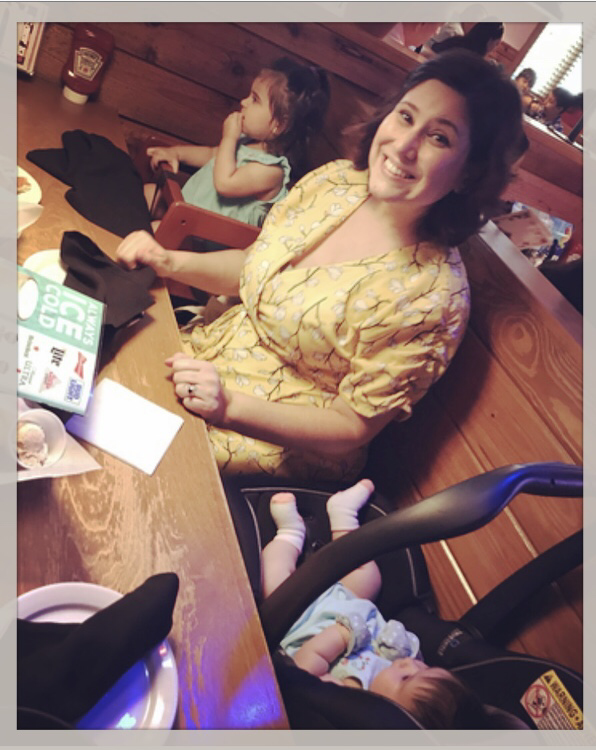
A Fashionable Motherhood! Part I- My Breastfeeding Friendly Wardrobe, with Ease and In-Style9/3/2019 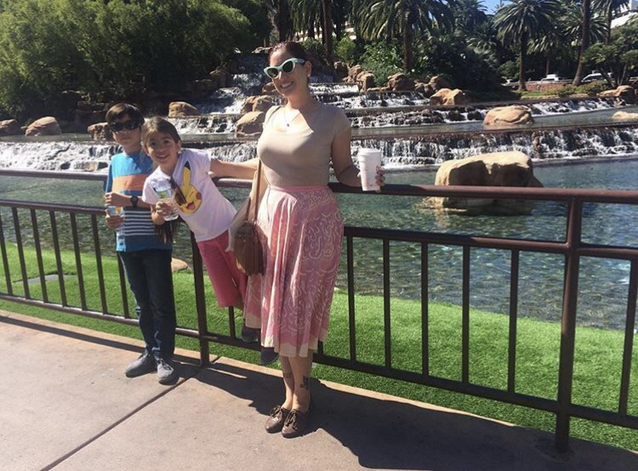 Myself, and my two eldest children, in Las Vegas, Nevada- September 2016 Hello Readers! Welcome back to my Blog! If you have read any of my recent Blog Posts, such as "A Fashionable Pregnancy: My Maternity Style-Part I" (and Part II), or if you follow me on any social media outlet, you will know that in the past two years, I have born two new children, both lovely little daughters. The last two years have been a challenge in the sense that all of my time literally goes into caring for my young babies, as well as my two older children. I have cut back on my personal career pursuits, such as creating fashion, participating in fashion shows, and writing for my blog (but I am so grateful to be able to spend that time with my wee ones!). However, as the children grow (way to quickly!) I am slowly getting back into the swing of things! (I even read a few books!) Growing a family not only brings changes to the current family dynamic, but it also brings changes to a mother's body! And with body changes, comes... New clothes?
Although there is not too much change I hope to achieve in regards to my body, the weight I have gained, and the task of breastfeeding, have left me looking in on my wardrobe, wondering, ‘What am I going to wear today?’ 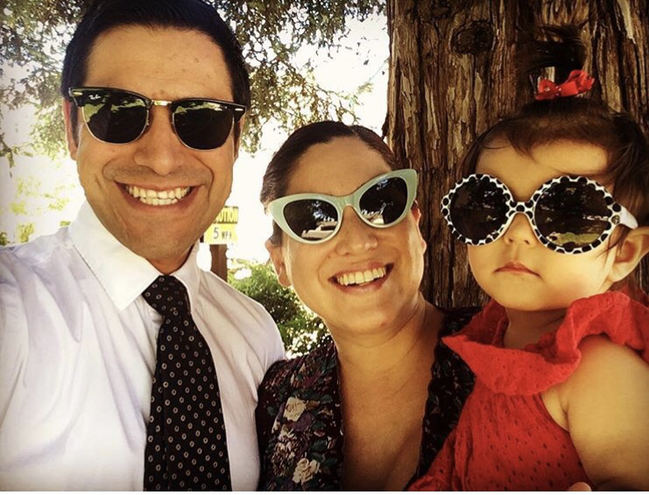 My Husband, Javier, Myself, and my second to youngest daughter, Skylynne- Summer 2018 What to Wear? Most of the clothing that I wore pre-pregnancy does not fit me properly. My waist line has expanded, my chest has grown larger due to breast-feeding, and my clothing size has increased from a size 8 to a about a size 14 depending on the brand or style. Because I am still nursing, even dresses, or blouses, that still fit me, don't allow access for baby-feeding. I had no idea, prior to giving birth to SkyLynne, that I would be perpetually confined to blouses or dresses with front buttons, front zippers, or elastic necklines that can easily be pulled down... But that's Motherhood: we sacrifice our own preferences for what we hope is best for our children... but, does personal style have to suffer? In my experience, I have found that dresses that require little effort, and allow access for breastfeeding, help me to still feel like myself, while accommodating my mothering needs. Honestly, on most days, my daughters look much more fashionable than I do! But when I leave the house, I try to look somewhat decent!
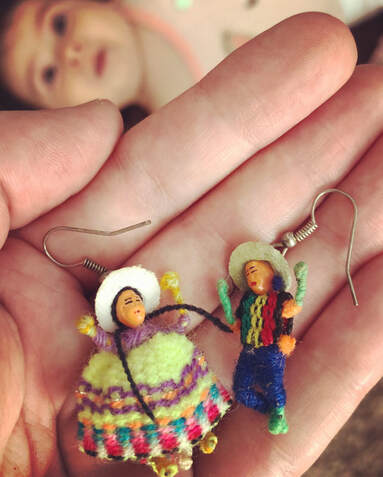
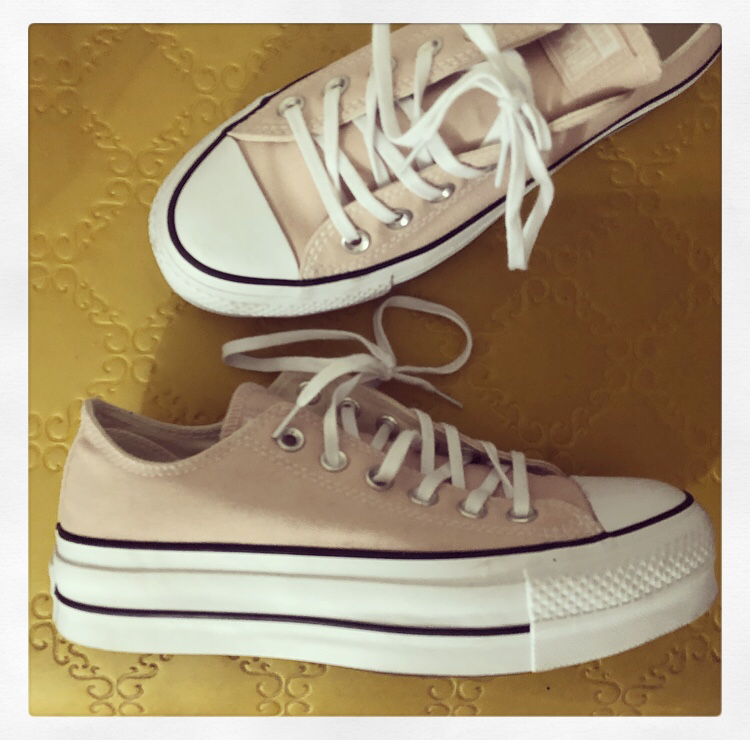
As a person trained in Fashion and Sewing, my mind is full of clothing that I would love to create for myself (I even have the fabric!). Now that I am done making babies, I will be creating several new garments made to fit my new clothing size, and offer the function that I now need. Until then, I have made some mostly online purchases, of several affordable dresses, and separates, that serve my needs terrifically, and were very reasonably priced. Now, let me show you a few of my new outfits, and, as a breastfeeding mother, how I felt about wearing them! JCrew V-Neck Tee, with a Denim A-Line Skirt 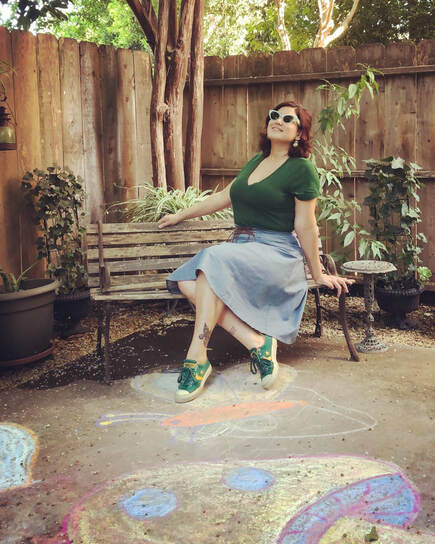 Here I am wearing a V-Neck T-Shirt made by J.Crew, and a skirt by Cellabie, paired with Peruvian Earings, Kate Spade Sunglasses, and All-Star Converse.
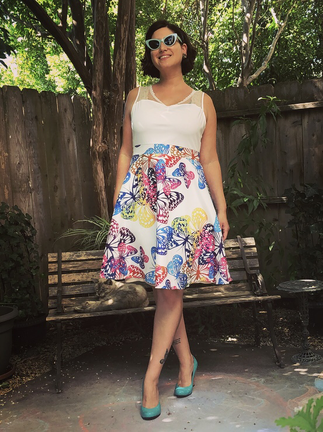
I love the lace-up detail at the front waistline. To complete this look, my accessories include my trusty sunglasses by Kate Spade, Green All Star Converse, and super cute Peruvian Novelty Earrings. Multi-Color Butterfly Dress
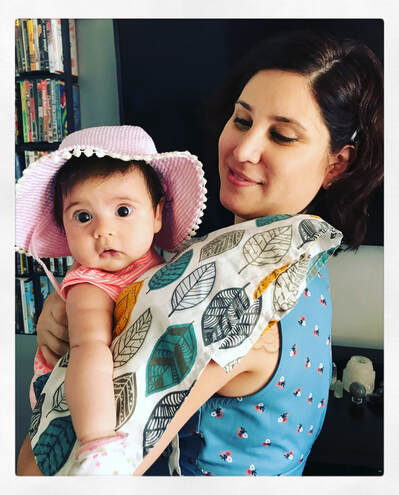
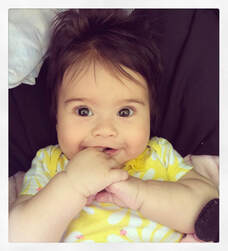
This dress, which features a lovely loose stretch-fabric, in both the bodice and the skirt, as well as a multi-color butterfly print, feels great on, and provides a body flattering look. Interestingly, this dress has no labels, so I am not sure which clothing company made it, or the exact material it is made of. I was gifted this dress by my Mother-in-Law, prior to finding out that I was pregnant with Little Minnie. I found the stretch in the neckline and bodice does allow me to pull it down to feed my baby. Although pulling down the neckline isn't as easy as I would like, it is possible. 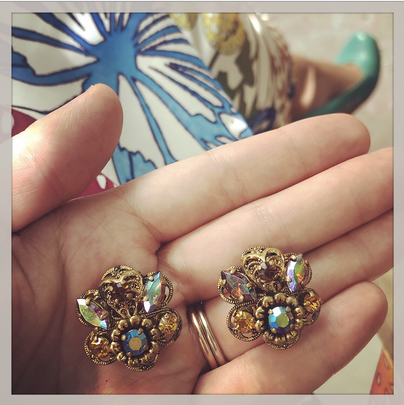 My Vintage Clip-On Earrings. Following is a photo of myself wearing this dress, paired with a coral sweater, holding my baby Minnie. This dress has a lovely spring look, and the multi-color butterfly textile allow for a wide range of matching accessories. 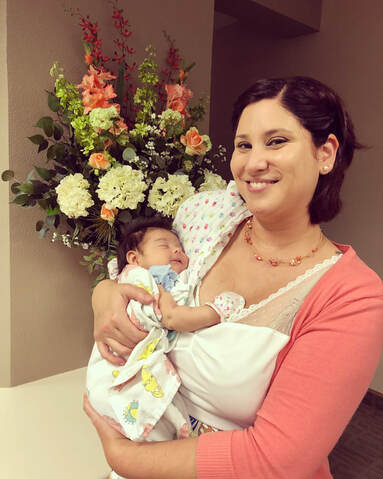 Little Minnie, at 5 Weeks Old, with myself. Floral "Chiffon" Wrap Dress, by Surplice I love an online Flash Sale! When I see a "Now $9.99 and Above" in bold print across my Smartphone Screen, you know I am scrolling through those dresses, looking for the styles that open in the front (if any!). I was pleasantly surprised when the web-site Zulily offered several Flash Sales over the summer, allowing me to purchase a hand-full of "Made in China" Dresses for little money. One such dress was described as a "Floral Chiffon Wrap Dress" made by a company called Surplice. I ordered the two colors on sale, both the Green and the Yellow, which were advertised as regularly $40.00, but now only $9.99. Both of these dresses are made in the same floral fabric, with different background fabric colors. 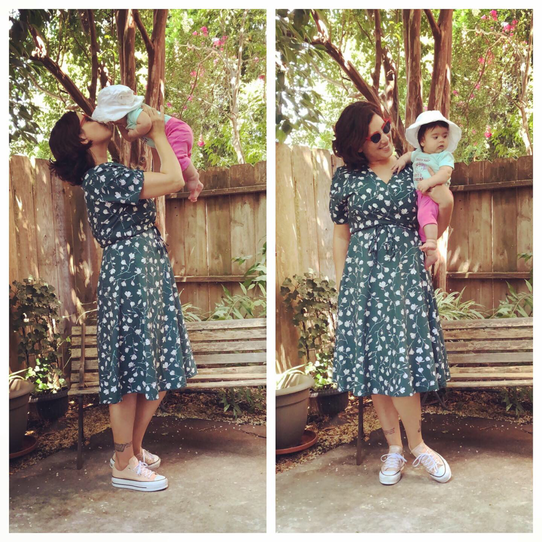 Here I am wearing the Green Floral "Chiffon' Wrap Dress by Surplice, holding my baby daughter, Minnie.
I really like the ease of wearing both of these dresses, but the fabric is definitely not Chiffon, based on the feel it is more likely 100% polyester (these dresses have no fabric labels!). I have found that wrap dresses are perfect for breastfeeding, because they are easy to open in the front, without the hassle of buttons or zippers. I have since seen these dresses offered online in both a light blue, as well as a black fabric, both with the same floral print. If they go on sale, I will definitely add them to my virtual "Shopping Cart" ! My Jewelry Storage Tip For easy access and organization of earnings, I use thin multi-compartment storage boxes, that I bought at The Dollar Tree. These storage boxes hold 12 or more pairs of earrings each, which are easy to view at a quick glance. Three of these boxes fit perfectly in just one of my Jewelry Armoire Drawers. I find myself no longer wearing bracelets, broches, or necklaces, which tend to dig into my little babies sensitive flesh as I hold them close! One day I will wear those pieces again! 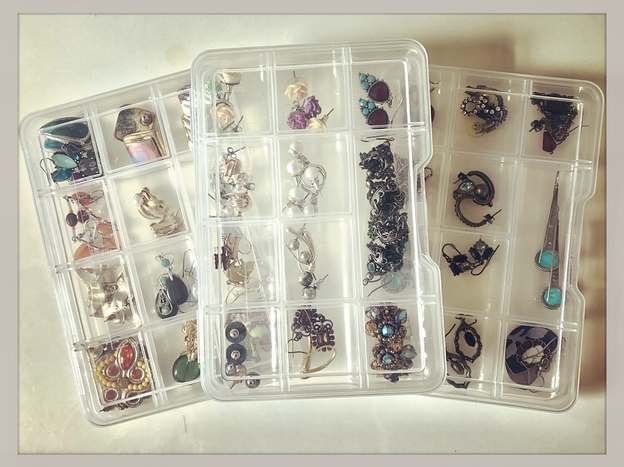 Some of the earrings within My Earring Collection White & Blue Stripe Collared Button-Front A-Line Dress, by Sacrefas 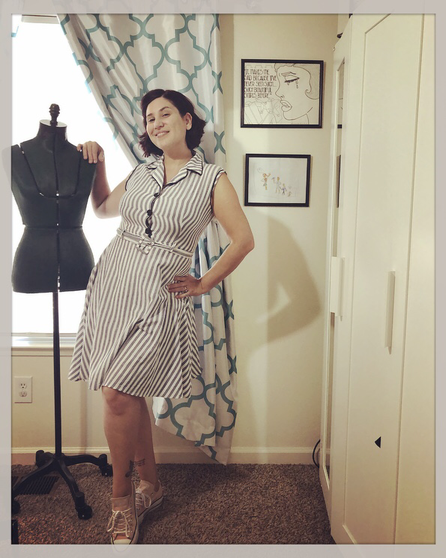 Here I am wearing the White & Blue Stripe Collared Button Front A-Line Dress, by Sacrefas. This White & Blue Stripe Collared Button-Front A-Line Dress makes me feel sporty, like I am ready for a game of Tennis! The lightweight fabric is perfect for summer. The fit is flattering! I found these buttons are larger, and easier to fasten and unfasten for breastfeeding, then the other button up dresses in my collection.
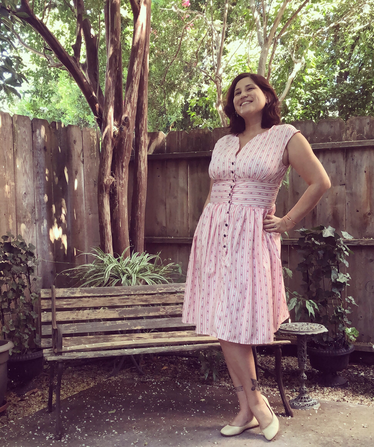
Navy & White Gingham Shirt Dress, by Sacrefas Next up is a lovely Navy & White Gingham Shirt Dress (with pockets!) that I purchased on Zulily, by Sucrefas. This dress is a size 3X, and is a little big, but paired with a belt, I found it looked great! In the first photo of me in this dress, I am wearing the dress as is, with only a slip underneath. In the photo to the right, I am wearing a Petticoat underneath to maximize the fullness of the skirt. I like both looks! The Petticoat was purchased online through Wish for a mere $4. 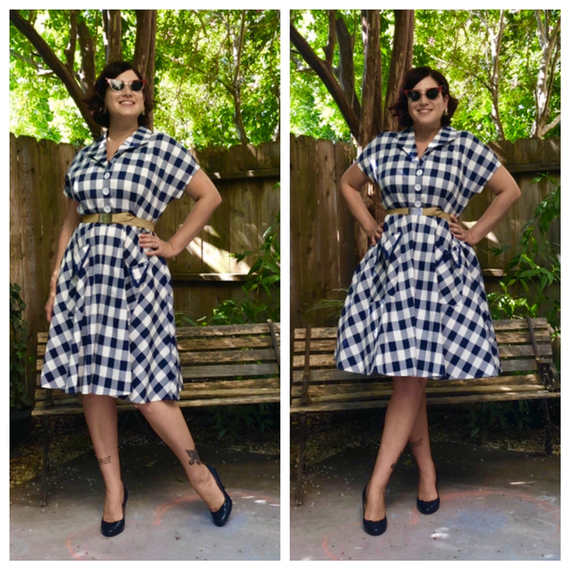 Here I am wearing the Navy & White Gingham Shirt Dress by Sucrefas. Pictured here without and with a petticoat underneath. Which look do you like better? Light Pink Floral & Foliage Dress 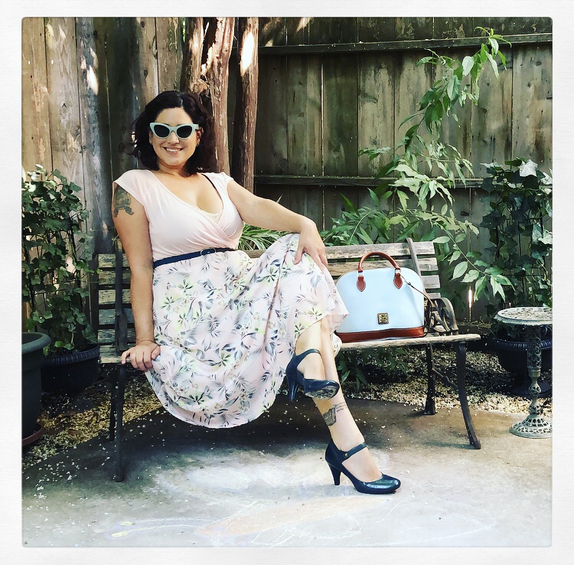 Here I am, wearing the Light Pink Dress, gifted to me by my Mother-In-Law.
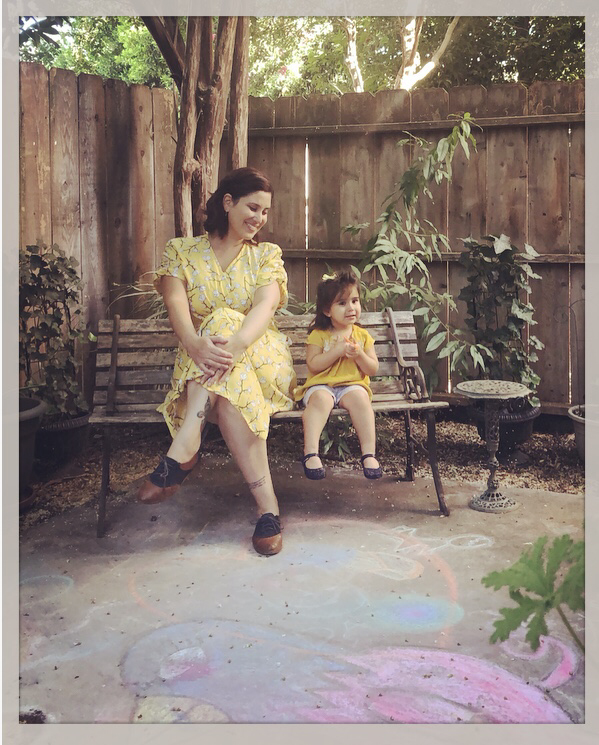
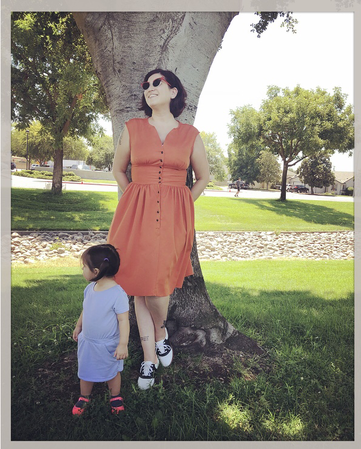
V- Neck Button Front Tea Length Vintage Fit & Flare Dress, by Sucrefas 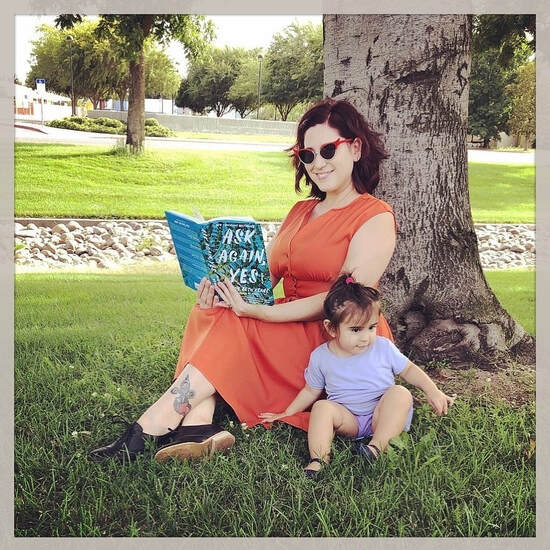 This is me, wearing the Orange V-Neck Button Front Tea Length Fit & Flare Dress by Sucrefas, along side my daughter, SkyLynne. The next three dresses are described as the "V-Neck Button Front Tea Length Fit & Flare Dress" made by Sucrefas, and was purchased online through Zulily's Flash Sale. I found that the size XL fit me perfect. These dresses are simple, yet offer a flattering fit. The button-up front allows for a somewhat easy breastfeeding experience. However, the buttons are many, and the button holes are a tight fit for the buttons, making it a little challenging to unfasten when holding the little one, so I have to either sit her down, or ask my Husband to carry her while I unbutton the bodice. I will most likely buy a few more colors if they go on sale again! So far I have purchased the "Pink Stripe Floral", "Blue Floral", and "Orange". The delivery of these dresses did take some time, as they are made and shipped directly from China.
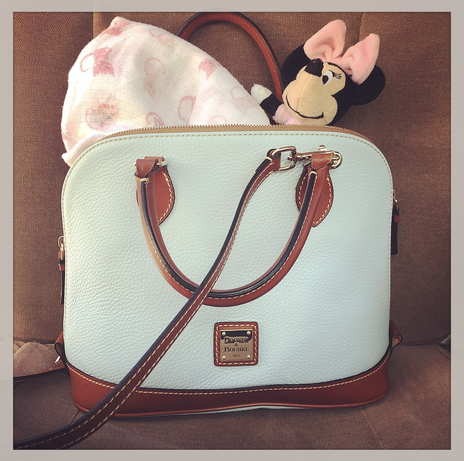
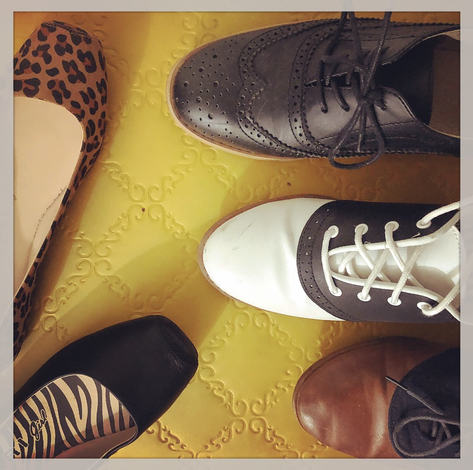
Shoes!
online, before Payless Shoes Source went out of business, and Brown & Navy Saddle Shoes, that are perfect for many different outfits, that I purchased at Ross several years ago. I also have these leopard print and black Ballet Flats from Tahari Girl (not surprisingly, leopard print matches everything!). In addition to these lovelies, I own dozens of more pairs of flats! Scoop Neck Tee by Wet Seal, with an A-Line Embroidered Skirt, by Sunny Leigh 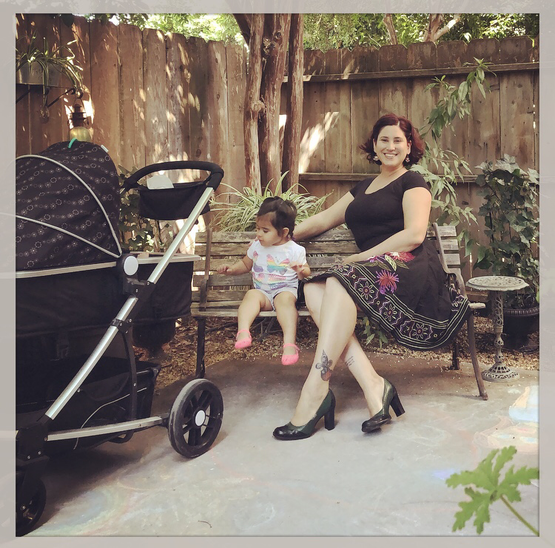 Here I am, wearing a Black Basic Scoop Neck Tee, by Wet Seal, and a thrift store find: a Black Floral Embroidered A-line Skirt by Sunny Leigh, that I bought for only a few dollars!
Wet Seal, may seem like a Teeny Bopper's Store, but I have found some great finds, at thier retail locations, over the years! One such find are Basic Scoop Neck Women's Tees, that are relatively inexpensive, and offer enough stretch to breastfeed in. For this look, I am wearing a Black Scoop Neck Tee, from Wet Seal, paired with a Black Floral Embroidered A-Line Skirt that I found at The Goodwill for only a few dollars. Many of the skirts within my massive skirt collection have been acquired from thrift stores. I love finding charming, and unique clothing, for a fraction of the price, at second-hand stores! However, I find myself not shopping in stores as often as I would like, do to juggling the two little ones! Thankfully, I found this one! Check out the Floral Embroidery Design on my Sunny Leigh a-Line Skirt, in more detail:  The embroidery design on my Sunny Leigh Skirt A-Line Skirt. That completes my review of My Breastfeeding Friendly Wordrobe! I hope that you have found the information I have included, both insightful and informative... especially if you are a new (or experienced) mother hoping to breastfeed with ease and in style! It is possible! Thank you so much for taking the time to read my article! I look forward to you reading my next article in this series, where I make, and finish, designing and constructing, a few more new outfits! Please leave me a comment below on your favorite outfits that I featured! I would love to hear your feedback, personal experiences, and opinions! Until We Meet Again!  No Filter, No Make-Up (Just a Blurred Background)= Most days of Motherhood Have a magnificent day!! Related Links:
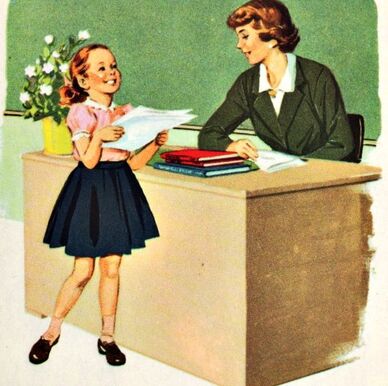
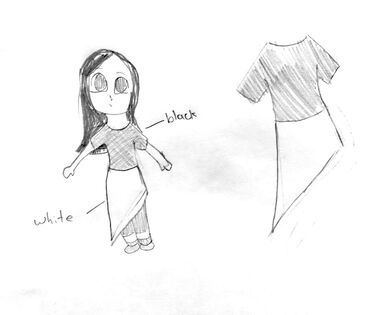
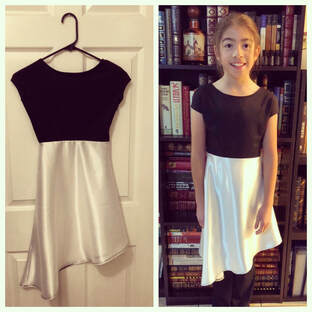
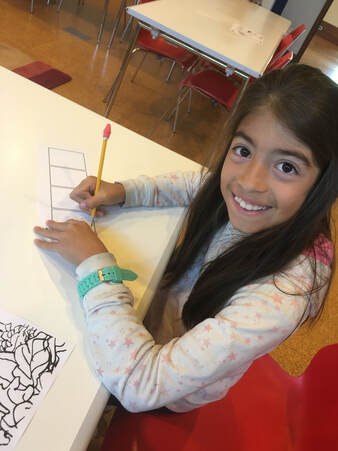
Iyska is a fantastic student, she learns quickly, and has a natural artistic talent and creative mind. Teaching her was a joy! In the past, Iyska has drawn her own Fashion Illustrations, which are adorable! This past year, she participated in her annual school play, and took the time to design her own costume, for her character, "The Historian". After Iyska completed her illustration, I created this look for her, using fabric I already had on hand. Here is her Fashion Illustration and the final costume, that I created for her.
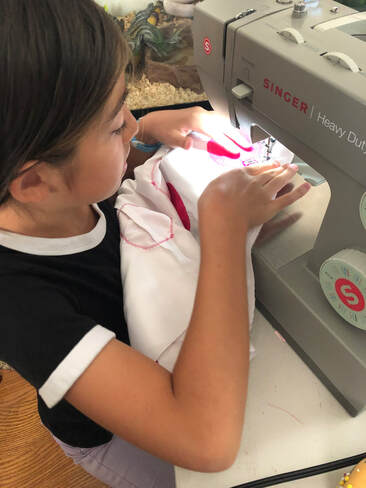
Teaching Sewing I began Iyska's Sewing Lessons by teaching her the basic functions of my sewing machine, how to thread the machine, and how to use the machine to stitch. Iyska was a natural! Soon she was perfecting straight stitching, and using her creativity to create patterns and shapes using thread and machine stitching! As Iyska continued to get familiar with the machine functions, she was soon ready to create her first sewing project! For her first task, I recommended creating a simple tote bag or purse. Iyska looked through my fabric bins, and chose a lovely tealish colored stretch taffeta, which she then used her new-found stitching skills, to create a sea-themed motif made with machine stitching. Iyska spent a lot of time on this project, and it really shows! I then taught her how to turn her decorated fabric into a bag, by stitching the side seams, and then adding a strap, hand stitched lining, a zipper, and her own label! Fairly advanced stuff for a beginner! Check out her finished Cross-Body Purse: (perfect for Field Trips, or day trips to her Grandparent's House!)  My oldest daughter, Iyska, posing with her first completed sewing project: a lovely Cross-Body Purse, with a machine stitched sea creature motif, hand sewn lining, zipper, strap, and label!
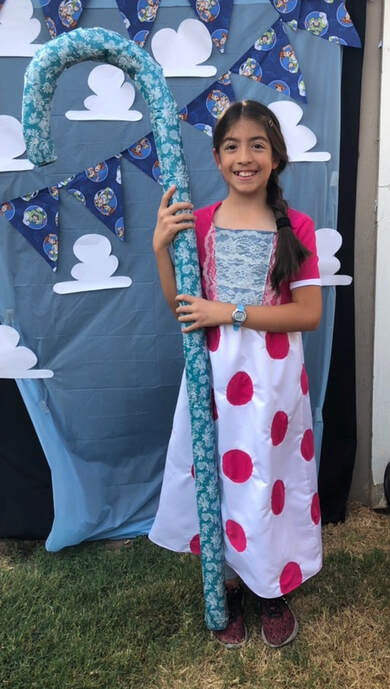
What was the hardest thing about sewing that you have done so far? And, what was the easiest? The sleeves on the dress was hardest, because I had to be careful not to mess up, especially near the shoulder. On the bag that I made, the decorative sewing, the squid and the fish that I put on there, was easiest, because I could make anything that I wanted, and couldn't really mess up. What did you find different in constructing your two recent projects: the Purse and the Dress? The dress was so much bigger, with way more fabric. We did more stuff with the sewing machine, because on the bag, I hand sewed, but the dress I used the sewing machine more. I had to sew on each circle to the skirt. Especially the skirt, when we did that weird thing where we pulled the string... Oh, when we gathered the waist? Ya, when we gathered it, it was different then the bag was, a lot more steps. What other things, related to Sewing or to Fashion, would you like to learn next? Making pants. You have to make pants more to the shape of your leg. It can't be too tight, so I think it would need to fit perfect. Now that you can sew, are you inspired to create more sewing projects? Yes, because now that I know how to do that, those were the more basic steps to making other stuff. Like, learning to sew a hem. It isn't only used for dresses, you can hem pants and skirts, and all kinds of stuff. A lot of the things that we did, like the zipper too, you can put it on a lot of stuff, not just only the projects we did. What will be your next Sewing Project? I think either I will make a jacket or another bag... but if I do another bag I would want to add pockets. Is there anything you would like to tell other people who are learning how to sew? Perhaps people who have never sewed before? Well, if you are learning, it is best if you learn from someone else, and not teach yourself. There is a whole bunch of techniques that you might not have even thought of, like... If you just don't know how to sew at all, and you put the fabric together the wrong way, you might not know, and your project will turn out weird. You might not know you did a mistake until you are already done!
Thank you for reading my Blog! Related Links:
|
AuthorHello Readers! Welcome to my Blog! I am Roxanne Rodriguez Rangel, a Fashion Designer from Northern California. I love all things Fashion, particularly historical fashion! Join me, as I take you around Northern California, covering fashion events and related topics! 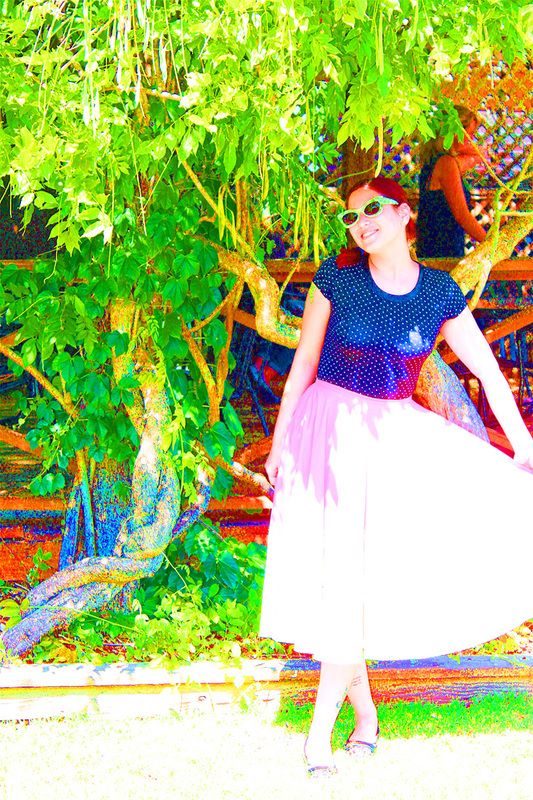
Categories
All
|


 RSS Feed